How to set up & use integrated labels.
Using integrated labels are a great way to have a packing list printed out along with a shipping label all on the same page. The beauty of this is that the 2 stay together right up until the time of packing to ensure that the product goes to the correct purchaser. Integrated labels are 24# copy paper with an adhesive label (or 2) attached somewhere to the copy paper. The adhesive labels are on a liner just like regular labels so that they can be peeled off easily. Imagine cutting a piece of copy paper in half and a sheet of labels in half and taping them together. That is what integrated labels are.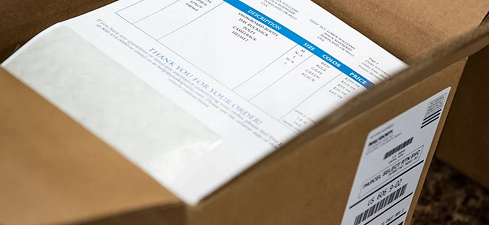
Setting up and using integrated labels may seem daunting for the first-time user so here I will walk you through the process step by step.
In this setup example I will be using MicroSoft Word® and MicroSoft Excel® but other software may also be compatible. I will show you how to create a document by scratch but LaserInkjetLabels.com does provide downloadable integrated labels templates for free, which can be found on our Design Center / Templates Page.
Setting up the integrated label template in Word®.
- Open Word® and click on Blank Document.
- If you are using a LaserInkjetLabels.com style, measurements can be found in our Design Center / Templates Page by finding the part number and clicking on .jpg file. In this example, we will use our product code IL-D as it is the most complex, having 2 labels on the sheet. Decide if you want the labels at the top of the page or bottom. These instructions will show you how to set it up with the labels at the bottom of the page.
- Measure the distance from the left edge of the sheet to the left edge of the first label. Measure the distance from the bottom of the page up to the bottom edge of the label. For IL-D, these are both 0.5”. These will be our margins for the entire sheet. To set these margins, click on Layout – Margins – Narrow, since narrow is preset for 0.5” margins all around.
- Now we need to get the starting point of the first label. Looking at the IL-D jpg, we see that the measurements have the first label 0.5” from the left margin of the sheet and 0.5” from the bottom of the page. Being that the label size is 2.75”, we add the bottom margin (0.5”) and label height together which gives us a total of 3.25”, our starting point.
- Since we are orienting the sheet so that the labels are at the bottom, we need to create a Footer. (If we wanted these at the top of the page, we would create a Header.) To create a Footer click on Insert Footer and select Blank.
- Click inside the Footer box to active the curser there, then click on Insert – Table and create a 3 x 1 table to make a table that has 3 columns in 1 row.
- Right click inside column 1 and select Table Properties. Now click the Row tab and put in the label height of 2.75”. Click on the Column tab and enter the label width of 3.5”. Click OK.
- Right click inside column 2 and select Table Properties. Now click the Row tab and put in the label height of 2.75”. Click on the Column tab and enter the label width of 0.5”. Click OK.
- Right click inside column 3 and select Table Properties. Now click the Row tab and put in the label height of 2.75”. Click on the Column tab and enter the label width of 3.5”. Click OK.
- You should now see 3 boxes. 2 the size of the labels and the middle is the gap between the labels. We do not want the table outline to print so we right click anywhere inside the table and click on Table Properties and under the Table tab, select Borders and Shading – None and OK out of all boxes. The table in the footer will now show grey dashes indicating that the border will no longer print but allows you to see where it is.
We now have our Footer set up with the exact label dimensions. The next step will be to enter some simple coding into the label boxes which will correspond with the database we will draw from in later in Excel®.
Adding the variable ship to address
- Double click inside the box we just created for the label position which will allow you to print within it.
For most purposes, the following information will be required to be printed on the shipping label so you will need to type them into the integrated label position:
«Company_Name»
«Address_1»
«Address_2»
«City», «State» «Zip»
- The brackets around the words are there for use with your database. You can change the names of each field or add/subtract fields, but you need to make sure that they match up exactly to the database we will create later.
- Double click anywhere outside of the label field and copy and paste your label fields to the top left of the paper portion of the document so that the paper and label will always match the recipients.
- Type the information you want to relay to the recipients below the address. You can always add a variable field that is taken from the database by adding << >> characters around the word you create in the corresponding database field. You can even have entire packing lists generated to this field.
- Once you have all the variable in place, save the document and close it.
Create the database.
- Open Excel® and create new file.
- Using the example above, create cells across the top of the spreadsheet called, Customer Name, Company Name, Address 1, Address 2, City, State and Zip, followed by any additional fields you created in the label portion or letter portion of the Word® document.
- Document is now ready for you to add the information into the appropriate cells of the spreadsheet.
- Save document.
Merging the database to document
- Open the Word® document you created for the integrated label / form.
- Click on Mailing - Start Mail Merge - Letters.
- Click on Select Recipients – Use an Existing List
- A Box with open for you to select a file. Go to the folder you saved the Excel® spreadsheet in and select that file and open it.
- If you created all the information on Sheet 1 of the spreadsheet, select just that option and click OK.
- Click on Edit Recipient List. When that box opens, click on the row(s) of information that you want to be printed to the integrated label and click OK. You can choose just one or as many as you want. This way you can add to the spreadsheet as long as you want, prior to printing.
- Now all that is left to do is print the document. To do this, click on Finish & Merge – Print Documents and follow your printer instructions. If you selected just one row or several, all selected rows will print out with unique information that you built.
- Save document and next time you go to print new information you added to the spreadsheet, the document will show you where you left off on your list so that you can clear the checks from the list and add new checks to the newly created information you want to print.
You now have everything you need to print on integrated labels. While the initial task of setting the Mail Merge forms up can be tedious, it only has to be done once and then printing the information you want to get to customers is a snap. Remember that LaserInkjetLables.com offers free downloadable templates for all the integrated labels we sell, making the Mail Merge process that much more easy and fast.
Integrated Label / Form sizes can be found here: Integrated Label Sizes