Label Design Software

Are you needing a better way to design and do your label printing at home? Let's face it, although MicroSoft Word® is readily available and somewhat easy to use, it is still a program for creating and printing documents, not graphics. Adobe Illustrator and Photoshop are great at design but are both very expensive solutions. So what's a small business owner of home do-it-yourself'er supposed to do? LaserInkjetLabels.com is proud to announce and promote an alternative program called Inkscape. Inkscape is a powerful, easy to use and free label software. Yes, you just read that correctly... Free Label Software!
Inkscape label design software is an easy to use yet powerful graphics program that has many of the same features offered by the expensive programs while maintaining a simple, easy to follow framework. All for free. Combine that with the free label templates provided by LaserInkjetLabels.com and you end up with a complete and ready to go label program.
 Features of Inkscape Label Printing Software:
- Compatible with LaserInkjetLabels.com Label Templates
- Opens & Edits Vector Based Images
- Open & Edit PDF, AI, EPS and many other graphic files
- Copy & Paste your art into Label Template
- Create & save art to be compatible with other software
- Online Manual
- Easily Align Artwork within Label cells
- Add Text over Images
- Change Text Direction
- Rotate and Resize Images
- Print Labels with a Full Bleed
Using Inkscape Label Design software is now your free and easy way to create and print off professional looking labels. Even if you are new to graphic design, this easy to use program will have you printing labels in no time. And if you have used Word® in the past and had a hard time lining your labels up and getting them to print within the margins, you'll definitely want to download and try this program. Using our label templates, you'll be able to see the outline of the label regardless if it is a rectangle, square, oval or circle.
Quick Start Instructions:
- Click the Download Button above and then click Run. The Program will download and self extract.
- Now go to our Templates Page and find your Part #.
- Select the Part# file for the PDF Template by right clicking on it and select Save Target As.. and save to a location on your computer where you will remember to find it.
- Start the Inkscape Label Program by clicking on the Inkscape link in your programs.
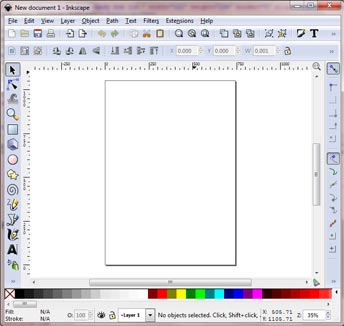
- When the label program is open, click File - Open.
- Go to the location that you saved the pdf label template, select the file and click open.
- The label template should now be open and centered on the canvas. Since we don't want the label lines to print when we go to print the labels, we will want to be able to hide these later. In order to do that, go to Layer - Layer. This will open up a tile on the right side of the program. Now go to Layer - Add Layer. You should see 2 layers.
- Lock the Layer with the Label Template. Do this by clicking on the padlock symbol next to the Label part # in the Layer Box. This will keep you from moving the outlines of the labels.
- In the Layer Box, click on the new layer you just created to select that layer for editing.
- Now you can start to design from scratch or just paste your completed design over the labels. It is easiest to create and finish the artwork and then copy and paste it over each label cell.
- When you are ready to print, go over to the Layer Box and click on Eye Icon next to the label template part number. This will cause the template outline to be hidden as we don't want those to print.
- Print one test sheet and adjust any artwork that may not be perfectly centered on the labels.
- Save the completed project under a new name and print as many sheets as needed.
- Inkscape Tutorial can be found starting here: Inkscape Tutorial