A shampoo or conditioner label has a demanding job. It needs to look appealing on a retail shelf, remain readable when handled with wet hands, and stay attached to a bottle that may be curved, squeezed, or kept in a humid shower. A design that looks perfect on a flat computer screen can wrinkle near the bottle shoulder, lift around a seam, or leave too little space for ingredients and directions once it is printed.
This guide explains how to select shampoo bottle labels and conditioner bottle labels by container shape, usable label area, material, printing method, and how the finished product will be used. It is intended for salon brands, private-label businesses, handmade bath-product sellers, and manufacturers printing their own labels. If you want to shop the available formats first, see our Cosmetic Labels and Bottle Labels pages.
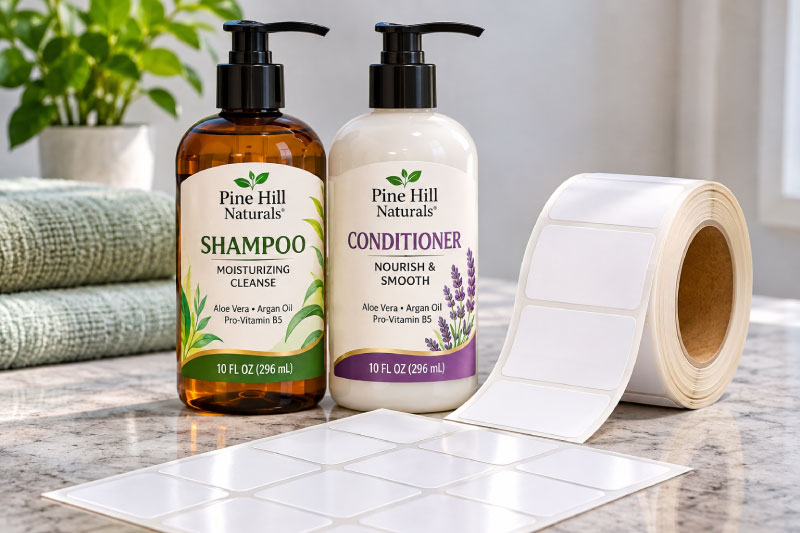
Quick Start: Choosing Shampoo and Conditioner Labels
Start with the actual bottle, not its advertised ounce capacity. Measure the smooth, usable panel, choose a front-and-back or wraparound layout, then test a printer-compatible material under realistic wet-handling conditions.
| Your packaging need | Good starting decision | Important test |
|---|---|---|
| Small travel shampoo bottle | Compact front rectangle; separate back information when needed | Does the entire label avoid the shoulder and bottom curve? |
| Tall, straight-sided shampoo bottle | Front rectangle or measured partial wrap | Does the label stay square when applied around the bottle? |
| Oval or flat-front conditioner bottle | Separate front and back labels | Do the label corners remain on the flat portion? |
| Tapered squeeze bottle | Shorter centered label or separately shaped panels | Does any edge lift after squeezing and warm-water exposure? |
| Bathroom or shower use | Compatible white or clear synthetic film | Face stock, ink and adhesive durability after repeated wet handling |
| Desktop inkjet or laser printer | Blank sheets specified for that printer | Alignment, smearing, toner/ink adhesion and feeding |
| Compatible roll-fed color-label printer | Blank die-cut or continuous rolls | Core, OD, sensor, roll orientation and coating compatibility |
At a glance: White matte film is a versatile look when a compatible durable construction is needed; glossy white gives colorful retail artwork more shine; clear film can create a no-label appearance but requires contrast testing. Paper may be suitable for dry gift packaging, but isn’t automatically the best choice for a bottle kept in a shower.
Jump to the Section You Need
- Quick Label Size Chart
- How to Measure a Shampoo Bottle
- Bottle Types and Label Layouts
- Label Materials Compared
- Sheet vs. Roll Printing
- Design and Required Information
- Applying and Testing Labels
- Common Mistakes
- Buying Checklist
- Frequently Asked Questions
- Need More Help?
Quick Label Size Chart: Practical Starting Tests
These are paper-cutout examples for planning, not guaranteed fits for any bottle volume, brand, or manufacturer. Dimensions are shown as applied width × height; roll products may describe orientation differently. Always confirm the actual bottle’s smooth panel and the exact label you intend to buy.
| Bottle shape or use | Suggested paper cutouts to test | Why these may work | What to watch |
|---|---|---|---|
| Small travel or sample bottle | 1.5″ × 2″ or 2″ × 2″ | Compact front identity | Short straight area and tight curves |
| Slim 6–8 oz bottle | 2″ × 3″ or 2″ × 4″ | Readable front label without a full wrap | Taper, flip-top cap and lower base |
| Medium round 8–12 oz bottle | 2″ × 4″ or 3″ × 4″ | Space for fragrance or hair-type message | Partial-wrap seam and straight panel height |
| Broad or oval 12–16 oz bottle | 3″ × 4″ or 4″ × 3″ | Wider branding on a usable front face | Side edges may roll away from the front |
| Large pump or refill bottle | 3″ × 5″ or 4″ × 6″ | More space for identity and directions | Pump collar, hand grips, curves and panel height |
Use the chart to narrow your choices—not to order immediately. A 12 oz oval bottle may have a shorter usable panel than an 8 oz straight-sided bottle. If the sample crosses a curve, use a smaller label or a front-and-back arrangement. For additional sizes, explore the Blank Labels catalog and matching Label Templates.
How to Measure a Shampoo or Conditioner Bottle
The easiest way to reduce wasted labels is to make a quick fit test using an actual production bottle. A physical bottle also reveals details that product photography hides: the shoulder, base curve, raised seam, cap clearance and how the bottle bends when squeezed.
- Find the straight or smooth panel. On a cylinder, identify where the neck or shoulder transitions into the relatively uniform body. On an oval or flattened bottle, find the central panel where the entire sticker can lie evenly.
- Measure the available height. Measure from below the shoulder to above the bottom curve. Leave a small margin rather than using the complete height.
- Measure the usable front width. For separate front labels, measure the area before the side curves make the sticker bend away sharply. This measurement is different from the bottle’s maximum diameter.
- Measure the circumference for a wrap. Use a flexible tape or narrow strip of paper at the actual label height, not at the widest or narrowest point elsewhere on the bottle.
- Check for taper. Compare the circumference at the top and bottom of the proposed label. If they differ noticeably, a standard rectangular wrap can wrinkle; shorten the label or consider a shaped label or individual panels.
- Mark obstacles. Include molded seams, ridges, pump collars, grips, indented areas and other details that interfere with full adhesive contact.
- Make two cutouts. Print the proposed dimensions on ordinary paper at actual size, cut them out and temporarily tape them to the bottle to compare proportions.
Wrap-label example: If the measured circumference at the usable panel is 8 inches and you want a ¼-inch gap, the proposed wrap width is 7¾ inches. If the usable straight panel is 4 inches tall, a 3½-inch-high test label leaves ½ inch of total vertical clearance when centered. This is an illustration of the method, not a recommended SKU for every shampoo bottle.
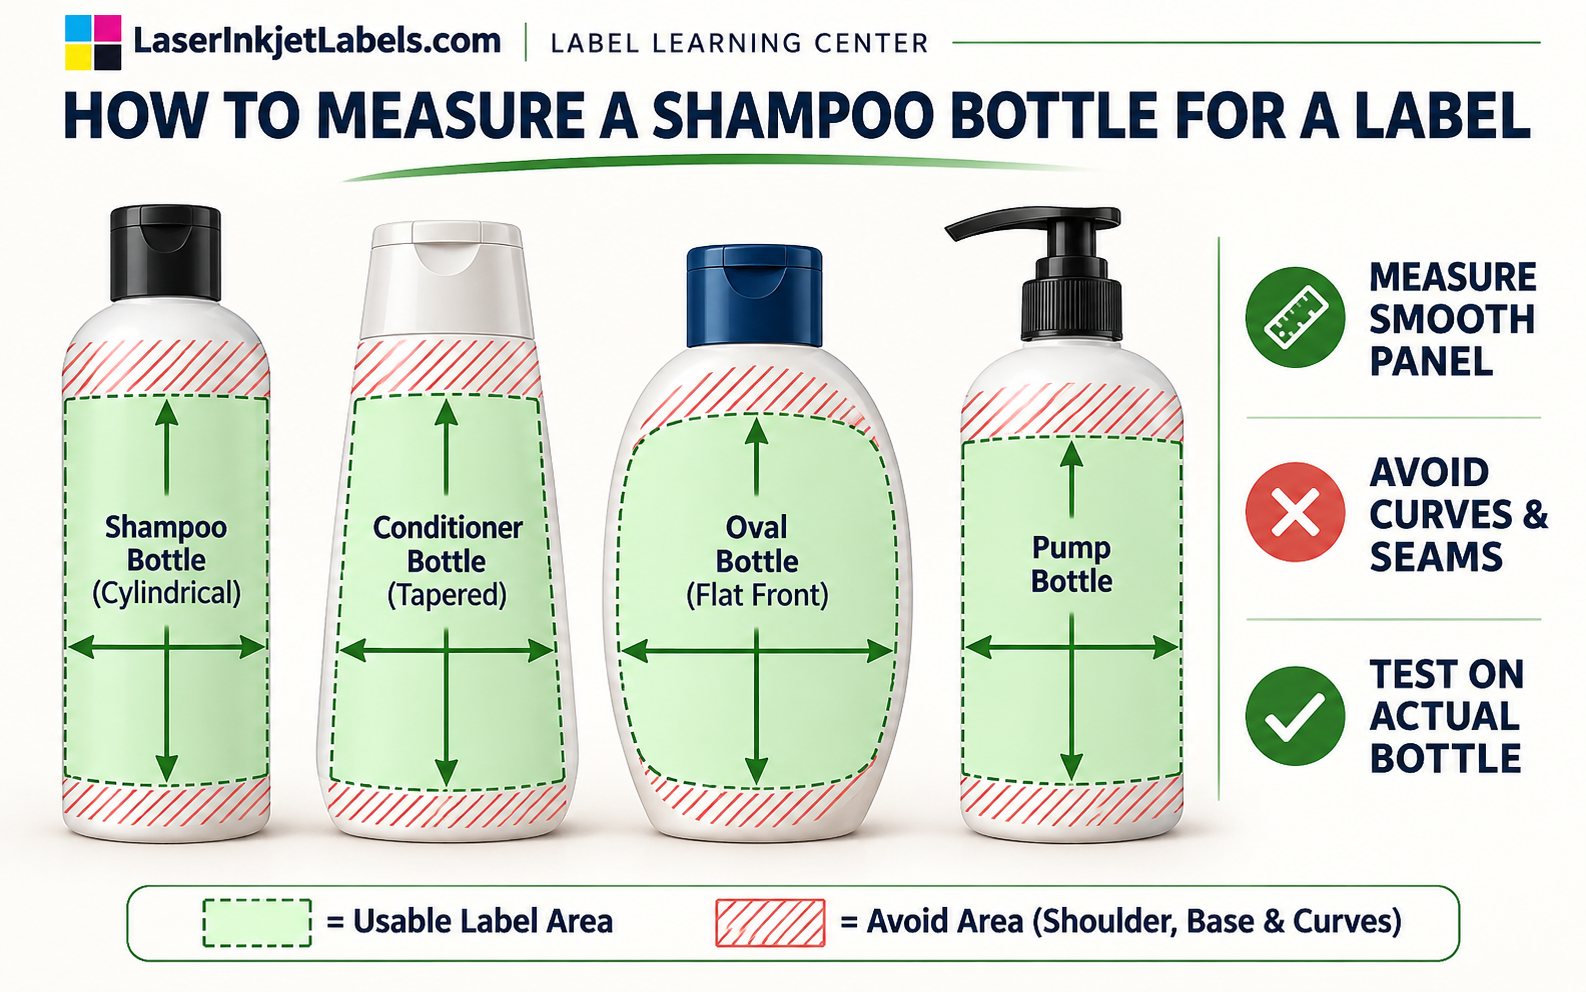
Choose the Label Layout for Your Bottle Shape
Round, straight-sided bottles
Round bottles can look good with a single partial-wrap label or two separate labels. A partial wrap gives the brand a broad area without covering the entire circumference, while separate front and back labels allow a clear distinction between branding and information. The label should stay within the straight cylinder and avoid the shoulder or bottom transition.
Oval and flat-front bottles
Many shampoo and conditioner bottles have a front panel designed to face the customer. These are often best served by one front label and a second back label. The apparent width can be misleading because the bottle rounds sharply at the sides. A cutout should stop before those curves unless your chosen stock and application method have been tested for them.
Tapered squeeze bottles
A tapered bottle may be wider at the shoulder than at the base or the reverse. When a rectangular label is forced around a cone-like surface, its edges may not meet cleanly and wrinkles can form. A shorter centered label or custom shape can be more reliable than trying to cover the entire bottle. Also test what happens when someone squeezes the filled bottle: a rigid or poorly matched label can crack or lift.
Pump bottles and salon sizes
Pump bottles are often tall enough for a generous brand panel, but a pump collar or rounded upper shoulder still reduces usable height. Take measurements with the actual pump installed. For salon backbar bottles, high-contrast labels and durable film are especially helpful because bottles may be wiped down repeatedly and handled by multiple people.
Shampoo and conditioner sets
Matching pairs benefit from a consistent label system. Keep the logo, type, artwork alignment and core layout in the same positions, then use clear product names, color accents or bands to distinguish shampoo from conditioner. The shapes of the two containers may be identical even when their contents are different, making standardized sizing and inventory control easier.
| Layout | Strongest use | What to check |
|---|---|---|
| Front label only | Simple product identification or secondary packaging | Whether the rest of the required information appears elsewhere appropriately |
| Separate front and back labels | Distinct brand and information panels | Both fit their panels and neither covers a seam or curve |
| Partial wrap | Broader branding across a round bottle | Side taper, seam placement and how edges behave when squeezed |
| Full wrap | Maximum continuous design space | Accurate circumference, required overlap/gap and applicator compatibility |
| Custom-shaped label | Distinctive tapered or contoured container | Exact bottle-specific die shape and application tests |
Best Label Materials for Shampoo and Conditioner Bottles
Shampoo and conditioner labels usually need more moisture resistance than a paper label on a dry pantry jar. But “waterproof” is not a complete performance specification. A label is a system of face material, printing ink or toner, protective coating when used, and adhesive. All of these need to work together on the specific bottle.
| Material | Appearance | Suitable use to consider | Testing priority |
|---|---|---|---|
| White matte paper | Soft, low-glare and easy to read | Dry samples, promotional sets and secondary packaging | Wet handling, edge wear and print durability |
| Gloss or semi-gloss paper | Vibrant color and polished finish | Dry display or packaging with controlled moisture exposure | Moisture, scuffing and printer coating compatibility |
| White BOPP / polypropylene film | Clean white with matte or glossy options | Bathroom and shower products needing water resistance | Ink durability, adhesive hold and squeeze resistance |
| Clear film | Minimal no-label look | Transparent bottles and premium hair-care branding | Text contrast, white ink limitations and visible bubbles |
| Brown kraft paper | Natural, handcrafted aesthetic | Dry gift packaging or specialty products kept away from water | Wet exposure and low contrast for small text |
| Other engineered synthetic film | Variable finish and durability | Special handling or specific plastic substrates | Full compatibility with bottle, ink and adhesive |
Why synthetic film often makes sense
Water-resistant white film such as appropriately coated BOPP or another compatible poly material generally stands up better to repeated splashes and damp handling than ordinary uncoated paper. It can also resist tearing during application. However, film may be water-resistant while the printed image still smears, and the adhesive may fail if it is poorly matched to the bottle material.
For this reason, test labels filled with the real shampoo or conditioner, including drips around the cap, hand soap residue, warm humidity and normal wiping. Inspect the corners after a day or more, not just immediately after application. For durable options and specifics about the available sheet material, visit White PolyGloss Labels.
White matte, gloss, or clear?
Matte offers understated branding and makes small text easier to read under strong lighting. Gloss adds shine and can enhance colorful shelf displays. Clear labels show the bottle color and product inside, but many desktop printers cannot print opaque white; pale colors may disappear against transparent or dark contents. Test the artwork on the filled bottle under realistic light before ordering.
Plastic bottle compatibility matters
Hair-care bottles may be made from plastics including HDPE, PET or polypropylene. Surface treatments, recycled-content variations, surface texture and flexibility affect adhesion. An adhesive that grips one clear PET bottle may behave differently on an untreated squeezable HDPE bottle. Ask about suitable adhesive constructions or test samples on the final production material.
Sheet Labels vs. Roll Labels vs. Custom Printed Labels
Choose your label supply format based on the equipment you actually have and how frequently your artwork changes.
| Option | Who prints? | Best-fit workflow | Before ordering |
|---|---|---|---|
| Blank sheet labels | You, using a compatible desktop inkjet or laser printer | Small-batch brands, samples, short runs and frequent design changes | Check printer-specific stock coating, sheet layout and settings |
| Blank roll labels | You, using a compatible roll-fed label printer | Repeated production runs, multiple SKUs or variable data | Check core size, maximum outside diameter, sensor type, roll orientation and media compatibility |
| Custom printed labels | Label supplier | Approved artwork, repeat orders, and labels ready to apply | Confirm proof, quantity, material, finishing and application method |
Desktop printing
Inkjet printing is useful for rich colors and photo-style designs when matched with inkjet-coated materials. Laser printing can produce crisp text and barcodes on compatible stocks. Neither printer technology is automatically suitable for every film or adhesive. If the wrong media is used, the result can smear, curl, jam or fail to bond. Use Blank Sheet Labels and the matching free label templates to plan a properly aligned print run.
Roll-fed printing
For compatible Epson ColorWorks, Primera or Afinia roll-fed inkjet systems, blank roll labels can simplify longer production runs and help with batch changes. Confirm the material coating, core, outer diameter, label gap or black mark sensor requirements, and the direction in which the artwork enters the printer. Remember that roll label dimensions may describe the web orientation, not the horizontal/vertical appearance of artwork on a bottle. See Blank Roll Labels for options.
Which is the lower-cost choice?
There is no universal break-even quantity. Consider print costs, labor, setup, waste, material durability, and frequency of artwork changes. For a small brand that updates scents and formulas often, printing sheets on demand can prevent unused inventory. For a stable product line printing thousands of labels regularly, a compatible roll-based or professionally printed workflow may be more efficient.
Design a Label That’s Readable and Ready for Retail
Reserve space for important information before deciding where decorative artwork goes. The front panel usually carries the brand, the product identity and net quantity, while the back or side panel can carry ingredients, directions and other applicable statements. Packaging design and regulatory requirements should be developed together, not added as an afterthought.
Front-label hierarchy
Make the word Shampoo or Conditioner unmistakable. Use a distinct but consistent visual cue for each product in a paired set. Fragrance, hair type or intended routine can be supporting text, but shouldn’t crowd out the basic product identity. Keep net contents readable and check that no important information disappears when a bottle is viewed on a shelf.
Back-label space
Ingredient declarations, directions, responsible business information and other required disclosures can demand significant space. Tiny type over a patterned background may look attractive on-screen but become difficult to read when printed. Use simple typography, high contrast and actual-size proofs. When a container cannot comfortably fit the necessary information, consider an outer carton or another legally appropriate presentation rather than relying on unreadably small text.
U.S. labeling requirements
In the United States, ordinary shampoo and conditioner products are generally cosmetics, but the product’s intended use and marketing claims matter. An anti-dandruff shampoo, for example, can be both a cosmetic and a drug, with additional labeling obligations. FDA guidance addresses product identity, net contents, ingredients and other requirements under applicable rules. These are product-specific compliance decisions, so have your actual formula, claims and finished package reviewed before commercial production.
For authoritative background, consult the FDA’s Summary of Cosmetics Labeling Requirements and cosmetic versus drug guidance. A blank label and an artwork template do not establish compliance by themselves.
Barcodes, QR codes and batch fields
Keep codes away from tight curves and reflective patches. Use a clean, high-contrast background with adequate quiet zones and print resolution. If you print batch identifiers or production dates separately, create a consistent variable-data area and test readability after labeling the actual filled bottle. Scan production samples with the types of devices your retailers or warehouse use.
Applying and Testing Labels on Wet-Use Bottles
- Start with clean, dry packaging. Remove dust, oil and residue without using a cleaner that damages the bottle or leaves residue. Follow the container and adhesive suppliers’ recommendations.
- Use a positioning reference. On hand-applied labels, create a simple alignment guide. Keep the upper edge at the same distance from the shoulder on every bottle.
- Apply steadily. Align the first edge, then smooth progressively across the surface. Avoid trapping air or stretching the stock.
- Allow bond development. Many pressure-sensitive adhesives strengthen over time. Follow the supplier’s application temperature and dwell-time recommendations.
- Test real use. Fill the bottles, use the cap or pump, expose samples to wet hands, warm humidity, product drips and repeated squeezing or wiping.
- Check shipping wear. Put labeled bottles in the actual cartons or mailers used for fulfillment, then inspect abrasion, corners and legibility after handling.
Why test with the actual product?
Some formulas contain oils, fragrance components, surfactants or other ingredients that can affect adhesives and printed surfaces. A label that passes a splash test with plain water may perform differently when conditioner repeatedly runs down the bottle. Testing on the final filled container gives a more realistic picture than testing on a clean empty bottle alone.
Common Shampoo Labeling Mistakes—and How to Avoid Them
| Problem | Likely reason | Better approach |
|---|---|---|
| Edges lifting near the shoulder | Label extends into a curve or bottle material needs a different adhesive | Shorten the label and test the correct adhesive on the production bottle |
| Wrinkles on a tapered bottle | Rectangular wrap cannot sit flat on a tapered shape | Use shorter panels or a bottle-specific shape |
| Ink smears after a shower | Print/coating is not sufficiently water-resistant | Test a compatible durable material and appropriate printing process |
| Clear label text disappears | Low contrast against bottle contents; missing white ink layer | Test on filled bottle, use darker artwork or an opaque white stock |
| Back label is unreadable | Too much information in too small an area | Rework layout or package design before shrinking type further |
| Misaligned roll labels | Wrong orientation, sensing settings or label dimensions | Confirm roll width, feed direction and sensor setup before ordering |
| Shampoo and conditioner mixed up | Designs are nearly identical without clear product names | Use prominent names and a consistent distinguishing color band |
Buying Checklist: Five Decisions Before You Order
- Identify the exact bottle. Record size, material, supplier, and whether it is round, oval, tapered or flat-sided.
- Choose the layout. Decide whether front/back labels or a single partial/full wrap will carry the required information.
- Measure and test size. Make full-size paper cutouts and verify they avoid curved areas, seams and caps.
- Choose a compatible material. Match coating and adhesive to your printer, bottle plastic, formula, wet use and brand appearance.
- Print and apply samples. Test readability, adhesion, moisture performance, scuffing, squeezing and fulfillment handling before ordering in volume.
For more packaging options, explore Cosmetic Labels, Bottle Labels, Blank Sheet Labels, Blank Roll Labels, and White PolyGloss Labels.
Frequently Asked Questions About Shampoo and Conditioner Labels
What is the best label size for an 8 oz shampoo bottle?
There is no universal 8 oz label size. A 2″ × 3″ or 2″ × 4″ paper cutout is a useful starting test for some slim bottles, but the actual straight panel, curvature and bottle style determine the fit.
What size label works on a 16 oz conditioner bottle?
For some broader bottles, 3″ × 4″ or 4″ × 3″ cutouts can be helpful starting points. Check the usable front panel and leave margins clear of seams and bottle curves.
Are shampoo bottle labels waterproof?
Some suitable film materials resist water, but performance depends on the coating, print, adhesive and handling conditions. Test the complete printed label on the filled container in the intended environment.
Is paper suitable for shampoo labels?
Paper can work for dry displays, gifts or secondary packaging, but moisture-resistant synthetic film is often a better choice for bottles stored or used in showers.
Should shampoo and conditioner use the same label dimensions?
If the bottles are identical, matching dimensions can simplify printing and branding. Still measure both production containers and clearly distinguish the products in the artwork.
What is the best material for squeezable bottles?
A flexible, properly engineered film with an adhesive compatible with the bottle surface is worth testing. Evaluate how the label holds during repeated squeezing rather than judging it on a rigid empty bottle.
Can I use clear labels on shampoo bottles?
Yes, if the print remains legible against the bottle contents and the material suits the application. Many desktop printers do not print opaque white, so pale graphics on clear stock may not show as expected.
Why do labels wrinkle on curved bottles?
A rectangular sticker cannot always sit smoothly over a changing diameter or compound curve. Move the design to a flatter area, reduce height or use a bottle-specific shape.
Are sheet labels or roll labels better for a small salon brand?
Sheet labels often suit small desktop batches and frequent design changes. Compatible roll-fed printers can help with repeat production. Choose based on your current printing equipment and workflow.
Can I print shampoo labels on a laser printer?
Yes, if the labels are explicitly manufactured for laser printing and the chosen construction is appropriate for the intended use. Do not assume any film label is laser compatible.
What information belongs on a shampoo label?
The appropriate information depends on the product and claims, but U.S. cosmetic requirements commonly address product identity, net contents and ingredient declaration, among other applicable rules. Seek a product-specific compliance review before production.
Is anti-dandruff shampoo labeled the same as ordinary shampoo?
No. An anti-dandruff shampoo can be regulated as both a cosmetic and a drug, creating additional requirements. Review applicable FDA guidance for the exact product and claims.
How do I keep a label from peeling in the shower?
Use a suitably durable printed material, check adhesive compatibility with the bottle plastic, avoid curved edges, prepare the surface properly and test filled bottles with water, product residue and repeated handling.
How do I choose between matte and glossy bottle labels?
Matte is low-glare and understated; gloss creates a brighter retail finish. The look should suit your brand, but durability and printing compatibility should be tested independently of appearance.
Where can I find blank labels and templates?
LaserInkjetLabels.com offers blank sheet labels, blank roll labels, and label templates for many standard sizes.
Still Not Sure Which Label to Choose?
Write down the bottle supplier and item number, the bottle plastic, the measured usable panel dimensions, your printing equipment, and where the finished product will be used. Those five facts usually narrow down the most suitable label formats. If your bottle has an unusual taper, a special adhesive requirement or large-volume production needs, ask about a custom size or construction instead of forcing a standard shape onto the bottle.
Related Label Learning Center and Product Guides
- Cosmetic Jar Labels: Size, Material & Printing Guide
- Supplement Bottle Labels: Size, Material & Printing Guide
- Lotion Bottle Labels
- Cosmetic Labels
- Label Size Guides
Shop Blank Labels for Shampoo and Conditioner Bottles
Once you have measured your bottle and tested your preferred material, browse blank printable labels by size and format. Shop Blank Sheet Labels for compatible desktop inkjet and laser printers, or Shop Blank Roll Labels for compatible roll-fed printers. You can also explore durable PolyGloss label materials and free templates.