Cosmetic Jar Labels: How to Choose the Right Size, Material & Printing Method

Choose cosmetic jar labels by measuring the actual container, matching the material to your printer and testing the finished package. This guide covers sizing, waterproof materials, sheets versus rolls, artwork, application and common problems.

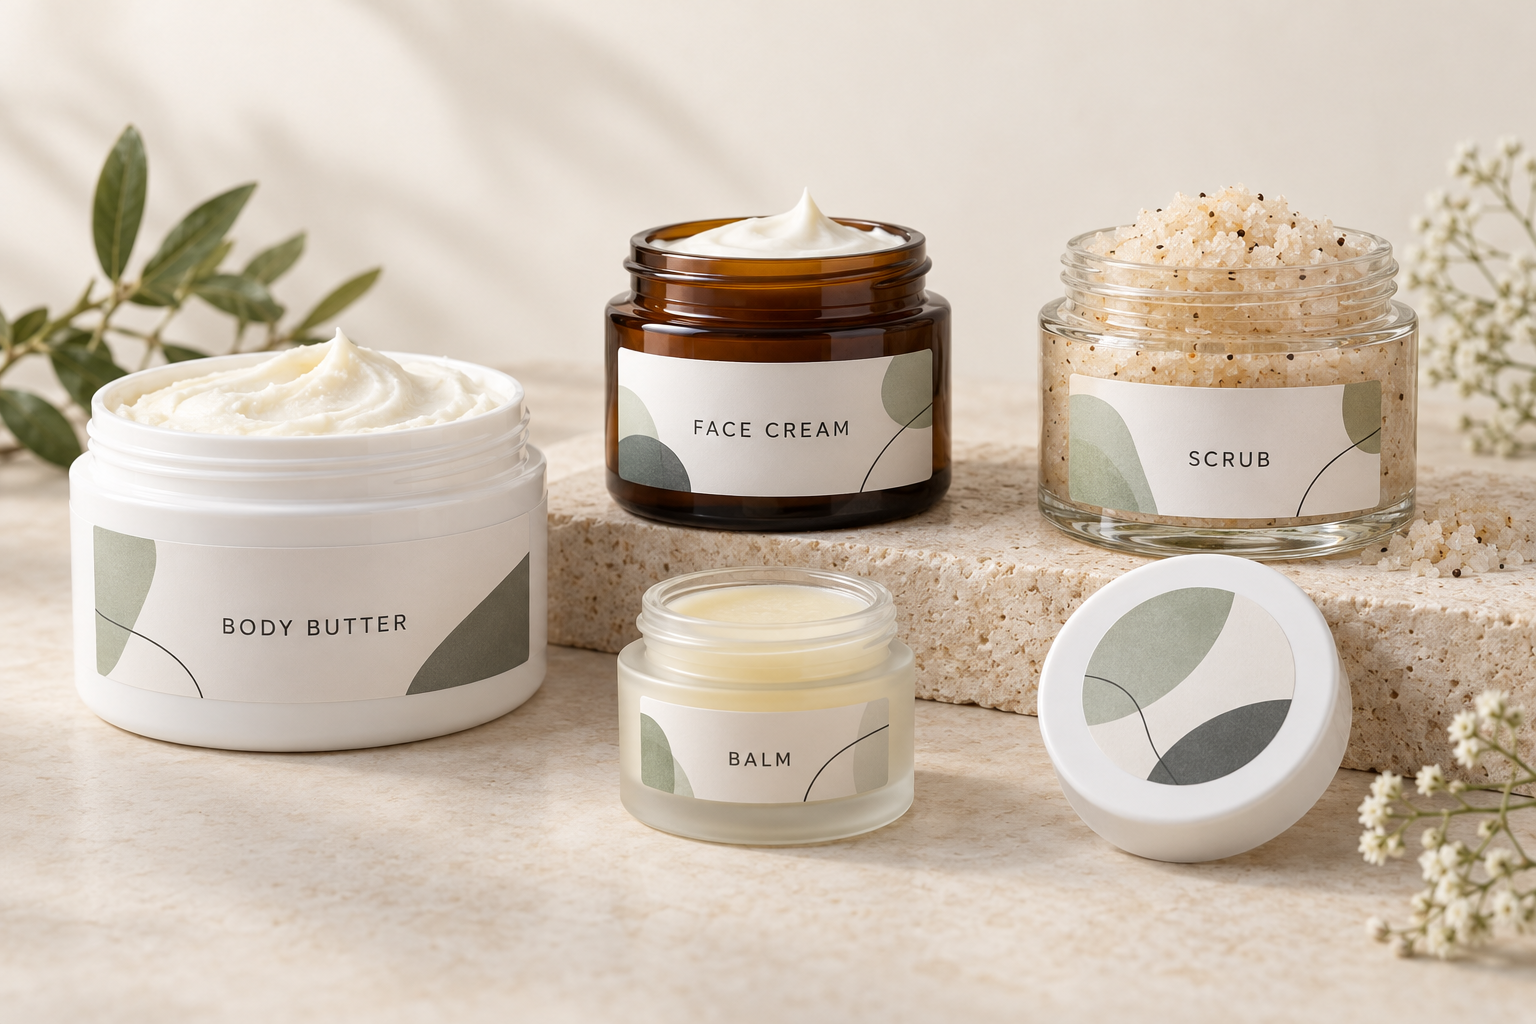
Cosmetic jar labels on body butter, face cream, scrub and balm containers with a circular lid label.
Rectangular side labels and a round lid label on cosmetic packaging.

Cosmetic jar labels should fit the jar’s smooth labeling area, match your printer, and remain readable through everyday handling. Start with the actual container rather than its ounce capacity. For creams, scrubs and body butters exposed to wet hands or product residue, test a printer-compatible synthetic label and the finished print before ordering a production quantity.

A beautiful label can still fail if its edges cross a curved shoulder, the ink smears, or the ingredient panel becomes too crowded. This guide brings sizing, material selection, printing and application into one workflow for skincare brands, handmade bath-and-body businesses and growing cosmetic manufacturers.

For shopping options, visit our Cosmetic Labels hub. For a dedicated sizing reference, see the Cosmetic Jar Label Size Guide.

Quick answer: how do you choose cosmetic jar labels?

Measure the straight sidewall and flat lid area. Choose a front, back, wrap or lid layout that leaves clearance around curves and seams. Match the label coating to your inkjet, laser or dedicated roll printer. Print a paper fit test at actual size, then test an adhesive sample for fit, rubbing, moisture and contact with your own product.

The key distinction: jar capacity does not determine label dimensions, and waterproof label stock does not automatically make every printed image waterproof.

1. Choose the label layout before choosing dimensions

Begin with the job your packaging must do. A small balm jar sold inside a carton has different space constraints from an unboxed body butter jar. A lid label may display the brand well when products sit flat on a market table, while a side label makes the product easier to identify on a shelf. Consider both views before committing to artwork.

List the information you need to accommodate, then decide how to distribute it. Keep the product name easy to recognize and leave an organized area for supporting text. Adding another panel can be more practical than shrinking every line onto the front. Check the information requirements for your particular product and packaging configuration before finalizing that arrangement.

Cosmetic jar label layouts and their practical uses
Layout Useful when Main fit check
Front and back labels You want clear branding plus a separate information panel. Both panels fit the smooth sidewall without crossing seams.
Single wrap label You need one continuous design with room around a cylindrical jar. The jar is sufficiently straight and the wrap ends align.
Round lid label plus side panel The lid is an important display surface. The circle stays inside the flat lid area and the side panel remains readable.
Small front label plus carton The jar has little usable surface and is sold with outer packaging. The complete package accommodates the required information.

A decorative sticker crossing the lid and jar may show that a package has been opened, but an ordinary label is not automatically a validated tamper-evident system. Select that feature separately if your product or distribution requirements call for it. Keep closure graphics distinct from the area people need to grip when opening the jar.

2. Measure the container you will actually use

Order or obtain a sample from the production jar supplier before selecting labels. Two jars sold as “4 oz” can differ in diameter, height, shoulder shape and lid size. Capacity describes what the container holds; it does not describe the surface available for a sticker. Double-wall jars and thick glass bases can make that difference especially noticeable.

Measure the straight sidewall

Use a ruler to find the uninterrupted vertical area between the upper shoulder and the base curve. Exclude ribs, seams, raised lettering and any surface that changes angle. Leave clearance rather than making the label exactly as tall as this area. A paper rectangle taped in place makes it easier to see whether the bottom corners extend onto a curve.

For a front label, measure the width that looks appropriate on the jar while keeping the text visible from the front. A wide label on a small cylinder may technically fit but force customers to rotate the container to read the product name. Evaluate the visual layout on the jar, not only on a flat design screen.

Measure the circumference for a wrap

Wrap a narrow paper strip around the labeling band, mark where the ends meet, then measure the strip flat. For a true cylinder, circumference can also be estimated as diameter multiplied by pi. The strip method is useful because it measures the actual surface where the label will sit, including small manufacturing variations.

Worked example: a cylindrical jar with a measured diameter of 2.5 inches has an approximate circumference of 7.85 inches. If your design calls for a 0.125-inch gap, the starting wrap width is about 7.73 inches. This is a calculation example, not a stocked-size recommendation. Confirm the final width with a physical test and available label dimensions.

A deliberate gap can help keep the ends from overlapping unevenly. If the design requires an overlap, test whether the adhesive bonds adequately to the printed label surface beneath it. Do not assume that an adhesive designed for a jar will perform identically when attached to a glossy coating or printed ink.

Measure the lid separately

Measure only the flat lid surface inside its raised rim or bevel. The outside lid diameter can be larger than the labelable area. A circle that reaches onto a rounded lip is more likely to be disturbed during opening and handling. Recessed lids may need a smaller circle even when the overall closure appears large.

Check for taper

Measure around the top and bottom of the intended labeling band. If the measurements differ, the surface is tapered. A rectangular wrap may wrinkle, angle upward or leave mismatched ends. A shorter front label can sometimes avoid the problem; another option is a label shape designed for that container. Test before ordering an entire roll.

3. Use size charts as starting points, not guaranteed fits

The following dimensions are examples to cut from paper and compare with your containers. They are expressed as applied width × applied height. Product listings may describe the dimensions in a different orientation, especially on rolls. Confirm which dimension runs across the roll and which runs in the feed direction before purchasing.

Paper fit-test examples for cosmetic containers
Container or labeling area Starting paper test What to verify
Very small sample or balm jar 1.5″ × 1″ front label; 1″ or 1.5″ lid circle Text space and flat lid diameter may be especially limited.
Small cream jar with a short sidewall 2″ × 1.5″ front label The full 1.5″ height stays between the curves.
Medium jar with a taller sidewall 3″ × 2″ front label The width remains visually balanced around the cylinder.
Wide body butter or scrub jar 4″ × 2″ front label, or a measured wrap The container actually has 2″ of usable label height.
Flat lid with adequate clearance 2″, 2.5″ or 3″ circle The selected circle fits inside the rim or bevel.

A shallow, wide jar may accommodate a large lid circle but only a low side strip. A taller jar can offer more vertical room even when its capacity is smaller. Use your measured surface to eliminate unsuitable examples immediately. Do not force a familiar label size onto a container simply because it worked on another product.

Once the paper test fits, compare available sizes and matching layouts in our label templates and sizes directory. The directory lets you move from the physical test to the correct production template without recreating the label layout by guesswork.

Practical tip: label several sample jars and place them together as they will appear for sale. Check whether names, scents and product variants can be distinguished quickly. A size that looks attractive on one isolated jar may be less useful when ten similar products sit next to one another.

4. Match the material to moisture, product residue and handling

Think about where the finished product will live. A dry gift set, a bathroom shelf and a shower ledge create different demands. The formula itself also matters: oils, creams and scrubs can reach the label through filling, application or customer handling. Test the actual formula rather than relying on water exposure alone.

Material-selection questions for cosmetic jar labels
Material or finish Why consider it? What to test
Matte paper A nonreflective look for products kept mainly dry. Staining, tearing and rubbing under expected handling.
Glossy paper A reflective finish for colorful branding. Moisture exposure and compatibility with your printer.
White synthetic film A durable face material for moisture-prone packaging. Adhesion, finished-print resistance and contact with the formula.
Clear synthetic film A transparent background that lets the container show through. Text contrast, visible adhesive and printer limitations.
Professionally printed label with a suitable protective finish A way to specify print and surface protection together. The particular coating or laminate under intended use.

Visit our waterproof and water-resistant labels page to compare the available material paths. Select the exact material listed for your printing method. “Synthetic,” “poly” and “BOPP” describe material families; those terms alone do not establish printer compatibility, adhesive suitability or chemical resistance.

Waterproof material and waterproof printing are separate questions

A film face stock can resist water while the image printed on it still smears or rubs away. The result depends on the coating, ink or toner, drying or curing conditions, and any protective finish. Test the complete printed label, not just an unprinted sample. Check both immediately after the recommended drying period and after realistic storage and handling.

A useful sample test includes a dry rub, wet-finger handling and a small amount of the actual product on the label surface. Inspect whether the color transfers, fine text becomes unreadable, edges lift or the film changes appearance. Follow the material supplier’s instructions and use test conditions that reflect your packaging’s real environment.

Matte, gloss or clear?

Matte surfaces can reduce reflections and support a restrained design. Gloss can make color appear more vivid but may produce glare under retail lighting. Clear labels let glass or plastic become part of the design. None of these finishes is a universal durability ranking; compare the actual material specification and test the finished package.

Most ordinary desktop inkjet and laser printers do not print white ink. On a clear label, white areas in the artwork generally remain transparent. Dark jars, dark formulas and colored containers can reduce contrast. If the design requires an opaque white logo or white underprinting, discuss a printing process that supports it before approving the artwork.

Check the adhesive as well as the face stock

Glass, rigid plastic and flexible plastic can behave differently. Texture, coatings and surface contamination also influence adhesion. Use the production jar for testing, including any decorative coating. A sample applied to a clean drinking glass does not prove that the same label will remain secure on a coated plastic cosmetic jar.

5. Choose sheets, rolls or custom printing around your workflow

The right format depends on your equipment, quantities, number of product variants and available production time. A small business may start with sheets for flexibility and later move selected products to rolls. Another brand may choose professionally printed labels from the beginning because repeatability and staff time matter more than printing every change in-house.

Compare cosmetic label printing approaches
Approach Practical advantages Checks before ordering
Blank sheet labels Small runs, design revisions and use with a compatible desktop printer. Sheet layout, supported media, feed path and material compatibility.
Blank roll labels Continuous production with a compatible dedicated label printer. Core, roll diameter, width, sensor detection and winding orientation.
Custom printed labels Labels arrive printed and ready for application. Artwork proof, material, finish, quantities and application requirements.

For sheets, use material explicitly intended for your laser or inkjet printer. Inkjet and laser processes differ, and their label coatings are not automatically interchangeable. Start with the printer manufacturer’s supported media guidance and the label supplier’s compatibility information. Do not assume that every printable film can safely pass through a laser printer.

For rolls, label width and height are only part of the order. Check the maximum media width, core size and outside roll diameter supported by the printer. Verify how the machine detects each label, such as a gap or black mark. If labels will be machine-applied, confirm unwind direction and which edge leaves the roll first with the equipment operator.

Compare blank sheet labels, blank roll labels and custom printed roll labels before choosing the production method. Include setup, rejected prints, application time and design changes when comparing your own costs. The lowest material price is not necessarily the lowest cost per usable finished jar.

6. Prepare artwork that stays readable at actual size

Open the template that matches the exact label product and layout. Two labels with the same outside dimensions can have different sheet margins, spacing or corner shapes. Keep a clean master template and save a separate artwork file for each product variant. This makes it easier to update a scent or ingredient panel without accidentally shifting the entire print layout.

Keep essential text and logos within the template’s safe area. Extend backgrounds into the bleed area when the template or printer requires bleed. Avoid placing a thin decorative border exactly on the cutting edge, where small print-position variations become obvious. Use the supplied template specifications rather than applying one universal margin to every label.

For raster images, prepare sufficient resolution at the final printed size; 300 pixels per inch is a common artwork target for detailed printing. Keep logos and small text as vectors when the design software and production process support them. Enlarging a small screenshot does not restore the original detail. Inspect fine text and lines on a physical printed sample.

Use clear contrast and a deliberate hierarchy. The customer should be able to find the product identity quickly, then locate the supporting information. Decorative scripts may work for a short brand name but become difficult to read in a dense paragraph. Check the design at arm’s length under ordinary room lighting as well as close up.

Print a paper proof before using label stock

Print at 100% or actual size, with scaling such as “fit to page” turned off unless your particular workflow explicitly requires otherwise. Compare the output with the template dimensions using a ruler. For sheets, hold the paper proof against the label sheet to check alignment. For a wrap, cut it out and place it around the jar.

Once the paper proof is correct, print a small adhesive test. Check the beginning and end of a sheet or run, because a design can align near the top while drifting elsewhere. Adjust the printer settings or layout systematically. Save the successful settings with the product record so the next batch starts from a documented setup.

7. Leave space for product information before finalizing the design

For U.S. retail cosmetics, FDA’s labeling overview addresses product identity, net contents, business information, ingredient declarations and applicable warnings. Placement and legibility matter, not just the presence of the words. Plan the information panel before choosing a very small label. Consult the FDA summary of cosmetics labeling requirements for your packaging configuration.

MoCRA also requires a domestic address, domestic phone number or electronic contact information through which the responsible person can receive adverse-event reports. FDA discusses this in its cosmetic registration and listing guidance. Claims to treat disease or affect body structure or function can change a product’s regulatory classification. These links support packaging planning; a label size alone does not establish compliance.

Beyond the required information, reserve space for useful production details such as a batch identifier when your workflow uses one. Keep the variable area accessible and easy to print consistently. Avoid putting a batch code across a fold, seam or highly curved surface where it may become difficult to read.

If you add a QR code, give it a clear purpose and test it on the finished jar. Scan it with more than one phone under realistic lighting. Curvature, a glossy reflection, low contrast or a tiny printed code can interfere with scanning. Keep the linked destination current and make essential on-pack information easy to locate without depending on a phone.

8. Apply labels to clean, dry jars and test a complete package

Prepare the container according to the jar and adhesive suppliers’ recommendations. Remove visible product residue and allow the surface to dry completely. If you use a cleaning agent, confirm that it will not damage the container’s coating or leave a film. Avoid applying labels to condensation or to jars that are still wet from cleaning.

Use a repeatable alignment reference, such as a simple application guide suitable for the container. Place the label gently, then smooth it with even pressure across the surface. For a wrap, keep the starting edge square to the jar’s axis so the ends meet at the intended height. Avoid stretching the label while applying it.

Allow the adhesive the dwell time recommended for the selected material before judging final bond strength or exposing it to moisture. Adhesion immediately after application may differ from adhesion after the bond develops. Store and apply labels within the supplier’s temperature and humidity guidance, and keep unused stock clean and protected.

Build a sample test around real use

Test filled, closed jars as well as empty containers. Include the handling conditions the customer is likely to create: opening the lid, wet fingers, a little formula on the side and ordinary rubbing during packing or transport. Inspect the print, corners and adhesive separately. Record what you observed instead of relying on a general “looks good” judgment.

For a new supplier or jar change, repeat the fit and adhesion checks. A nearly identical container can have a different surface treatment, seam or sidewall profile. Keep one approved labeled sample as a visual reference for later batches. That reference helps staff spot a changed label position or color before a large quantity is packed.

9. Troubleshoot the symptom before changing everything

Common cosmetic jar label problems and first checks
Problem First things to check Useful next test
Wrinkles or uneven wrap ends Taper, excessive label height or skewed application. Try a shorter paper label and compare top and bottom circumference.
Edges lift Curves, residue, surface compatibility or insufficient application pressure. Test a smaller label on a clean production jar.
Ink smears Coating compatibility, printer settings and drying time. Compare finished samples after the specified drying period.
Print alignment drifts Wrong template, automatic scaling or media feeding. Measure a 100%-scale paper proof across the full layout.
Clear-label text disappears Low contrast against the jar or product color. Test darker text, a white label or a suitable white-ink process.
Label stains during use Face material, coating and contact with the formula. Compare printed samples using the actual product.

Change one variable at a time so the result tells you something. If you change the adhesive, artwork, container and application method together, you may solve the immediate issue without learning its cause. Keep notes about the jar, material, printer settings, application conditions and test outcome for each sample.

When requesting help, provide the jar material and dimensions, the printer model, the label product and a description of the exposure that caused the failure. Photos of the label on the actual jar can be more useful than an artwork screenshot alone. They show the curves, seams and closure details that affect performance.

Cosmetic jar label ordering checklist

  • Measure the smooth sidewall, circumference and flat lid surface.
  • Confirm the panel layout and information space before final artwork.
  • Cut and apply an actual-size paper fit test.
  • Choose a material and adhesive for the container and expected use.
  • Confirm printer compatibility and, for rolls, core and winding requirements.
  • Use the exact matching template and proof the print at 100% scale.
  • Test moisture, rubbing and contact with your cosmetic formula.
  • Approve one complete labeled sample before the production order.

Frequently asked questions about cosmetic jar labels

What size label fits a 2 oz or 4 oz cosmetic jar?

There is no universal fit based on ounces. Measure the actual jar’s straight sidewall and flat lid area. A 2″ × 1.5″ or 3″ × 2″ paper rectangle can be a useful front-label test if the measured area accommodates it, but neither size is guaranteed by capacity.

Should cosmetic jar labels be waterproof?

Moisture-resistant packaging is worth considering for products handled with wet hands or kept near water. Test both the label material and the printed image. A waterproof film does not guarantee that every ink, coating or adhesive will resist your product and its use conditions.

Can I print cosmetic jar labels with a home printer?

Yes, if the label material and sheet format are compatible with that printer. Use the exact template, confirm the manufacturer’s media guidance and test a small batch. A dedicated roll printer needs compatible roll media and the correct core, dimensions and detection method.

Are clear labels suitable for amber or dark cosmetic jars?

They can be, but the jar color affects readability. Most ordinary desktop printers do not print white ink, so white artwork areas remain transparent. Test the design on the actual container or consider a white label or a printing process that supports white ink.

Why do rectangular labels wrinkle on my jars?

The label may cross a curve or wrap around a tapered surface. Compare the circumference at the top and bottom of the labeling band. Try a shorter front label, reduce label height or investigate a shape designed for the specific container.

Should I use a lid label or a side label?

Choose according to the way customers view the package and the information it needs. A lid label is useful for top-down display, while a side panel supports shelf identification and product details. Many packages benefit from both, subject to their information and fit requirements.

Are sheet labels or roll labels better for a skincare business?

Sheets can suit small batches and frequent design changes with a compatible desktop printer. Rolls suit compatible dedicated printers and continuous production. Compare equipment requirements, variants, application time and rejected prints rather than choosing solely by business size.

How do I stop cosmetic labels from peeling?

Keep the label off curves, apply it to a clean and dry production container, use an appropriate adhesive and follow the supplier’s application and dwell-time guidance. Test the actual jar surface and formula before increasing the order quantity.

Find labels and templates for your cosmetic jars

Start with the container measurements and your printing method. Then compare compatible materials and test the finished package. LaserInkjetLabels.com offers shopping paths for blank labels on sheets, blank labels on rolls and custom printed labels so you can choose a workflow that fits your products.

Shop Cosmetic LabelsShop Sheet LabelsShop Roll LabelsExplore Custom Printing

Find matching label sizes and templates or return to the Cosmetic Jar Label Size Guide for the dedicated sizing reference.
Essential Oil Labels: How to Choose the Right Size, Material & Printing Method

Learn how to choose essential oil labels for 5 mL, 10 mL, 15 mL, 30 mL and roll-on bottles. Compare label sizes, materials, sheet and roll labels.

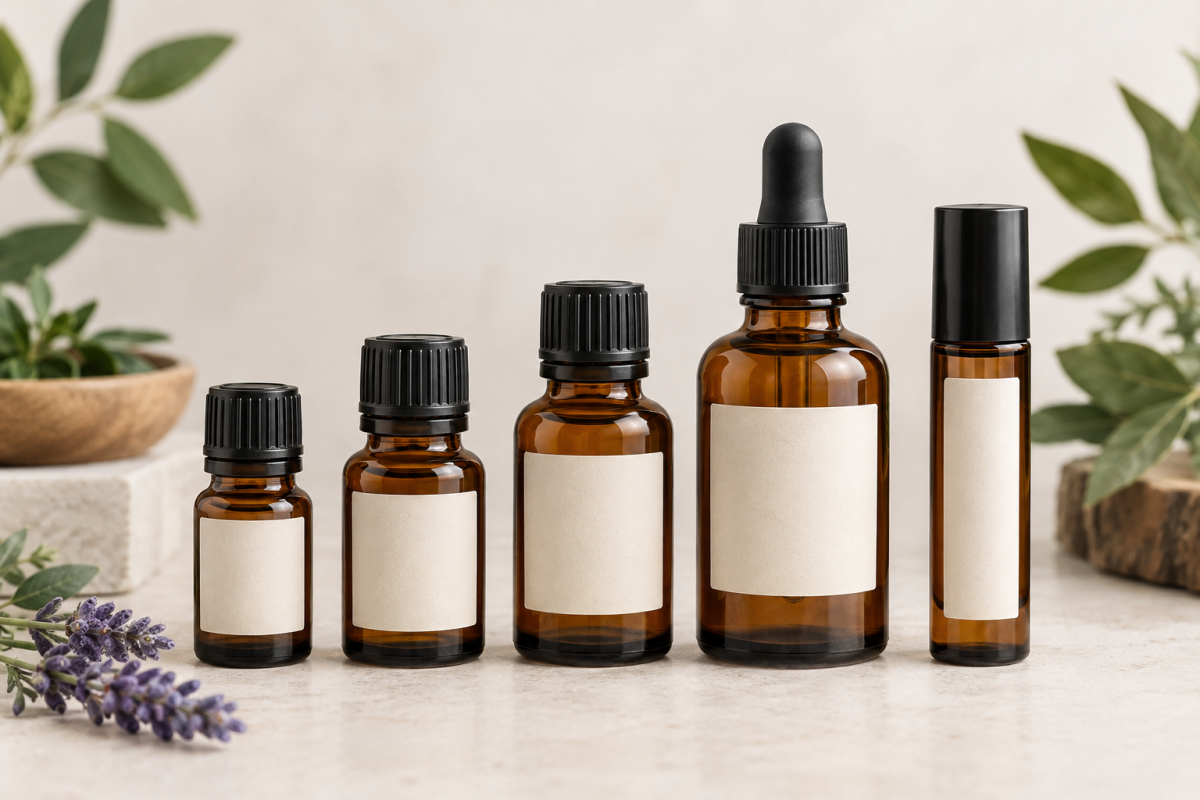
Essential oil bottles may be small, but their labels have a big job to do. A good essential oil label needs to fit a narrow bottle, remain easy to read, withstand frequent handling and provide enough room for branding and important product information.

For businesses selling essential oils, aromatherapy blends, massage oils, fragrance oils, roll-on products or private-label wellness products, choosing the right essential oil labels starts with four basic decisions:

  • What label size fits the bottle?
  • Which label material is appropriate for the product?
  • Should you use sheet labels or roll labels?
  • Will you print the labels yourself or order them professionally printed?

This guide explains each choice and helps you select a practical label for essential oil bottles ranging from small sample bottles to larger 30 mL containers and roll-ons.

Looking primarily for dimensions? Visit our Essential Oil Bottle Label Size Guide for detailed bottle-size recommendations.


Quick Guide to Choosing Essential Oil Labels

Need Good Starting Point
Small 5 mL bottle Compact rectangular label
Standard 10 mL bottle 1.5" × 2" is a useful starting size
15 mL bottle Slightly taller rectangular label
30 mL bottle Larger front or partial-wrap label
Roll-on bottle Tall, narrow rectangular label
Small production runs Sheet labels
Higher-volume production Roll labels
Oil or moisture exposure Appropriate durable synthetic material
Labels ready to apply Custom printed labels

Important: Bottle dimensions vary between manufacturers. Always measure the actual bottle you will use and test the proposed label size before ordering a production quantity.


Why Essential Oil Bottles Can Be Difficult to Label

Essential oil bottles create several challenges that larger containers do not.

The available labeling area is usually narrow. Bottle shoulders and bottom curves reduce the amount of flat surface available, and even a small difference in label height can determine whether a label applies smoothly or begins to wrinkle.

Essential oil labels may also need to accommodate information such as:

  • Brand name
  • Essential oil or blend name
  • Botanical name
  • Net contents
  • Ingredients
  • Directions
  • Warnings or precautions
  • Lot or batch information
  • Company information
  • Barcode
  • QR code

Exactly what information is appropriate or required depends on the product and how it is marketed, so leave enough label space for the information your particular product needs.


What Size Label Works Best on Essential Oil Bottles?

There is no single universal essential oil label size because bottle dimensions vary. However, common essential oil bottles tend to fall into several familiar capacities.

Useful starting points include:

  • 5 mL bottles: approximately 1.25" × 1.5"
  • 10 mL bottles: approximately 1.5" × 2"
  • 15 mL bottles: approximately 1.5" × 2.25"
  • 30 mL bottles: approximately 2" × 3"
  • 10 mL roll-on bottles: approximately 1.25" × 2"

These are starting points, not guaranteed fits. The bottle’s straight-sided labeling area is more important than its advertised capacity.

For more size options and bottle-specific recommendations, see our Essential Oil Bottle Label Size Guide.

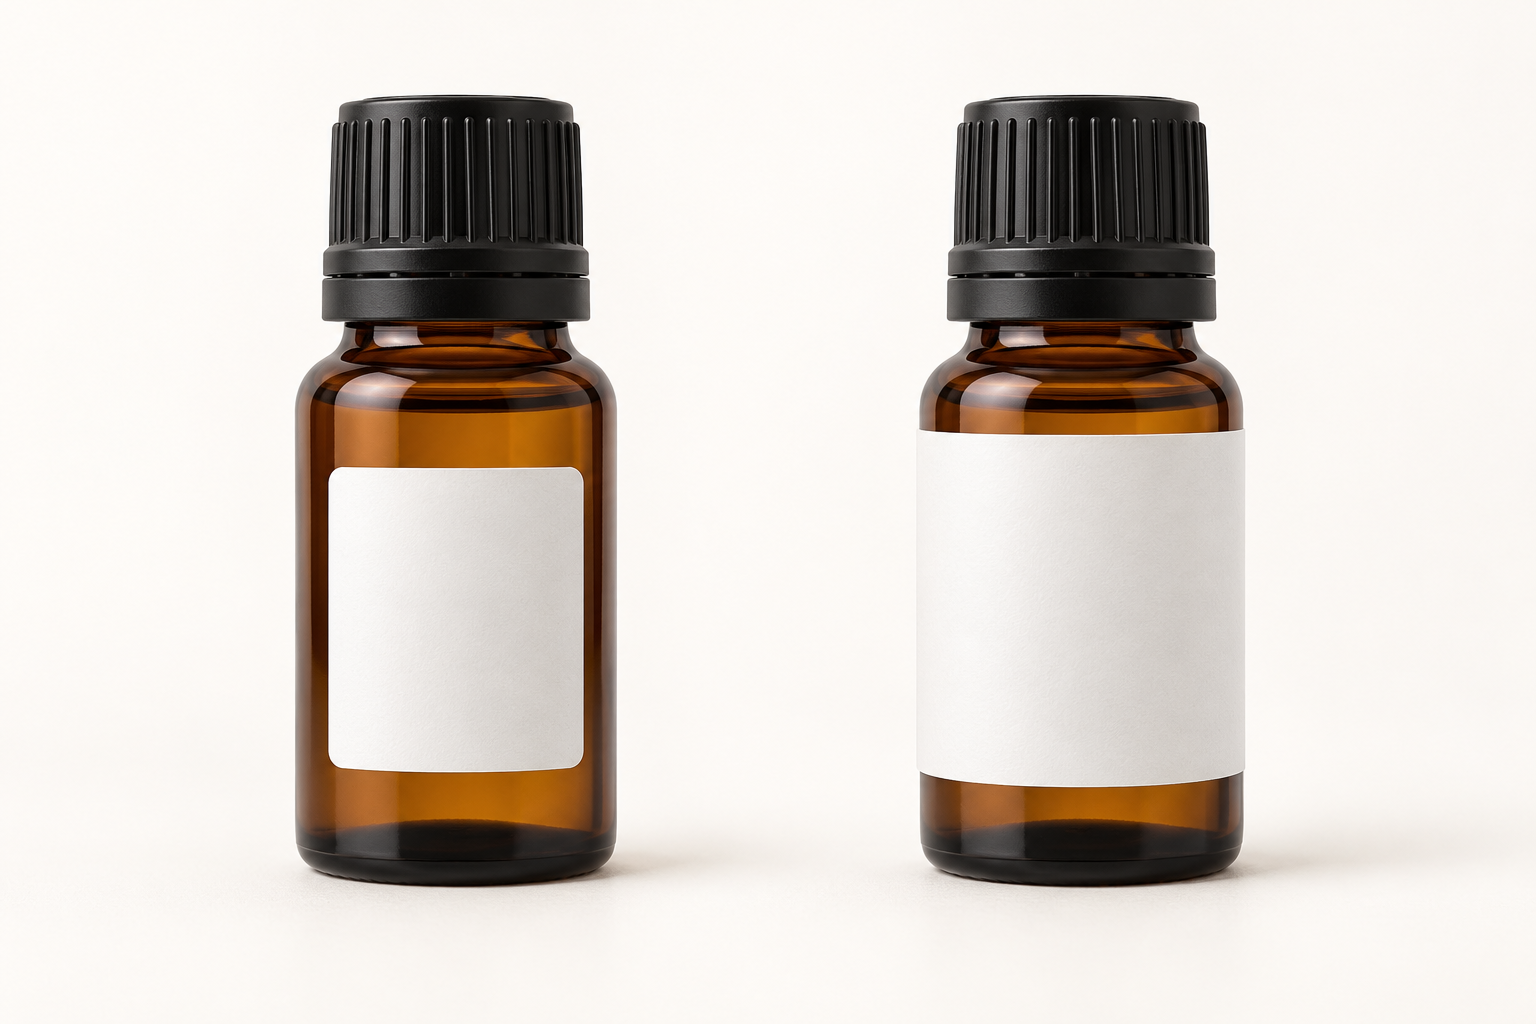
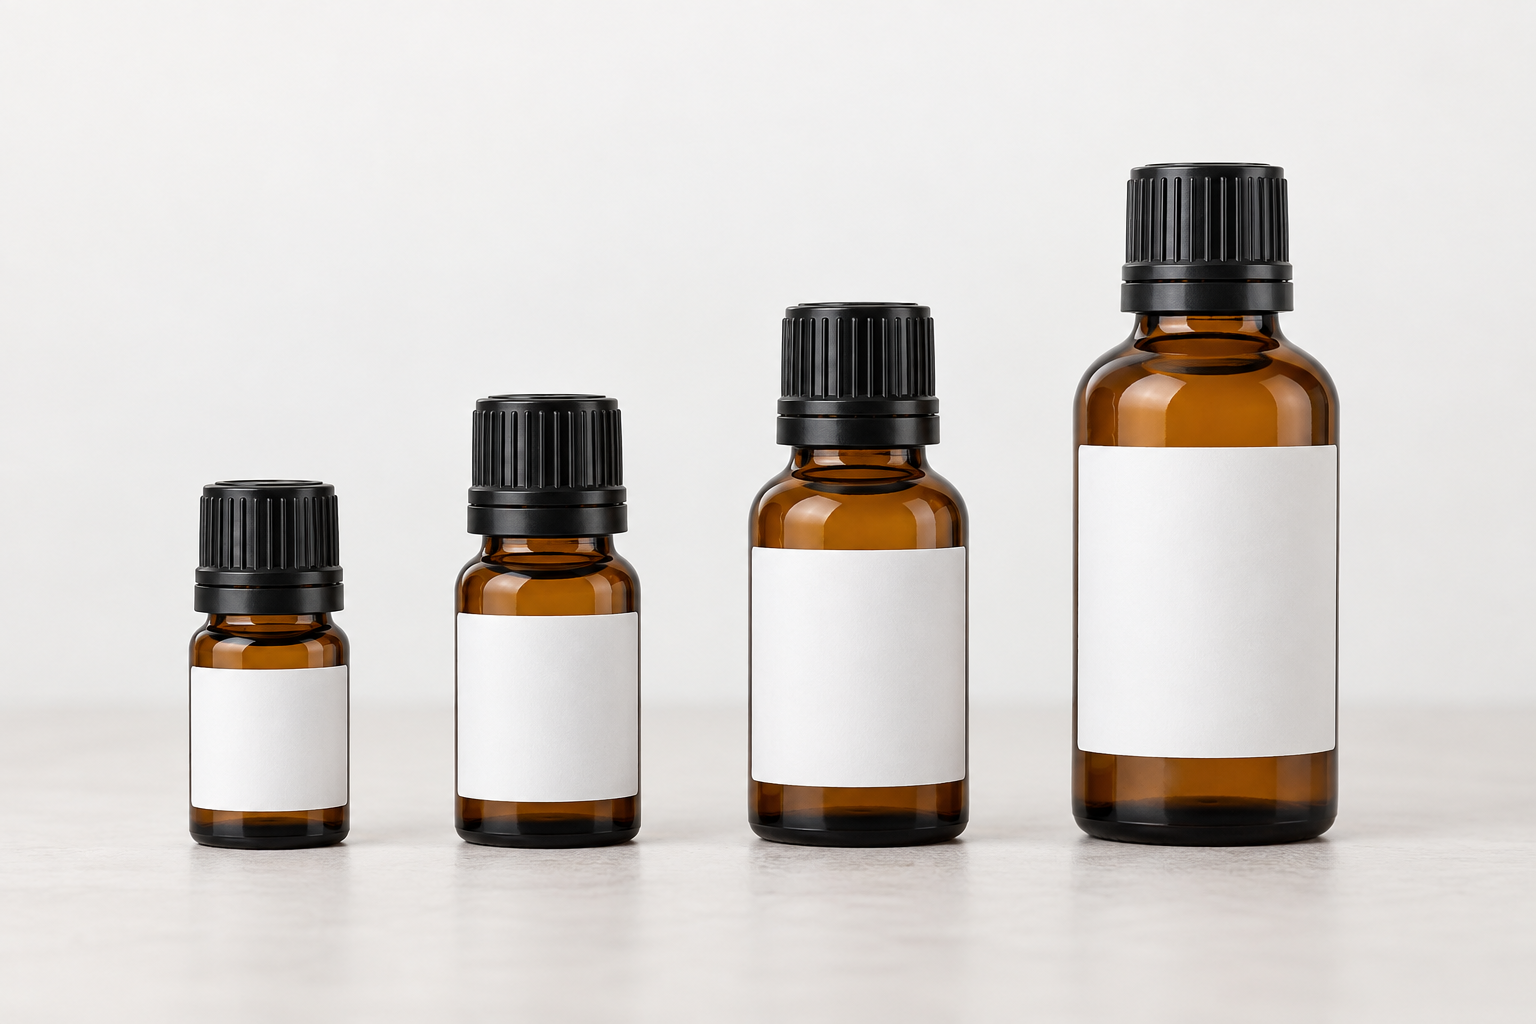
Essential oil bottle label size examples for 5 mL, 10 mL, 15 mL, and 30 mL bottles

How to Measure an Essential Oil Bottle for a Label

Measure the actual production bottle before selecting a label.

  1. Find the straight-sided portion of the bottle. Avoid measuring across the curved shoulder or rounded base.
  2. Measure the usable label height. Leave a little space above and below the label so minor placement differences do not push the label onto a curve.
  3. Measure around the bottle. If you are considering a partial-wrap or near-wrap label, measure the circumference of the straight portion.
  4. Choose a label slightly smaller than the maximum usable area. A little extra room usually makes application easier.
  5. Make a paper test. Print or cut the proposed dimensions from ordinary paper and position the mockup on the actual bottle.

A slightly smaller label often applies more consistently than a label designed to use every fraction of available space.

Our free label templates can also help you test common sizes before ordering blank labels.


Front Labels vs. Wraparound Labels

Essential oil bottles can use a small front label, a partial-wrap design or a longer label that uses most of the bottle circumference.

Front Labels

A small front label works well when the primary goal is quick product identification.

It can display:

  • Logo
  • Essential oil name
  • Botanical name
  • Net contents

Additional information can then appear on a second back label, outer package or accompanying material where appropriate.

Partial-Wrap Labels

A longer rectangular label provides additional room for ingredients, directions, warnings and company information while still leaving some of the bottle visible.

Near-Wrap Labels

A label that uses most of the bottle circumference can maximize usable space, but leave a small gap between the ends whenever practical. Overlapping label ends can create an uneven appearance and may make application more difficult.

Front label and partial-wrap label options for essential oil bottles

Choosing the Best Material for Essential Oil Labels

Material selection is particularly important for essential oil products because bottles may be exposed to oil residue, moisture and frequent handling.

White Matte Paper

Matte paper provides a clean, natural appearance and works well for products stored in relatively dry environments.

It can be a good fit for:

  • Sample bottles
  • Gift sets
  • Dry retail displays
  • Small production runs
  • Brands seeking a softer, natural appearance

Semi-Gloss Paper

Semi-gloss gives printed colors additional brightness while retaining a professional retail appearance.

It can work well for essential oils that are packaged and handled in relatively controlled environments.

Brown Kraft

Brown kraft provides a handmade, earthy appearance that complements natural or artisan branding.

Because kraft is a paper material, it should generally be kept away from repeated oil or moisture exposure unless the specific construction has been tested for that environment.

Weather-Resistant BOPP

For products likely to encounter moisture, oil residue or frequent handling, an inkjet-compatible BOPP or other appropriate synthetic material can provide additional durability.

Always test both the printed surface and adhesive with the actual filled product. An essential oil may behave differently from ordinary water exposure.

Clear Labels

Clear labels can create a minimal, premium appearance on amber, blue, green or clear glass bottles.

Important: Clear label material should not automatically be considered waterproof. Durability depends on the specific material, adhesive, printer and ink system.

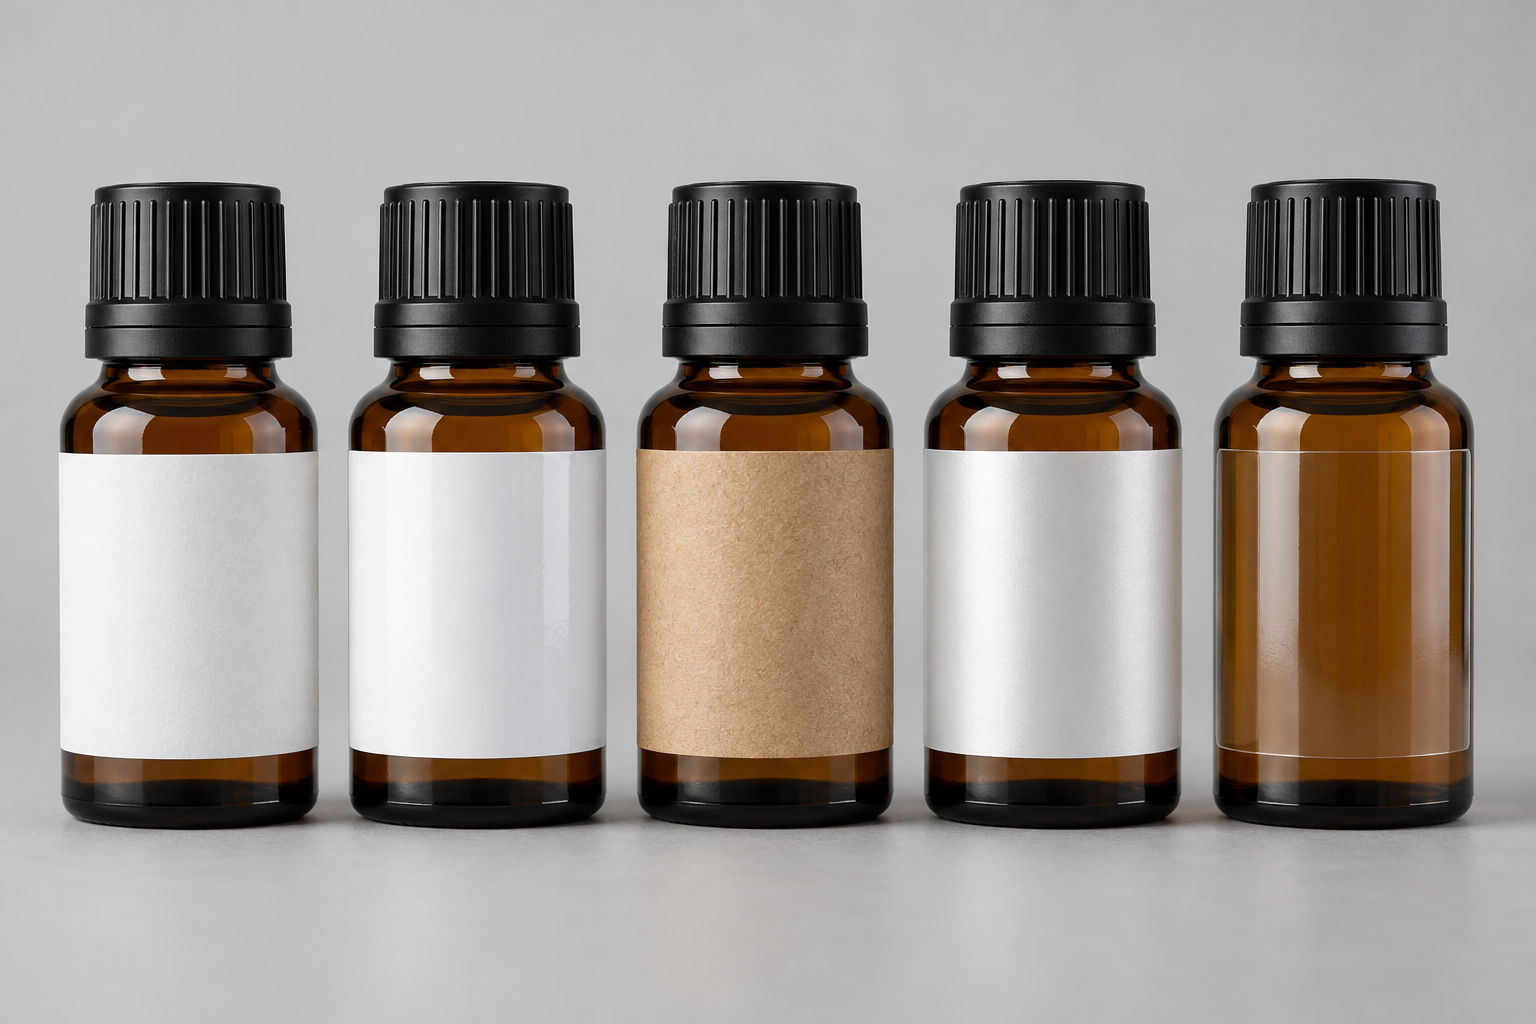
Essential oil label material options including matte, semi-gloss, kraft, BOPP, and clear film

For products that need greater moisture resistance, see our Waterproof and Water-Resistant Labels.


Why Oil Resistance Matters

Essential oils present a different challenge from ordinary water exposure.

A bottle may be handled after dispensing the product, allowing small amounts of oil to contact the label. Depending on the material, adhesive and printed ink, this can affect:

  • Print appearance
  • Adhesion
  • Surface durability
  • Label edges
  • Smudging or abrasion resistance

For that reason, do not select a material solely because it is described as water-resistant. Test the printed label with the actual essential oil or blend you will sell.

A useful production test is to apply several printed labels to filled bottles, handle them normally for several days and expose one sample to a small amount of the actual product.


Sheet Labels vs. Roll Labels for Essential Oils

Both sheet and roll labels can produce professional essential oil packaging. The better choice depends on your printer, production volume and number of different products you sell.

Feature Sheet Labels Roll Labels
Typical volume Small to moderate runs Moderate to higher-volume production
Printer Compatible sheet-fed laser or inkjet printer Compatible roll-fed label printer
Changing designs Very convenient Excellent for on-demand production
Application Typically hand applied Hand or compatible applicator

Blank Sheet Labels

Blank labels on sheets are especially useful for startups, handmade-product businesses and companies producing many essential oil varieties in smaller quantities.

You can print only the labels needed for the current batch without maintaining a large quantity of preprinted labels for every fragrance or blend.

Blank Roll Labels

Blank inkjet roll labels are useful for businesses using compatible Epson ColorWorks, Primera, Afinia or other roll-fed inkjet label printers.

Roll printing can be especially efficient when producing larger quantities or regularly printing many different product variations.

If you use a roll-fed printer, verify label width, core size, outside roll diameter, sensing method and orientation before ordering. See our Inkjet Roll Label Printer Compatibility Guide.

Custom Printed Essential Oil Labels

If you do not want to print labels in-house, custom printed labels can arrive finished and ready to apply.

This is useful when artwork is established and you want to eliminate printing from your production process.


Printing Essential Oil Labels In-House

Essential-oil companies often sell many individual oils and blends. Printing labels on demand can reduce the amount of finished-label inventory that must be kept for every product variation.

For example, one business may sell:

  • Lavender
  • Peppermint
  • Eucalyptus
  • Tea Tree
  • Lemon
  • Orange
  • Rosemary
  • Frankincense
  • Sleep blends
  • Massage blends
  • Roll-on aromatherapy products

With blank labels, the same inventory of label stock can be used for multiple designs as production needs change.

This can be particularly useful for:

  • Seasonal blends
  • Limited releases
  • Private-label products
  • Small batches
  • Test products
  • Changing lot or batch information

Designing Small Essential Oil Labels That Stay Readable

A small bottle does not leave much room for design mistakes.

Make the Oil Name Easy to Find

The customer should be able to quickly distinguish Lavender from Peppermint, Tea Tree or a proprietary blend.

Keep the product name prominent and avoid allowing decorative elements to overwhelm essential information.

Use a Consistent Product-Line Design

A consistent label system makes a group of oils easier to recognize as one brand.

Keep elements such as these in consistent positions:

  • Logo
  • Oil name
  • Botanical name
  • Net contents
  • Company information

Individual products can then be distinguished through controlled changes in color, illustration or accent graphics.

Avoid Extremely Small Type

Fitting more information onto a label does not help if customers cannot comfortably read it.

If the front label becomes crowded, consider a longer partial-wrap label, a second label or outer packaging instead of continually reducing the font size.

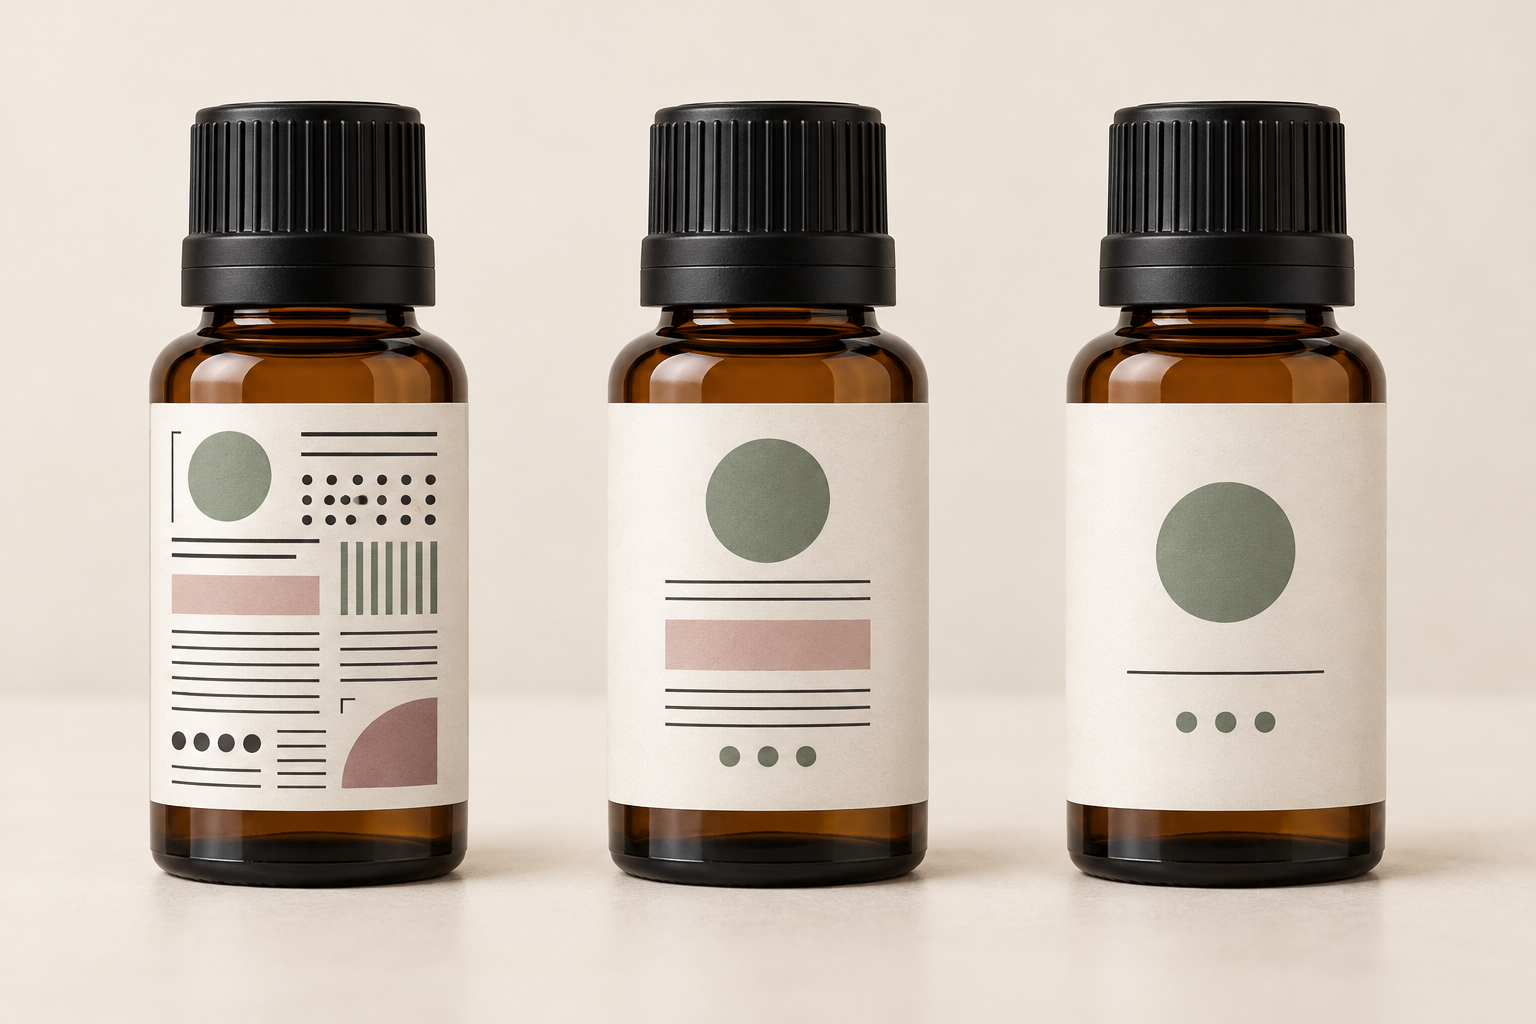
Three essential oil bottles showing crowded, improved, and readable label layouts

Barcodes and QR Codes on Essential Oil Labels

Small bottle size makes barcode and QR-code planning particularly important.

QR Codes

A QR code can connect a small package to information that does not fit comfortably on the bottle.

Potential uses include:

  • Product information
  • Usage instructions
  • Batch information
  • Reorder pages
  • Videos
  • Related products

Always test the printed QR code at its finished size before producing a full batch.

Barcodes

If the product will be sold through retail stores, plan barcode space before finalizing the artwork.

Do not squeeze a barcode into whatever space remains at the end of the design process. Keep the barcode readable, maintain sufficient surrounding space and test the printed code after the label has been applied to the bottle.


Essential Oil Labels for Roll-On Bottles

Roll-on bottles create a slightly different labeling challenge because they are usually taller and narrower than standard essential oil bottles.

A tall rectangular label often works well because it uses the vertical surface efficiently while keeping the label edges away from strong curves near the top and bottom.

Roll-ons are also frequently carried in purses, pockets, travel bags and cosmetic cases, so frequent handling should be considered when choosing the label material.

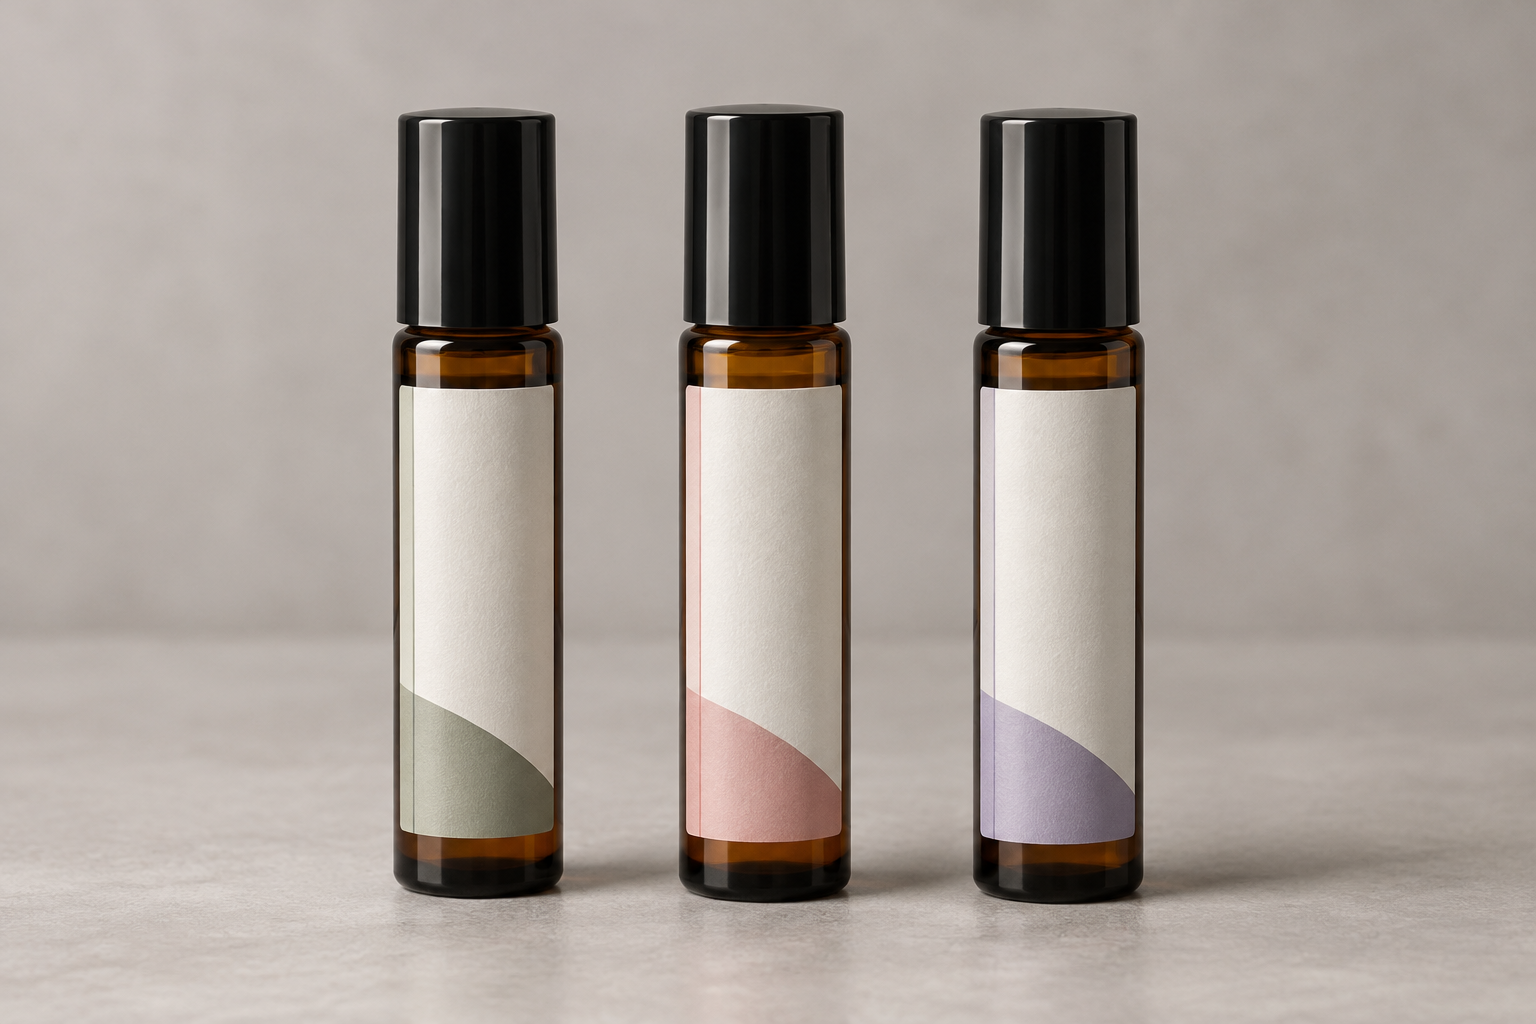
Essential oil roll-on bottles with tall narrow label designs

Common Essential Oil Label Mistakes

Choosing the Label Before Choosing the Bottle

Select the production bottle first whenever possible. Even two bottles advertised as the same capacity can have different usable labeling areas.

Using Every Available Fraction of Space

A label that exactly matches the maximum straight area can be difficult to apply consistently. Leaving a small amount of space around the label often creates a cleaner result.

Placing the Label Across the Bottle Shoulder

Label edges that extend onto strong curves are more likely to wrinkle or lift.

Assuming Water Resistance Means Oil Resistance

Water and essential oils are different exposures. Test the material, printed ink and adhesive with the actual product.

Using Text That Is Too Small

Prioritize information instead of continually reducing type size to fit more copy onto a small label.

Ignoring Printer Compatibility

For roll labels, verify the printer’s supported media width, core size, outside diameter, sensing method and roll orientation.

Skipping the Test Print

Always print several labels and apply them to actual bottles before beginning a production run.


What to Check Before Ordering Essential Oil Labels

Before placing an order, confirm:

  • The actual bottle dimensions
  • The usable straight-sided labeling area
  • The desired label width and height
  • Front, partial-wrap or near-wrap layout
  • The material appropriate for the environment
  • Printer compatibility
  • Barcode or QR-code requirements
  • The amount of text the design must accommodate
  • Whether labels will be applied by hand or with equipment

A simple paper mockup and a few printed test labels can prevent expensive mistakes before full production begins.


Shop Labels for Essential Oil Bottles

LaserInkjetLabels.com offers blank sheet labels, blank roll labels and custom printed labels for essential oils, aromatherapy products, fragrance oils, roll-ons and related small-bottle applications.

Shop Blank Label Sheets

Print your own essential oil labels with a compatible desktop laser or inkjet printer.


Shop Blank Sheet Labels

Shop Blank Inkjet Roll Labels

Print labels using compatible roll-fed color inkjet label printers.


Shop Blank Roll Labels

Custom Printed Essential Oil Labels

Have finished labels professionally printed and delivered ready to apply.


Shop Custom Printed Labels

Find the Right Label Size


View the Essential Oil Bottle Label Size Guide

Free Label Templates

Use our templates to set up artwork and test common label dimensions.


Browse Free Label Templates


Frequently Asked Questions About Essential Oil Labels

What size label is best for a 10 mL essential oil bottle?

A 1.5" × 2" rectangular label is a useful starting point for many 10 mL essential oil bottles. Bottle dimensions vary, so measure the straight-sided labeling area and test the size before ordering.

What size label fits a 5 mL essential oil bottle?

A label around 1.25" × 1.5" is a useful starting point for many 5 mL bottles. Compact bottles have limited flat surface area, so test the label on the actual container.

What size label works for a 15 mL bottle?

A rectangular label around 1.5" × 2.25" can work well for many 15 mL bottles. Other nearby sizes may fit better depending on the bottle manufacturer and design.

What size label works for a 30 mL essential oil bottle?

A 2" × 3" label is a useful starting point for many 30 mL bottles and provides additional room for branding and product information.

What material is best for essential oil labels?

The best material depends on the product and environment. Matte or semi-gloss paper can work for dry applications, while appropriate inkjet-compatible BOPP or other synthetic materials can provide greater durability where moisture, oil residue and frequent handling are concerns.

Should essential oil labels be waterproof?

Greater moisture resistance is useful for many essential oil products, but water exposure is not the only concern. Essential oils can affect materials differently, so test the label material, adhesive and printed ink with the actual filled product.

Are clear labels waterproof?

Not automatically. Clear material can create a premium no-label appearance, but whether it is waterproof or water-resistant depends on the specific material construction, adhesive and printing system.

Are sheet or roll labels better for essential oils?

Sheet labels are convenient for smaller production runs and compatible desktop printers. Roll labels are useful for higher-volume production with dedicated roll-fed label printers. Both can produce professional results when the material and printer are compatible.

Can I print essential oil labels myself?

Yes. Blank sheet labels can be printed with compatible laser or inkjet printers, while blank roll labels are designed for compatible roll-fed label printers.

Can I put QR codes on essential oil labels?

Yes. QR codes can be useful for linking customers to product information, instructions, videos or reorder pages. Test the printed code at its final size before production.

Can I print barcodes on essential oil bottle labels?

Yes. Plan barcode placement early in the design, maintain adequate surrounding space and test the printed barcode after the label has been applied to the actual bottle.

What is the best label shape for essential oil bottles?

Rectangular labels are generally the most practical choice because they use the narrow bottle surface efficiently. Small round labels can also be useful for caps, lids or promotional seals.

How do I prevent essential oil labels from wrinkling?

Keep the label within the straight-sided portion of the bottle and avoid extending its edges onto the curved shoulder or bottom radius. Choosing a slightly smaller label can also make application easier.

How can I test an essential oil label size before ordering?

Print the proposed dimensions on ordinary paper at 100% scale, cut out the shape and position it on the actual bottle. You can also use our free label templates to test common sizes.

Where can I find more essential oil bottle label sizes?

Visit our complete Essential Oil Bottle Label Size Guide for additional size recommendations and measuring guidance.

What Size Label Fits a Vape Bottle? Complete Size Guide for E-Liquid & CBD Bottles

Vape bottle label size guide showing recommended labels for 10 ml, 15 ml, 30 ml, 60 ml, 100 ml and 120 ml bottles

Choosing the correct vape bottle label size helps your packaging look professional, keeps important information readable and reduces problems such as wrinkling, lifting or excessive overlap. The best size depends on the bottle’s diameter, height, shape and available smooth labeling area.

This guide provides starting recommendations for common 10 ml, 15 ml, 30 ml, 60 ml, 100 ml and 120 ml vape bottles. It also explains how to measure the actual container, compare label materials and choose between blank sheet labels, roll labels and professionally printed labels.

Important: Always Measure Your Actual Bottle

Vape bottles from different manufacturers can have different diameters, shoulders, caps and usable labeling areas even when they hold the same number of milliliters. Treat the sizes in this guide as starting points and test a paper mockup or label sample on the exact bottle you plan to use.

Quick Navigation

Quick Answer: Recommended Vape Bottle Label Sizes

The following dimensions are common starting points for straight-sided vape and e-liquid bottles. The correct label may be smaller if the bottle has tapered shoulders, pronounced curves, ridges or limited space beneath the cap.

Bottle Capacity Suggested Starting Size Common Label Style Typical Use
10 ml Approximately 1.5″ × 2″ Small front label or partial wrap Sample bottles, flavor testing and compact e-liquid containers
15 ml Approximately 1.75″ × 2.25″ Front label or partial wrap Small dropper bottles and compact retail packaging
30 ml Approximately 2″ × 3″ Front label, partial wrap or front-and-back set Nicotine salts, CBD oils and standard small e-liquid bottles
60 ml Approximately 2.5″ × 4″ Large front label or partial wrap Common retail vape juice and short-fill bottles
100 ml Approximately 3″ × 5″ Partial wrap or large front label Large-capacity e-liquid and short-fill bottles
120 ml Approximately 3″ × 6″ Partial wrap or extended front label Large retail bottles requiring more branding and information space

For additional bottle-specific recommendations, visit our vape bottle label size guide.

Recommended Label Sizes by Vape Bottle Capacity

10 ml Vape Bottle Labels

A 10 ml vape bottle has limited labeling space, so the label must communicate the most important information without overwhelming the container. A label near 1.5″ × 2″ may work as a small front panel or partial wrap on many straight-sided bottles.

Prioritize the brand name, flavor or variety, capacity and the most important required information. Additional details may need to appear on a small back label, outer carton or accompanying package.

15 ml Vape Bottle Labels

Many 15 ml bottles provide slightly more width and height than 10 ml containers. A starting size near 1.75″ × 2.25″ may offer enough room for a product name, flavor, logo, volume and basic directions.

Because many 15 ml bottles narrow near the shoulder, measure only the straight-sided area beneath the shoulder and above the base curve.

30 ml Vape Bottle Labels

The 30 ml bottle is common for nicotine salts, CBD oils and other concentrated products. A 2″ × 3″ rectangle is a practical starting point for many 30 ml containers, but bottle style matters.

A wide chubby gorilla bottle may support a broader wrap, while a narrow glass dropper bottle may require a smaller front label or a tall, narrow rectangle. Do not select a size based on capacity alone.

60 ml Vape Bottle Labels

A 60 ml container generally provides enough surface area for more detailed branding. A label near 2.5″ × 4″ may work well as a large front panel or partial wrap on many bottles.

This size can provide room for the brand, flavor, product description, volume, warnings, manufacturer information, ingredients, barcode and QR code. Review all applicable regulations before finalizing artwork.

100 ml Vape Bottle Labels

Large 100 ml bottles often use labels around 3″ × 5″, depending on the usable circumference and height. This format provides more design flexibility but should still avoid the bottle’s shoulder and lower curve.

Test how the artwork looks when the bottle is viewed from the front. A wide label may wrap farther around the sides than expected, moving important text away from the primary viewing area.

120 ml Vape Bottle Labels

A starting size near 3″ × 6″ may be suitable for many 120 ml bottles. However, long labels require careful application because even a small alignment error becomes more noticeable as the label wraps around the container.

A shorter partial-wrap label may sometimes produce a cleaner result than attempting a nearly complete wrap.

How to Measure a Vape Bottle for a Label

Accurate measurement is more important than the stated bottle capacity. Two bottles can both hold 60 ml while having different diameters, heights and usable labeling areas.

Five-Step Measuring Method

  1. Identify the smooth, straight-sided area. Do not include the cap, shoulder, neck, lower curve, ridges or recessed areas.
  2. Measure the usable label height. Leave a small margin above and below the proposed label.
  3. Measure the circumference. Wrap a flexible measuring tape or strip of paper around the bottle’s straight-sided section.
  4. Decide how much of the bottle to cover. Choose a front label, partial wrap, nearly full wrap or separate front-and-back labels.
  5. Create a paper mockup. Cut plain paper to the proposed dimensions and tape it temporarily to the bottle.

How to Measure the Bottle Circumference

Wrap a flexible tape measure around the bottle at the location where the label will be applied. If you do not have a flexible tape, wrap a narrow strip of paper around the bottle, mark where the ends meet and measure the paper with a ruler.

For a partial-wrap label, select a width smaller than the full circumference. Leaving an uncovered gap can make application easier and prevent the label edges from overlapping.

How Much Uncovered Space Should You Leave?

There is no single required gap, but leaving approximately 1/8″ to 1/4″ of uncovered space between the ends of a wrap label can make placement more forgiving. Bottles with severe curves may require a larger uncovered area.

Test with an Actual Label Sample

A paper mockup confirms general size, but an actual sample confirms adhesive performance, flexibility, print quality and resistance to handling. Test the proposed material on a clean bottle under normal filling, storage and shipping conditions.

Front Labels, Wrap Labels or Front-and-Back Labels?

Front Labels

A front label covers only the main viewing area. It is easy to apply and keeps the bottle visible, but provides limited room for ingredients, warnings and other information.

Partial-Wrap Labels

A partial-wrap label covers most of the bottle without meeting at the back. It provides more printable space while reducing the risk of overlap.

Front-and-Back Labels

Separate labels allow the front to focus on branding while the back displays ingredients, warnings, directions, barcodes and manufacturer details.

Nearly Full-Wrap Labels

A wide label offers maximum space but requires accurate measuring and application. Leave a small gap to avoid overlap unless the packaging is specifically designed for it.

Best Label Materials for Vape Bottles

Vape and e-liquid bottles may be exposed to oils, moisture, frequent handling, temperature changes and product residue. Material choice should reflect the actual storage and use conditions.

Material Appearance Best Environment Important Consideration
White Matte Clean, non-reflective and easy to read Dry indoor packaging Paper material is not intended for significant moisture exposure
White Gloss Smooth and polished with vibrant colors Retail bottles stored in dry conditions Confirm printer compatibility before ordering
Clear Minimal no-label appearance Clear glass or plastic bottles Clear materials are not automatically waterproof
Kraft Natural and handcrafted Dry specialty or artisan packaging Paper kraft labels should be kept away from moisture and product residue
Synthetic Poly Durable and professional Moisture-prone and frequently handled bottles Printed ink durability depends on the material, printer and ink system

Learn more about durable materials on our waterproof and water-resistant labels page.

Test for Oils and Product Residue

A material that performs well against water may react differently to oils, flavoring ingredients or e-liquid residue. Test the printed label with the actual filled product before committing to a larger quantity.

Should You Use Sheet Labels or Roll Labels?

Both formats can produce professional vape bottle labels. The best choice depends on your printer, production volume, number of designs and application method.

Feature Sheet Labels Roll Labels
Best volume Small batches and multiple designs Regular and higher-volume production
Printer Compatible desktop laser or inkjet printer Compatible Epson, Primera or Afinia inkjet roll-label printer
Application Usually applied by hand Applied by hand, dispenser or compatible applicator
Design changes Convenient for short runs and frequent changes Efficient for recurring production and variable data
Initial investment Lower if a suitable desktop printer is already available Requires a dedicated compatible roll-label printer

Printing Vape Bottle Labels

Desktop Inkjet Printing

Desktop inkjet printers are useful for colorful short runs, prototypes and businesses producing several flavor varieties. Use materials specifically designed for inkjet printing and allow printed sheets to dry before handling or application.

Desktop Laser Printing

Laser printers produce crisp text, barcodes and graphics with toner. Use laser-compatible sheet labels designed to withstand the heat and pressure of the fusing process.

Inkjet Roll-Label Printers

Compatible Epson ColorWorks, Primera and Afinia printers can print pre-cut roll labels in sequence. This format is useful for regular production, multiple SKUs, barcodes, lot numbers and variable product information.

Before ordering, confirm the required label width, direction, core size, maximum outside roll diameter and sensing method. Visit our inkjet roll-label printer compatibility guide for additional information.

Professionally Printed Labels

Custom printed labels are supplied ready to apply and eliminate the need to purchase a printer, maintain ink inventory or dedicate staff time to production. They may be the better option for established designs and recurring production runs.

What Information Should Appear on a Vape Bottle Label?

The information required on a vape or e-liquid bottle may vary by product type, ingredients, jurisdiction, distribution channel and applicable regulations. Verify current requirements with the appropriate regulatory authority or qualified adviser.

Common label elements may include:

  • Brand and product name
  • Flavor or variety
  • Net contents
  • Ingredient statement
  • Nicotine concentration or other relevant product information
  • Applicable warnings
  • Manufacturer or distributor information
  • Lot, batch or production code
  • Barcode or SKU
  • QR code
  • Website or customer-service information
  • Storage or handling instructions

Keep critical text away from rounded corners, edges and the portion of the label that wraps farthest around the back of the bottle.

Common Vape Bottle Label Mistakes

Mistake Possible Result Better Approach
Choosing by capacity alone The recommended size may not fit a differently shaped bottle Measure the actual container
Covering the bottle shoulder Wrinkles, bubbles or lifting edges Keep the label within the straight-sided area
Making a wrap label too wide Edges overlap or important information moves out of view Leave a small uncovered gap
Using incompatible material Smearing, poor toner adhesion or feeding problems Match the label material to the printer technology
Applying labels to oily bottles Reduced adhesive contact and lifting Clean and dry the bottle before application
Skipping product testing Unexpected reactions to oils, residue or storage conditions Test the complete printed label with the actual filled product

Vape Bottle Label Buying Guide

Step 1: Identify the Bottle

Record the bottle capacity, material, diameter, circumference, usable height and shape. Note whether it has straight sides, tapered shoulders or molded ridges.

Step 2: Choose the Label Style

Decide whether you need a front label, front-and-back set, partial wrap or nearly full wrap. Consider how much information must fit on the bottle.

Step 3: Select the Material

Choose a material based on moisture, oil exposure, handling, storage temperature, desired finish and printer compatibility.

Step 4: Select Sheets, Rolls or Custom Printing

Use sheet labels for smaller batches and desktop printing, roll labels for dedicated label printers and recurring production, or professionally printed labels when you want finished labels supplied ready to apply.

Step 5: Test Before Ordering

Print a paper mockup, request samples and test the proposed material on the actual bottle. Confirm the label fits, adheres properly and remains readable after filling, storage and handling.

Explore Vape Bottle Labels

Compare blank sheet labels, blank roll labels, materials and custom printed options for vape bottles, e-liquid packaging and related containers.

Shop and Learn About Vape Bottle Labels

Frequently Asked Questions About Vape Bottle Label Sizes

What size label fits a 30 ml vape bottle?

A 2″ × 3″ rectangle is a common starting point for many 30 ml vape bottles. Measure the actual bottle because glass dropper bottles, cylindrical bottles and chubby gorilla bottles can have different usable labeling areas.

What size label fits a 60 ml vape bottle?

A label near 2.5″ × 4″ may fit many 60 ml bottles as a large front panel or partial wrap. The correct size depends on the bottle circumference, shoulder and available straight-sided height.

What size label fits a 100 ml vape bottle?

A 3″ × 5″ label is a useful starting point for many 100 ml bottles. Test a paper mockup because some bottles are wider, shorter or more tapered than others.

Should a vape bottle label wrap completely around the bottle?

Not necessarily. A partial-wrap label is often easier to apply and leaves a small gap between the label ends. A full or nearly full wrap provides more space but requires more precise measuring and alignment.

What material is best for vape bottle labels?

White matte and gloss paper can work well in dry conditions. Synthetic materials are often a better choice for bottles exposed to moisture, oils, residue or frequent handling. Test the material with the actual product.

Are clear vape bottle labels waterproof?

Not automatically. Clear refers to the appearance of the material, not its resistance to water. Review the specific material construction and test the printed label under actual use conditions.

Can I print vape bottle labels with a desktop printer?

Yes. Blank sheet labels are available for compatible desktop inkjet and laser printers. Make sure the label material is designed for the printer technology you use.

Can I print vape bottle labels on rolls?

Yes. Blank roll labels are available for many compatible Epson ColorWorks, Primera and Afinia inkjet roll-label printers. Verify the required width, direction, core size and maximum roll diameter before ordering.

Can vape bottle labels include barcodes and QR codes?

Yes. Leave enough blank space around the code, use strong contrast and test scanning on the curved bottle before production.

Can I request samples before ordering?

Yes. Sample testing is strongly recommended to confirm label size, print compatibility, adhesion and resistance to moisture, oil or product residue.

Find the Right Labels for Your Vape Bottles

Choose blank sheet labels, blank roll labels or custom printed labels for vape bottles, e-liquid containers, CBD oils and related product packaging.

Shop Sheet Labels Shop Roll Labels Custom Printed Labels

Related Vape Label Resources

Back to Top

What Size Label Fits a Beer Bottle? Complete Guide to Beer Bottle Label Sizes

labels for beer bottles guide

Whether you’re labeling a few bottles of homebrew or producing thousands of craft beer bottles each week, choosing the correct label size is one of the easiest ways to give your product a professional appearance. A label that is too small can make the bottle look unfinished, while one that’s too large may wrinkle around curves, overlap seams, or interfere with caps and necks. Since beer bottles come in many different shapes and sizes, there isn’t a single label size that works for every application. This guide compares the most popular beer bottle styles, recommended label sizes, measuring techniques, material options, and printing methods to help you select the best label for your bottles.


Quick Start Guide

Looking for a quick recommendation?

  • Standard 12 oz Longneck Bottles
    Front Label: 3″ × 4″ or 3.5″ × 4″
    Neck Label: 1″ × 3″
  • Stubby Bottles
    Front Label: 3″ × 3″ or 3.5″ × 3.75″
  • 22 oz Bomber Bottles
    Front Label: 4″ × 5″ or 4″ × 6″
  • Belgian Bottles
    Front Label: 3.5″ × 5″ or 4″ × 5″
  • Growlers
    Front Label: 5″ × 6″ or 5″ × 7″

Always measure the smooth usable area of your bottle before ordering labels. Different bottle manufacturers often produce bottles with slightly different diameters and straight-wall heights.


At-a-Glance Recommendations

Bottle TypeMost Popular Label SizeCommon Shape
12 oz Longneck3″ × 4″Rectangle
Stubby Bottle3″ × 3″Square
22 oz Bomber4″ × 5″Rectangle
Belgian Bottle3.5″ × 5″Rectangle
Growler5″ × 6″Rectangle
Neck Labels1″ × 3″Rectangle
Bottle Caps1″ CircleCircle

Quick Answer

If you have…Recommended Label
Standard 12 oz beer bottle3″ × 4″
Short craft bottle3″ × 3″
Large bomber bottle4″ × 5″ or 4″ × 6″
Belgian bottle3.5″ × 5″
Growler5″ × 6″
Neck label1″ × 3″

Why Label Size Matters

A professionally designed label deserves to fit the bottle correctly. Proper sizing improves appearance, makes application easier, and helps important information remain readable. A correctly sized label also allows enough room for your brewery logo, beer style, alcohol content, government warnings, UPC barcode, QR code, ingredients, tasting notes, and branding without crowding the design. For breweries producing multiple beers, selecting consistent label proportions also creates a recognizable product line across different styles and bottle sizes.


Labels for Standard 12 oz Longneck Beer Bottles

Standard 12 ounce longneck beer bottle with professionally printed labelThe traditional 12-ounce longneck bottle remains the most common beer package in North America. It provides a generous straight panel for front branding while leaving room for optional neck and back labels. For most breweries and home brewers, a 3″ × 4″ label offers the best balance between appearance and usable print space. Excellent for craft beer Home brewing IPA bottles Lagers Stouts Ales Recommended Sizes 3″ × 4″ Labels 3.5″ × 4″ Labels 4″ × 4″ Labels

Labels for Stubby Beer Bottles

Short stubby beer bottle with square printed labelStubby bottles feature a shorter body with less vertical label space than longneck bottles. Square labels often complement the proportions of these bottles and create a balanced appearance. Many craft breweries use slightly smaller front labels while emphasizing bold graphics and typography. Recommended Sizes 3″ × 3″ Labels 3″ × 4″ Labels

Labels for 22 oz Bomber Bottles

22 ounce bomber beer bottle with large printed labelBomber bottles provide significantly more printable area than standard beer bottles. Their taller straight sides allow breweries to incorporate larger logos, illustrations, tasting notes, brewery history, pairing suggestions, and detailed product information. Many premium craft beers use oversized labels to maximize shelf impact. Recommended Sizes 4″ × 5″ Labels 4″ × 6″ Labels 5″ × 5″ Labels

Labels for Belgian Beer Bottles

Belgian style beer bottle with premium rectangular labelBelgian-style bottles are typically taller with elegant shoulders that benefit from vertically oriented labels. These bottles are popular for Belgian ales, saisons, farmhouse beers, specialty releases, and premium craft beverages. A taller label emphasizes the bottle’s shape while providing ample room for artwork and brewery branding. Recommended Sizes 3.5″ × 5″ Labels 4″ × 5″ Labels 4″ × 6″ Labels


Labels for Beer Growlers

Glass beer growler with large professionally printed product labelBeer growlers provide one of the largest printable surfaces of any beer container. Whether you package fresh draft beer, limited seasonal releases, or brewery-exclusive products, a large front label creates an impressive retail presentation while leaving room for detailed product information. Growlers are commonly used by craft breweries, brewpubs, taprooms, cider producers, kombucha companies, cold brew coffee producers, and refill stations. Popular Label Sizes 5″ × 6″ Labels 5″ × 7″ Labels 5″ × 8″ Labels

How to Measure a Beer Bottle for Labels

Diagram showing how to measure a beer bottle for labels

Beer bottles that appear identical often have slightly different body diameters, shoulder curves, and straight-wall heights depending on the manufacturer. Because of this, measuring your actual bottle is always recommended before purchasing labels.

Step 1 — Measure the Flat Label Panel

Measure only the straight portion of the bottle body where the label will be applied. Avoid measuring into the curved shoulder or lower heel of the bottle.

Step 2 — Measure the Circumference

Wrap a flexible tape measure around the bottle or use a strip of paper to determine the bottle circumference. Rather than wrapping the label completely around the bottle, leave approximately 1/8″–1/4″ of exposed glass to help prevent label overlap.

Step 3 — Check Curved Areas

Beer bottles become more curved near the shoulder and base. Keeping the label inside the straight portion reduces wrinkles and improves adhesion.

Step 4 — Print a Paper Sample

Before ordering labels, print your chosen template on ordinary paper, cut it out, and tape it to the bottle. This simple test confirms that the proportions and appearance are exactly what you want.


Front Labels, Back Labels & Neck Labels

labels from front, back and neck of beer bottles

Many commercial breweries divide information across multiple labels instead of placing everything on a single front panel.

Label PositionTypical Contents
Front LabelBrand name, beer style, artwork, logo, alcohol content, volume
Back LabelGovernment warning, UPC barcode, ingredients, brewery information, tasting notes
Neck LabelSeasonal branding, awards, limited release, promotional messaging
Bottle CapBeer style, logo or brewery initials

Using multiple labels creates a cleaner design while giving customers easier access to important product information.


Beer Bottle Neck Labels

Beer bottle with professionally printed neck labelNeck labels add a premium appearance and immediately attract attention on retail shelves. They’re commonly used for seasonal beers, limited editions, award-winning brews, and specialty releases. Most breweries choose a narrow rectangular label that wraps around the neck without extending onto the bottle shoulder. Popular Sizes 1″ × 3″ 1.25″ × 2.625″ 1″ × 4″

Beer Bottle Cap Labels

Beer bottle cap with printed round labelRound labels designed for bottle caps provide a simple way to identify beer styles while adding another branding opportunity. Many breweries print IPA, Stout, Porter, Lager, Pilsner, Saison, or seasonal names directly on the cap label. Bottle cap labels also work well for home brewers organizing multiple recipes. Popular Sizes 1″ Round

Choosing the Best Label Material

label materials to use on beer bottles

Beer bottles experience refrigeration, condensation, transportation, and frequent handling. Choosing the proper label material is just as important as selecting the correct size.

MaterialBest For
White MatteHome brewers, short runs, handwriting, economical labels
Gloss WhiteBright retail graphics and vibrant colors
Semi-GlossGeneral purpose brewery packaging
Clear LabelsPremium “printed directly on glass” appearance
Brown KraftRustic craft breweries and vintage branding
Waterproof FilmIce buckets, refrigerated bottles and moisture exposure

Waterproof Beer Bottle Labels

Condensation is one of the biggest challenges for beer bottle labels. Traditional paper labels perform well for many applications, but bottles stored in coolers, refrigerators, or ice buckets often benefit from waterproof synthetic label materials. These films resist moisture while maintaining excellent print quality and adhesion.

Waterproof labels are especially popular for:

  • Craft breweries
  • Cold storage
  • Outdoor events
  • Restaurant service
  • Beverage distributors
  • Wedding favors
  • Home brewing competitions

Clear Beer Bottle Labels

Clear labels create one of the most premium appearances available. When printed correctly, the transparent material allows portions of the bottle to remain visible, creating the impression that graphics have been printed directly onto the glass. This style has become increasingly popular among modern craft breweries.


Sheet Labels vs. Roll Labels

the difference between sheet labels and roll labels
Sheet LabelsRoll Labels
Perfect for home brewers Laser & inkjet compatible Lower quantities Economical Easy storageBest for production Epson ColorWorks Primera printers Afinia printers Automatic applicators

If you’re producing fewer than several hundred bottles at a time, sheet labels often provide the most economical solution. Commercial breweries printing thousands of labels generally prefer roll labels for their faster printing and easier application.


Common Mistakes When Choosing Beer Bottle Labels

  1. Choosing labels based only on bottle capacity.
  2. Not measuring the straight label panel.
  3. Wrapping labels too far around the bottle.
  4. Ignoring condensation and moisture.
  5. Using the wrong material for the printer.
  6. Not testing a printed paper sample first.
  7. Using artwork with insufficient bleed.
  8. Choosing labels that interfere with neck curvature.

Buying Guide

When selecting beer bottle labels, consider the bottle size, label placement, printing method, storage conditions, and production volume. Home brewers generally benefit from sheet labels printed on desktop laser or inkjet printers because they allow economical short runs and frequent design changes. Growing breweries often transition to roll labels for Epson ColorWorks, Primera, or Afinia printers because they increase production speed while maintaining professional print quality. If your beer will be refrigerated, displayed in coolers, or submerged in ice, waterproof label materials provide the greatest durability. Premium craft breweries often choose clear labels or high-gloss white materials to maximize shelf appeal. Finally, always measure your actual bottle, print a paper sample, and verify the fit before ordering larger quantities.


Frequently Asked Questions About Beer Bottle Labels

What is the most common beer bottle label size?

For standard 12-ounce longneck bottles, the most popular size is 3″ × 4″. This size provides plenty of room for branding while fitting comfortably within the bottle’s straight label panel.


Should beer bottle labels wrap completely around the bottle?

Generally, no. Leaving approximately 1/8″ to 1/4″ of exposed glass helps prevent labels from overlapping, lifting, or wrinkling after application.


Are waterproof labels necessary for beer bottles?

If bottles will be refrigerated, stored in coolers, or placed in ice buckets, waterproof labels provide the best durability and appearance. Standard paper labels work well for many indoor applications but may soften when exposed to moisture.


Can I print beer bottle labels with my inkjet printer?

Yes. Blank sheet labels designed for inkjet printers allow you to produce professional beer bottle labels from your desktop printer. Make sure you select a material compatible with your printer.


What’s the difference between sheet labels and roll labels?

Sheet labels are ideal for home brewers and smaller production runs, while roll labels are better suited for commercial printing, Epson ColorWorks, Primera, Afinia printers, and automatic applicators.


How do I measure a beer bottle for labels?

Measure only the straight section of the bottle where the label will sit. Avoid measuring into the shoulder or base curves and always test with a paper sample before ordering.


Can clear labels be used on beer bottles?

Absolutely. Clear labels create a premium “printed directly on the glass” appearance and are especially popular among craft breweries.


Which material is best for homebrew labels?

White matte labels remain one of the most popular choices because they print beautifully on desktop inkjet and laser printers while offering excellent value.


What size label works best on growlers?

Most breweries choose labels between 5″ × 6″ and 5″ × 7″, depending on the growler diameter and available printable area.


Can I use removable labels on beer bottles?

Yes. Removable adhesives work well when bottles will be reused or returned. Permanent adhesives are recommended for retail sales.


Should I use separate front and back labels?

Many breweries place branding on the front label and move ingredients, government warnings, UPC barcodes, and tasting notes to a smaller back label for a cleaner appearance.


Can I print variable information on each label?

Yes. Desktop inkjet and laser printers make it easy to print different beer names, batch numbers, seasonal artwork, or QR codes without ordering preprinted labels.


Do I need neck labels?

Neck labels are optional but add shelf appeal and are commonly used for seasonal releases, limited editions, medals, and promotional messaging.


What is the best label shape for beer bottles?

Rectangular labels remain the most popular because they maximize printable space, although oval and circular labels are frequently used for specialty craft beers.


Can beer bottle labels be applied by hand?

Yes. Sheet labels and roll labels can both be applied manually. Larger breweries often use automatic label applicators for higher production volumes.


Will waterproof labels survive ice buckets?

Quality waterproof film labels are specifically designed to withstand condensation, refrigeration, and ice buckets while maintaining excellent adhesion.


Should I test my design before ordering?

Always print your design on ordinary paper and tape it to the bottle first. This simple step helps verify size, appearance, and artwork placement.


Where can I buy blank beer bottle labels?

LaserInkjetLabels.com offers blank sheet labels, blank roll labels, waterproof materials, clear labels, and custom printed labels for beer bottles in a wide variety of sizes and materials.


Related Articles


Shop Blank Beer Bottle Labels

Whether you’re labeling a few bottles of homebrew or producing thousands of craft beers every week, LaserInkjetLabels.com offers blank sheet labels, roll labels, waterproof materials, clear labels, and custom printed labels to fit virtually every beer bottle on the market.

Shop Blank Labels Shop Roll Labels Shop Waterproof Labels

What Size Label Fits a Candle Jar? Complete Size Guide

Candle jars showing common front and lid label sizes

Choosing the right candle-jar label requires more than knowing how many ounces of wax the container holds. Two jars sold as 8-ounce candle jars may have different diameters, heights, curves, lids and usable labeling areas. The best label is one that fits entirely within the jar’s smooth, relatively flat surface while leaving enough room for your brand name, fragrance, wax type and other important product information.

This guide provides practical starting sizes for popular candle containers, including 4-ounce, 6-ounce, 8-ounce and 9-ounce jars. It also explains how to measure your actual container before ordering blank labels, because the final choice should always be based on the jar in your hands—not its advertised capacity alone.

Quick Start Guide

Need a recommendation fast? Start here. These are our most common recommendations for candle makers. Measure your container before ordering, but this guide will point you in the right direction.

I Have… Recommended Starting Label Recommended Material
4 oz Candle Jar 2″ Circle White Matte
6 oz Candle Jar 2″ Square White Matte
8 oz Straight-Sided Jar 2″ × 3″ Rectangle White Matte
9 oz Straight-Sided Jar 3″ × 2″ Rectangle White Matte
12 oz Candle Jar 3″ Square Gloss White
16 oz Candle Jar 3″ × 4″ Rectangle Gloss White

Our Most Common Recommendations

  • Best Overall Label: 2″ × 3″ Rectangle
  • Most Popular Material: White Matte
  • Best Premium Finish: Gloss White
  • Best Rustic Appearance: Kraft Paper
  • Best Modern Look: Clear Labels
  • Best Durability: Waterproof Polypropylene
  • Best for Beginners: Sheet Labels
  • Best for High-Volume Printing: Roll Labels

LaserInkjetLabels Pro Tip

If you’re unsure between two label sizes, test both using ordinary printer paper before ordering. Most candle makers discover that the slightly smaller option produces a cleaner, more upscale appearance while remaining easier to apply consistently.

Quick Answer: What Size Label Fits a Candle Jar?

For many common candle jars, front labels between 2 and 3 inches wide work well. An 8-ounce straight-sided jar often accommodates a 2″ × 3″ rectangle, 2″ × 4″ horizontal label, 2½” circle or similar compact design. A 9-ounce straight-sided jar often works well with a label around 2″ × 3″, although the jar’s exact flat area must be measured before ordering.

Smaller 4-ounce jars generally look best with 1½- to 2-inch labels, while wider 10- to 16-ounce vessels may support labels measuring 2½ to 4 inches across.

Quick Candle-Jar Label Size Chart

candle jar size comparison chart image

Use the following recommendations as starting points. Because candle vessels vary by manufacturer, always measure your actual jar and test a paper cutout before purchasing a large quantity of labels.

Candle Container Common Front-Label Starting Sizes Possible Lid-Label Sizes Bottom Warning-Label Starting Sizes
4 oz jar 1½” × 2″, 1¾” circle or 2″ circle 1½”–2″ circle 1½”–2″ circle
6 oz jar or tin 1½” × 2½”, 2″ × 2″ square or 2″ circle 2″–2½” circle 1½”–2″ circle
8 oz jar 2″ × 3″, 2″ × 4″, 2½” circle or 2½” square 2½”–3″ circle 2″–2½” circle
9 oz straight-sided jar 2″ × 3″, 2¼” × 3″ or 2½” circle Measure the lid before ordering 2″–2½” circle
10–11 oz tumbler 2½” × 3″, 3″ square or 3″ circle Measure the lid before ordering 2″–2½” circle
12 oz jar 2½” × 4″, 3″ × 3″ square or 3″ circle Approximately 3″ circle when the lid allows 2½” circle
16 oz jar 3″ × 4″, 3″ × 5″, 3½” circle or 3½” square Measure the lid before ordering 2½”–3″ circle

Important: These are practical starting recommendations, not guaranteed dimensions for every candle vessel. Jar capacity describes how much product the container holds; it does not establish the jar’s exact height, diameter or labelable area.


How to Measure a Candle Jar for a Label

how to measure candle jars guide

Before ordering labels, measure the smooth area on the actual candle container. Do not measure across curved shoulders, tapered edges, raised seams, embossing or the thick rounded area near the bottom of the jar. Labels adhere most cleanly when every edge remains within a smooth, consistent surface.

Step 1: Identify the Flat Labeling Area

Hold the jar at eye level and locate the smoothest front-facing portion of the container. On a straight-sided jar, this area may cover most of the body. On an apothecary jar, mason jar or curved tumbler, the usable area may be considerably smaller than the jar’s overall height.

Step 2: Measure the Maximum Label Height

Use a flexible ruler or measuring tape to measure vertically between the upper and lower curves of the container. Leave a small margin above and below the proposed label so minor placement differences do not push the label onto a curved surface.

For example, if the smooth vertical area measures 2½ inches, a label approximately 2 or 2¼ inches tall may be safer than a full 2½-inch label.

Step 3: Measure the Available Width

Measure the width of the front-facing area you want the label to cover. For a centered front label, you usually do not need to calculate the full circumference. Measure the visual space available before the container begins curving away from the viewer.

For a wraparound label, measure the circumference with a flexible tape or a strip of paper. Leave a small gap between the ends unless you specifically want the label to overlap.

Step 4: Measure the Lid and Bottom Separately

Do not assume the lid label or bottom warning label should match the front label. Measure the flat, unobstructed area on the lid and the base separately. Avoid raised rings, feet, seams and deeply recessed areas that may prevent complete adhesive contact.

Step 5: Test the Size With Plain Paper

Before ordering a large quantity, cut a piece of ordinary paper to the proposed label dimensions and temporarily attach it to the container with removable tape.

View the jar from several angles and ask:

  • Does the label look proportionate to the container?
  • Do all four edges remain on the flat surface?
  • Is there enough space for the product name and fragrance?
  • Does the label leave enough glass visible for the desired presentation?
  • Will small placement differences cause an edge to reach a curve?

LaserInkjetLabels Tip

Test at least two nearby sizes. A slightly smaller label often looks more polished and is easier to apply consistently than one that uses every available fraction of an inch.


What Size Label Fits a 4 oz Candle Jar?

Four-ounce candle jars are commonly used for samples, travel candles, gift sets, wedding favors, seasonal collections and introductory fragrance sizes. Because the vessel is compact, the label should display the most important branding without overwhelming the glass.

Recommended Starting Sizes

  • 1½” × 2″ rectangle: A useful compact size for a brand name, fragrance and wax description.
  • 1¾” circle: A balanced option for a small logo-focused design.
  • 2″ circle: A strong choice when the jar has a wide enough flat front or when labeling the lid.
  • 1½” square: Suitable for minimalist packaging with limited text.

A small front label should prioritize information carefully. The brand name, fragrance and basic product identity belong on the front. Longer burning instructions, company information and safety language can be placed on a separate bottom label or on the outer packaging.

Best Shapes for 4 oz Candle Jars

Circle labels create a soft, handcrafted appearance and work especially well for favors and gift sets. Small rectangles use the available width efficiently and provide more room for longer fragrance names. Square labels can create a modern boutique look when the container has a broad, straight front.

Our Starting Recommendation

Begin by testing a 1½” × 2″ rectangle and a 1¾” or 2″ circle. Select the one that best matches the amount of text and the jar’s flat printable area.


What Size Label Fits a 6 oz Candle Jar or Tin?

Six-ounce candles are popular for small retail candles, travel collections, gift boxes and candle tins. Container styles vary widely in this category, so the correct label depends heavily on whether the vessel is a glass jar, metal tin, straight-sided tumbler or short round container.

Recommended Starting Sizes

  • 1½” × 2½” rectangle: Provides useful width without requiring a tall flat area.
  • 2″ square: Creates a balanced contemporary presentation.
  • 2″ circle: Works well on many jar fronts, lids and round tins.
  • 2″ × 3″ rectangle: May fit wider straight-sided vessels after measurement.

Special Considerations for Candle Tins

Round candle tins frequently use a large circle label on the lid and a smaller safety label on the bottom. A separate side label may not be necessary unless you need additional room for ingredients, fragrance notes, a barcode or company information.

Measure inside the raised rim of the lid rather than using the lid’s total outside diameter. A label that touches or crosses the raised edge may wrinkle, lift or appear off-center.

Our Starting Recommendation

For a 6-ounce glass candle jar, begin with a 1½” × 2½” rectangle or 2″ square. For a round tin, test a 2″ circle on the lid and a smaller circle or rectangle on the bottom.


What Size Label Fits an 8 oz Candle Jar?

The 8-ounce candle jar is one of the most widely used sizes for handmade and retail candles. It is available in straight-sided glass, amber glass, mason-style jars, jelly jars, apothecary vessels and tumblers. Because those containers can have very different shapes, there is no single label size that fits every 8-ounce candle jar.

Recommended Starting Sizes

  • 2″ × 3″ rectangle: One of the most versatile choices for an 8-ounce straight-sided jar.
  • 2″ × 4″ horizontal rectangle: Useful for a broader design or a partially wrapping label.
  • 2½” circle: Popular for a centered artisan-style front label.
  • 2½” square: A strong option for modern or minimalist branding.
  • 3″ circle: May work on a wide lid or a broad jar after careful measurement.

Straight-Sided 8 oz Jars

Straight-sided jars are generally the easiest 8-ounce vessels to label because the walls provide a larger consistent surface. They often accommodate square and rectangular labels more successfully than tapered jelly jars or containers with pronounced shoulders.

Even on a straight-sided jar, leave space above the thick lower base and below any shoulder, lid or threaded area. A label that fits the geometric dimensions but reaches these transitions may still develop lifted edges.

Tapered, Mason-Style and Apothecary 8 oz Jars

Containers that narrow toward the bottom or curve toward the top provide less flat space. A smaller centered label—such as a 2-inch rectangle, 2-inch circle or narrow oval—may adhere more cleanly than a broad rectangular design.

How Much Information Fits?

A 2″ × 3″ rectangle generally provides space for:

  • Brand name
  • Candle fragrance
  • Wax type
  • Net weight
  • A small decorative graphic

Keep detailed warnings and burning instructions on a separate bottom label so the front remains easy to read and visually appealing.

Packaging Tip

For an upscale appearance, pair a simple front label with a coordinated lid label and a separate bottom warning label. Each label can perform one clear job instead of forcing every detail onto the front.

Our Starting Recommendation

For most straight-sided 8-ounce jars, first test a 2″ × 3″ rectangle, a 2½” circle and a 2½” square. For a tapered or curved container, begin with the smallest of those options.


What Size Label Fits a 9 oz Straight-Sided Candle Jar?

Nine-ounce straight-sided candle jars are popular because they provide a smooth body, professional proportions and enough space for prominent branding. Many vessels in this category are approximately 2¾ to 3 inches wide, but their labelable height can differ based on the base thickness, shoulder, lid and specific manufacturer.

Recommended Starting Sizes

  • 2″ × 3″ rectangle: A dependable starting point for many 9-ounce straight-sided vessels.
  • 2¼” × 3″ rectangle: Uses more vertical space when the jar provides a sufficiently tall flat panel.
  • 2½” circle: Offers a strong centered design while leaving visible glass around the label.
  • 2½” square: Suitable for clean, modern packaging.
  • 3″ square: May fit broader vessels but should be tested carefully before ordering.

As one representative example, a 9-ounce straight-sided jar measuring approximately 2.875 inches wide was listed with a maximum side-label area of about 2.25 inches tall by 3 inches wide. That provides a useful reference, but it should not be treated as a universal specification for all 9-ounce candle jars.

Should the Label Cover Most of the Jar?

Not necessarily. Many premium candle brands deliberately use a label that covers only part of the visible front. Leaving glass around the design can make the product feel less crowded and allows the candle color and vessel finish to remain part of the presentation.

A larger label is useful when you need additional branding or product details. A smaller label is often more effective when the logo, fragrance name and typography are intended to be the main visual focus.

Our Starting Recommendation

Begin with a 2″ × 3″ rectangle. If the jar has more than 2¼ inches of safe flat height, also test a 2¼” × 3″ rectangle. For a more minimal design, compare both with a 2½” circle.


Choosing Between the Recommended Sizes

When two or three label sizes fit the same jar, make the final decision based on the design rather than selecting the largest possible option automatically.

Choose a Smaller Label When… Choose a Larger Label When…
Your design is logo-focused and minimal. You need space for a longer fragrance or product name.
You want more of the candle and glass visible. The front label includes wax type, weight or fragrance notes.
The jar has tapered or curved sides. The jar has a broad, smooth, straight-sided body.
You are concerned about hand-application consistency. You need stronger visibility in a retail display.
You use separate bottom and lid labels. The front label must carry most of the product information.

Need Blank Labels for Candle Jars?

LaserInkjetLabels.com offers blank printable candle labels in numerous circle, square, rectangle and specialty sizes. Choose from sheet labels for desktop inkjet and laser printers or roll labels for compatible roll-fed printing systems.

Browse Blank Candle Labels


What Size Label Fits a 10 oz or 11 oz Candle Jar?

Ten-ounce and eleven-ounce candle jars are popular with boutique candle makers because they provide more room for branding while still maintaining a clean, modern appearance. Most containers in this size range are either straight-sided tumblers or contemporary glass jars with gently rounded corners.

The additional front surface makes these jars an excellent choice for decorative labels, seasonal collections, and luxury branding.

Recommended Starting Sizes

  • 2½” × 3″ Rectangle – Excellent overall choice.
  • 3″ Square – Popular for premium candle brands.
  • 3″ Circle – Ideal for centered minimalist branding.
  • 2½” × 4″ Rectangle – Provides additional room for decorative artwork.

These larger vessels often accommodate more detailed artwork while still leaving enough glass visible to showcase the candle color.

Our Starting Recommendation

For most straight-sided 10–11 oz candle jars, begin by testing a
3″ square and a
2½” × 3″ rectangle.
These two sizes work well across a wide variety of container styles.


What Size Label Fits a 12 oz Candle Jar?

Twelve-ounce candle jars provide one of the largest printable surfaces commonly used by handmade candle companies. They are ideal for premium collections, luxury fragrances, and retail products where shelf presentation is especially important.

Recommended Starting Sizes

  • 3″ Square
  • 3″ Circle
  • 2½” × 4″
  • 3″ × 4″

Many premium candle companies intentionally use labels that cover only about half of the available front surface. This allows the glass, wax color, and vessel itself to become part of the product presentation.


What Size Label Fits a 16 oz Candle Jar?

Sixteen-ounce candle jars are frequently used for large candles, gift collections, and long-burning premium products. Their larger front surface gives you tremendous flexibility when designing your packaging.

Recommended Starting Sizes

  • 3″ × 4″
  • 3″ × 5″
  • 3½” Circle
  • 3½” Square
  • 4″ Square (after measuring)

If your candle includes fragrance notes, burn time, wax information, social media links, or QR codes, larger rectangular labels often provide the best balance between aesthetics and available print space.

LaserInkjetLabels Tip

Larger jars don’t necessarily require oversized labels. Many luxury candle brands intentionally use smaller centered labels to create a clean, upscale appearance.


Choosing Labels by Candle Container Style

Container style often influences label selection just as much as container size.

Straight-Sided Glass Jars

These are generally the easiest containers to label because they provide a large, flat printable surface. Squares and rectangles both perform exceptionally well.

Tumbler Candle Jars

Tumbler jars usually feature gently curved sides. Labels should remain within the center portion of the glass to minimize lifting near the edges.

Apothecary Jars

Because apothecary jars narrow near the top and bottom, slightly smaller labels often produce cleaner results than labels that attempt to fill the entire front.

Mason Jar Candles

Mason jars have embossed logos, shoulders, and threaded tops that reduce the usable labeling area. A centered front label paired with a matching lid label often creates the best presentation.

Candle Tins

Round tins frequently benefit from a large decorative lid label and a separate warning label on the bottom rather than using a side label.


Where Should Candle Labels Be Placed?

Many candle products actually use three different labels rather than one.

Location Purpose Recommended Shape
Front Branding & fragrance Circle, Square or Rectangle
Lid Brand identification Circle
Bottom Safety warning Circle or Rectangle

Using multiple labels allows each one to serve a specific purpose while keeping the front of the candle attractive and uncluttered.


Should You Use Circle, Square or Rectangle Labels?

circle v rectangle example on candle jars

Each label shape creates a different impression.

Circle Square Rectangle
Traditional artisan look Modern premium appearance Maximum information
Excellent for centered logos Balanced contemporary design Great for ingredients and fragrance notes
Popular for candles Luxury collections Retail packaging
Simple minimalist branding Symmetrical layouts Long product names

None of these shapes is universally better than the others. The right choice depends on your logo, typography, container style, and the amount of information that must appear on the front of the candle.

Our Design Recommendation

If you’re launching a new candle line, test one circle, one square, and one rectangle on the actual jar before committing to a production run. Viewing all three side by side often makes the best choice obvious.


Professional Candle Packaging Tips

  • Keep the fragrance name easy to read from several feet away.
  • Avoid placing important information near curved edges.
  • Use high-resolution graphics for crisp printing.
  • Leave generous white space around your logo.
  • Choose one consistent label shape across your product line.
  • Use matching lid labels for premium gift collections.
  • Separate safety information onto a bottom label whenever possible.
  • Always print a paper test before ordering large quantities.


Recommended Label Sizes for Popular Candle Jars and Vessel Lines

Many candle makers search for a label by the name of the jar, vessel supplier or product line they use. This can be a helpful starting point, but even containers with the same advertised capacity may have different diameters, label-panel heights and side profiles.

The chart below combines published vessel measurements with practical starting label sizes. Always confirm the current specifications for your exact container and test the proposed label with a plain-paper cutout before ordering.

Supplier or Vessel Published Container Details Suggested Front-Label Starting Sizes Important Consideration
CandleScience Small Straight-Sided Jar Approximately 3.6 oz wax fill; 2.70″ tall; listed side-label height of 1.88″ 1½” × 2″, 1½” square or 1¾” circle Keep the label height safely below the published 1.88″ maximum, especially when labels will be applied by hand.
CandleScience 8 oz Straight-Sided Jelly Jar Straight, non-tapered sides designed to be easier to label 2″ × 3″, 2″ × 4″, 2½” square or 2½” circle Straight sides provide more flexibility than a tapered jelly jar, but the actual flat height should still be measured.
CandleScience Libbey Straight-Sided Tumbler Approximately 8.5 oz wax fill; 3.50″ tall; 3.15″ top outside diameter; listed label height of 3″ 2½” × 3″, 3″ square or 3″ circle The published 10″ label width refers to a full side or wraparound format. A centered front label can be much narrower.
Makesy 11 oz Dream Vessel Approximately 11 oz capacity; supplier lists a 3″ circle and a 3″ × 2½” rounded rectangle 3″ circle or 3″ × 2½” rounded rectangle These dimensions come directly from the vessel supplier and are strong starting points for this specific product line.
Makesy 12 oz Aura Vessel Contemporary glass vessel offered in matte, translucent, metallic and iridescent finishes Begin by testing 2½” × 3″, 3″ circle and 3″ square Opaque and metallic finishes can affect contrast. Test both size and print visibility on the actual vessel color.
Fillmore Container 9 oz Straight-Sided Jar 3.50″ tall; 2.82″ outside diameter; 2.25″ label-panel height; 8.82″ circumference 2″ × 3″, 2″ × 4″, 2¼” × 3″ or 2½” circle A front label should generally remain at or below the published 2.25″ panel height. The 8.82″ circumference also supports a longer partial-wrap or wraparound design.
Fillmore Container 12 oz Straight-Sided Jar 3.14″ tall; 3.38″ outside diameter; 1.84″ label-panel height; 10.63″ circumference 1½” × 3″, 1¾” × 3″, 1¾” × 4″ or a compact circle Although this jar holds more than the 9 oz version, its published label-panel height is shorter. This is a good example of why capacity alone cannot determine label size.
Fillmore Container 16 oz Amber Straight-Sided Jar 3.81″ tall; 3.56″ outside diameter; 2.50″ label-panel height; 11.31″ circumference 2″ × 3″, 2½” × 3″, 2½” × 4″ or 3″ circle Amber glass can reduce the readability of transparent labels. White or light-colored printing areas may provide stronger contrast.
Ball 16 oz Mason Jar Available in regular-mouth and wide-mouth styles; body shape may include embossing, shoulders or molded details 2″ × 3″, 2½” circle or 3″ circle when the front surface allows Measure between embossed areas and curves. A front label that fits a smooth straight-sided candle vessel may not fit the same-capacity mason jar.

Note: Suppliers can revise vessels or introduce additional versions under similar product names. Confirm the item number and current specifications before using any recommendation as a production standard.


Why Jar Brand and Capacity Are Not Enough

The examples above show why a label should never be selected solely because a container is described as an 8-ounce, 9-ounce or 12-ounce candle jar.

The following characteristics can change the usable label area:

  • The thickness of the glass base
  • The presence of rounded shoulders
  • A tapered or curved body
  • Embossed logos or decorative patterns
  • The height of the lid or threaded neck
  • A recessed label panel
  • The difference between wax fill weight and overflow capacity
  • Manufacturing changes between product versions

LaserInkjetLabels Tip

Save the supplier name, vessel item number and final label size in your production records. This makes reordering easier and prevents confusion when several jars have similar capacities but different dimensions.


Front Label or Wraparound Label?

Manufacturer specifications sometimes list a label width that equals most or all of the container’s circumference. That does not mean you must use a full wraparound label.

A centered front label is often the better choice when:

  • You want the wax and vessel finish to remain visible.
  • Your branding is simple and logo-focused.
  • Labels will be applied manually.
  • You use a separate bottom warning label.
  • You want a clean, premium presentation.

A partial-wrap or full-wrap label may be more useful when:

  • You need room for fragrance notes and product details.
  • The label includes burning instructions or company information.
  • You need a barcode, QR code or batch information.
  • The jar has a long, uninterrupted straight-sided panel.
  • You want the label itself to be the dominant design feature.

How to Calculate a Wraparound Label

Measure the jar’s circumference with a flexible measuring tape or a narrow strip of paper. Decide whether you want a visible gap or an overlapping seam.

For a label with a gap, subtract the desired gap from the measured circumference. For example, if the jar measures 8.82 inches around and you want a ¼-inch gap, the maximum wrap-label length would be approximately 8.57 inches.

Do not automatically use the full available height. Leave a small margin above and below the label to account for placement variation and any subtle curve in the glass.

Our Wraparound Recommendation

Before ordering a custom or less-common wrap size, create a full-size paper prototype. Wrap it around the jar, mark the seam and verify that all text and graphics remain visible from the intended viewing angle.


Label Recommendations by Branding Style

Branding Style Label Shape to Test Material or Finish to Consider
Minimalist or luxury Small centered square, circle or vertical rectangle White matte, clear or premium synthetic material
Rustic or farmhouse Circle, oval or compact rectangle Kraft or white matte paper
Bright and contemporary Square or broad horizontal rectangle Gloss white or bright white matte
Apothecary inspired Narrow vertical rectangle or oval Matte white, kraft or clear
Information-heavy retail packaging Large rectangle, partial wrap or separate front and back labels White matte, gloss or durable synthetic material
Gift set or seasonal collection Coordinated front and lid labels Finish selected to match the collection design

How to Test Labels Across an Entire Candle Collection

Candle companies frequently use several vessel sizes while keeping the same overall branding. Rather than forcing one label size onto every jar, create a coordinated size family.

For example:

  • Use a 1¾” circle on travel candles.
  • Use a 2½” circle on standard jars.
  • Use a 3″ circle on larger tumblers.
  • Keep the logo, fonts and basic layout consistent across all three.

The same approach works for square and rectangular labels. Scaling the label while preserving the visual design creates a consistent product line without compromising the fit on each container.

Find a Label Size for Your Candle Vessel

LaserInkjetLabels.com offers blank printable labels in hundreds of circle, square, rectangle, oval and specialty sizes. Shop labels on sheets for desktop printers or rolls for compatible roll-fed inkjet printing systems.

Browse Blank Candle Labels


Choosing the Best Label Material for Candle Jars

candle label comparison chart image

After selecting the correct label size, the next decision is choosing the right material. Your label material affects not only the appearance of your candle, but also how well the label performs during shipping, handling, storage, and everyday use.

A premium fragrance deserves a premium presentation, and the label is often the first thing customers notice. Whether your brand emphasizes luxury, rustic charm, clean minimalism, or vibrant color, selecting the appropriate material helps reinforce your overall brand image.

Below are the most popular blank label materials used by candle makers and when each one works best.


White Matte Labels

White matte labels are one of the most versatile choices for candle jars. Their smooth, non-glare surface produces crisp text, rich colors, and a handcrafted appearance that works well for both small businesses and larger production runs.

Best For

  • Soy candles
  • Farmhouse collections
  • Hand-poured candles
  • Seasonal candles
  • Gift candles
  • Everyday retail products

Advantages

  • Easy to write on
  • Excellent print quality
  • Professional appearance
  • Affordable
  • Works well with both colorful and minimalist designs

Our Recommendation

If you’re just starting a candle business, white matte labels are often the best overall choice because they combine excellent print quality, broad compatibility, and an attractive finish at an economical price.


Gloss White Labels

Gloss labels enhance contrast and color, making photographs, metallic accents, and vibrant branding stand out. They are commonly used by premium candle companies that want a polished retail appearance.

Best For

  • Luxury candle brands
  • Retail boutiques
  • Gift collections
  • Holiday product lines
  • Premium fragrance collections

Advantages

  • Bright, vivid colors
  • Professional retail appearance
  • Excellent image reproduction
  • Easy to clean

Clear Labels

Clear labels create the popular “printed directly on the glass” appearance. They allow the candle color and the container itself to become part of the overall design, producing a clean, contemporary presentation.

Because the candle wax is visible through the label, darker text and high-contrast graphics generally produce the most readable results.

Best For

  • Colored wax candles
  • Luxury collections
  • Minimalist branding
  • Modern product lines

Design Tip

If your candle wax is cream, white, or pastel, avoid using light-colored text on clear labels. Strong contrast significantly improves readability.


Kraft Labels

Kraft paper labels have become extremely popular with artisan candle makers because they communicate a natural, handcrafted aesthetic. They pair especially well with soy candles, wooden lids, amber glass, and rustic packaging.

Best For

  • Farmhouse décor
  • Handmade candles
  • Organic collections
  • Craft fairs
  • Farmers markets

Advantages

  • Natural appearance
  • Unique texture
  • Warm earth-tone color
  • Excellent for rustic branding

Waterproof Polypropylene Labels

Although candle labels are not typically exposed to moisture in normal use, waterproof polypropylene labels provide additional durability during shipping, storage, and frequent handling. They also resist oils, scuffing, and many household chemicals.

Recommended For

  • Spa products
  • Bathroom candles
  • Outdoor markets
  • Subscription boxes
  • Premium retail products

If your candles are packaged with body care products, bath accessories, or shipped in environments where condensation may occur, waterproof labels are an excellent upgrade.


Which Label Material Is Right for Your Candle Business?

If Your Brand Style Is… Recommended Material
Farmhouse or Rustic Kraft Paper
Luxury Boutique Gloss White
Modern Minimalist Clear Labels
Everyday Handmade White Matte
Maximum Durability Waterproof Polypropylene

Matte vs. Gloss: Which Finish Should You Choose?

Matte Finish Gloss Finish
Soft, handcrafted appearance Bright retail presentation
Minimal glare Enhanced color vibrancy
Easy to write on Professional polished finish
Popular for artisan brands Popular for luxury brands

Neither finish is universally better. The right choice depends on your brand personality, packaging design, and the impression you want customers to have when they first see your candle.

Our Material Recommendation

For most candle makers, we recommend beginning with white matte labels unless your branding clearly benefits from another finish. Matte labels offer excellent print quality, broad design flexibility, and a timeless appearance that complements nearly every candle style.


Should You Use Sheet Labels or Roll Labels for Candle Jars?

One of the most common questions we receive from candle makers isn’t about label size—it’s about label format.

Should you purchase blank labels on sheets or on rolls?

The answer depends less on the size of your candle business and more on how you produce your candles. A business making 50 candles a week may be perfectly happy with sheet labels, while another producing the same quantity may benefit from roll labels because of its workflow or printing equipment.

The good news is that many popular label sizes are available in both formats, making it easy to transition as your business grows.


When Sheet Labels Are the Better Choice

Sheet labels remain the preferred option for many home-based candle businesses because they work with standard desktop inkjet and laser printers and require no specialized equipment.

Sheet Labels Are Ideal If You…

  • Print labels only when needed.
  • Produce small batches of candles.
  • Create seasonal fragrances.
  • Frequently change label designs.
  • Need maximum flexibility.
  • Apply labels by hand.

Because labels remain attached to an 8½” × 11″ sheet until needed, they’re easy to organize, store, and transport.

LaserInkjetLabels Tip

Many successful candle companies continue using sheet labels long after they’ve grown beyond a hobby. If your production process works well, there’s no reason to change simply because your business is larger.


When Roll Labels Become the Better Choice

Roll labels are popular with growing businesses because they simplify printing and handling when larger quantities are required.

If you’re using a compatible roll-fed label printer, rolls can eliminate the need to reload sheets during longer production runs and can improve workflow efficiency.

Roll Labels Are Ideal If You…

  • Print hundreds of labels at one time.
  • Own a compatible roll-fed label printer.
  • Want faster production.
  • Need labels in long continuous runs.
  • Are preparing for wholesale or retail distribution.

Many businesses begin with sheet labels and later transition to rolls once production becomes more consistent.


Sheet Labels vs. Roll Labels

Sheet Labels Roll Labels
Compatible with most desktop printers Designed for compatible roll-fed printers
Excellent for smaller production runs Excellent for continuous printing
Easy to change designs Efficient for larger quantities
Simple to store Reduced printer reloading
Ideal for startups Popular with established production workflows

Inkjet vs. Laser Printing

Both printer technologies produce excellent candle labels when paired with compatible materials.

Inkjet Printing

Inkjet printers are known for vibrant color reproduction and excellent photo quality. They’re a popular choice for candle makers who use colorful artwork, watercolor designs, or detailed graphics.

Advantages

  • Excellent color
  • Rich gradients
  • Beautiful photography
  • Ideal for boutique branding

Laser Printing

Laser printers excel at producing crisp black text, sharp logos, and highly readable barcodes. They’re often chosen by businesses printing larger quantities of labels with straightforward branding.

Advantages

  • Sharp text
  • Excellent barcode quality
  • Fast printing
  • Smudge-resistant output

Our Recommendation

Neither technology is inherently better. The best choice is to purchase blank labels that are specifically manufactured for the printer you already own. Using inkjet labels in a laser printer—or laser labels in an inkjet printer—can result in poor print quality or feeding issues.


How to Apply Candle Labels Like a Professional

Even a beautifully designed label can look unprofessional if it’s applied crooked or contains trapped air bubbles.

Following a consistent application process helps every candle in your product line maintain the same polished appearance.

Step 1 — Clean the Glass

Remove fingerprints, dust, oils, and wax residue using a lint-free cloth before applying labels.

Step 2 — Align the Label

Use the edge of the jar or the center of the lid as your reference point before making contact with the adhesive.

Step 3 — Apply From the Center Outward

Press the center of the label first, then smooth toward the edges to reduce trapped air.

Step 4 — Check Alignment

View the candle from multiple angles before packaging. Small alignment corrections are much easier immediately after application.


Common Candle Labeling Mistakes

  • Choosing labels based only on candle capacity.
  • Ignoring the printable flat area.
  • Using artwork with insufficient contrast.
  • Printing without first testing alignment.
  • Applying labels to dusty glass.
  • Attempting to cover embossed logos.
  • Using oversized labels that extend onto curved surfaces.
  • Trying to fit all product information onto one front label.

Growing Your Candle Business

Many successful candle companies don’t completely change their labeling process as they grow. Instead, they refine it.

A typical progression looks something like this:

Business Stage Typical Workflow
Startup Sheet labels printed on demand using a desktop printer.
Growing Business Standardized label designs with larger production batches.
Established Brand Roll-fed printing, streamlined production, and consistent branding across multiple product lines.

The important thing isn’t rushing to the next stage—it’s selecting a labeling process that supports your current production needs while leaving room to grow.

Find the Right Blank Labels for Your Candle Business

Whether you’re pouring your first batch of candles or shipping hundreds of orders every month, choosing the right blank labels helps create a professional presentation that reflects the quality of your products.

Browse our selection of blank sheet labels and roll labels available in hundreds of sizes and materials for inkjet and laser printers.


Quick Buying Guide: Choosing the Right Candle Label in Five Minutes

If you’ve made it this far, you probably have a good idea of which label size fits your candle jar. The final step is selecting the combination of size, material, finish, and printing method that best matches your product.

The checklist below summarizes the decision process used by many successful candle makers.


Step 1 — Identify Your Candle Container

Container Recommended Starting Label
4 oz 2″ Circle
6 oz 2″ Square
8 oz 2″ × 3″ Rectangle
9 oz Straight-Sided 2″ × 3″ Rectangle
12 oz 3″ Square
16 oz 3″ × 4″ Rectangle

Step 2 — Select Your Label Material

Your Brand Style Recommended Material
Rustic Handmade Kraft Paper
Luxury Gloss White
Modern Clear Labels
Classic White Matte
Maximum Durability Waterproof Polypropylene

Step 3 — Choose Your Printing Method

If You… Choose…
Print small batches Sheet Labels
Own a roll-fed printer Roll Labels
Need vibrant graphics Inkjet-Compatible Labels
Print mostly text Laser-Compatible Labels

Step 4 — Test Before Ordering Large Quantities

Before purchasing a large quantity of labels, print a sample on plain paper, cut it out, and temporarily tape it to the candle jar. Viewing the container from several angles is one of the simplest ways to confirm that the proportions look right.

Testing also helps identify potential issues with curved glass, embossed logos, decorative lids, or wrap-around designs before you begin production.

LaserInkjetLabels Tip

We recommend testing two nearby label sizes whenever possible. In many cases, a label that’s just slightly smaller produces a cleaner, more premium appearance than one that fills every available inch of glass.


Candle Label Planning Checklist

Before ordering labels, ask yourself:

  • Have I measured the flat printable area?
  • Does the label fit within the smooth surface of the glass?
  • Will customers easily read the fragrance name?
  • Does my brand logo remain prominent?
  • Will I use a separate warning label?
  • Do I need a matching lid label?
  • Have I selected the correct material for my brand?
  • Have I chosen labels compatible with my printer?
  • Have I printed and tested a sample?

Related Resources

Continue learning with these helpful guides:

  • What Size Label Fits a Mason Jar?
  • Waterproof Labels Explained
  • Sheet Labels vs. Roll Labels
  • Circle vs. Rectangle Labels
  • Clear Labels vs. White Labels
  • Gloss vs. Matte Labels
  • Choosing the Right Label Adhesive
  • How to Print Professional Product Labels

Recommended Products

Depending on your container and branding style, you may want to explore:

  • Blank Sheet Labels
  • Blank Roll Labels
  • Circle Labels
  • Square Labels
  • Rectangle Labels
  • Waterproof Labels
  • Clear Labels
  • Kraft Labels
  • White Matte Labels
  • Gloss White Labels
  • Label Templates

Final Thoughts

Selecting the right candle label is about much more than finding a label that physically fits the jar. The right combination of size, material, finish, and design creates packaging that reinforces your brand and helps your products stand out whether they’re displayed at a craft fair, boutique, farmers market, or online store.

By measuring your container, testing a sample, and choosing materials that complement your branding, you’ll create labels that look professional and perform reliably from production through the customer’s first burn.

Ready to Find the Right Candle Labels?

Browse hundreds of blank printable label sizes designed for candle jars, tins, tumblers, and specialty containers. Choose from sheet labels or roll labels in materials compatible with both inkjet and laser printers.

Browse Blank Candle Labels

“`html


Still Not Sure Which Label You Need?

Choosing the right label doesn’t have to be complicated. If you’re unsure where to start, answer these four questions and you’ll quickly narrow down the best options for your project.

Step 1 — What Are You Labeling?

  • Candle Jar
  • Candle Tin
  • Mason Jar
  • Honey Jar
  • Coffee Bag
  • Soap Packaging
  • Food Containers
  • Another Product

Step 2 — What Size Is the Container?

Measure the flat printable area—not just the overall dimensions of the container. This provides the best starting point for choosing a label that looks professional and applies cleanly.

Step 3 — Where Will the Product Be Used?

  • Indoor display
  • Retail shelf
  • Refrigerated
  • Outdoor market
  • Shipping nationwide
  • Gift packaging

The environment often determines which label material will perform best.

Step 4 — What Printer Will You Use?

  • Inkjet Printer
  • Laser Printer
  • Roll Label Printer

Always choose labels specifically designed for your printer type to achieve the best print quality and feeding performance.


Helpful Resources

Browse Labels by Size

Find blank labels organized by exact dimensions, including circles, rectangles, squares, ovals and specialty shapes.

Blank Labels by Size

Browse Labels by Material

Compare white matte, gloss, kraft, clear and waterproof label materials to find the best option for your application.

Sheet Label Materials

Download Free Label Templates

Use free templates to design and test your labels before printing.

Label Templates

Explore the Label Learning Center

Read additional buying guides covering label sizes, materials, printing tips and packaging ideas.

Label Learning Center


Common Questions We Hear From Customers

“Can I use the largest label that fits?”

Usually not. Leaving a small border of visible glass often creates a cleaner, more premium appearance and reduces the chance of labels lifting around curved edges.

“Should every candle size use the same label?”

Not necessarily. Many successful candle brands scale their label sizes while keeping the logo, fonts and overall layout consistent. This creates a cohesive product line without forcing one size to fit every container.

“Do I need a separate warning label?”

Many candle makers place the required safety information on the bottom of the container. This keeps the front label clean and focused on your brand while still providing customers with important safety information.

“Should I choose circle or square labels?”

Neither is universally better. Circle labels often create a handcrafted feel, while square and rectangular labels provide more room for branding and product information. Testing both on your actual container is the best way to decide.


Our Advice

If you’re between two label sizes, order or print a sample of both. Seeing each size on your actual container is the fastest way to decide. A label that’s slightly smaller than the maximum printable area often produces the most polished, professional result.

cta browse candle label sizes

Shop Popular Candle Label Sizes

What Size Label Fits a Mason Jar? Complete Label Size Guide

Common mason jar sizes with printable blank labels

Whether you are selling homemade jam at a farmers market, packaging local honey, pouring hand-crafted candles, creating wedding favors or preserving vegetables from your garden, choosing the right label size can dramatically improve the appearance of your product. A properly sized label creates a clean, professional look while leaving enough room for ingredients, branding, barcodes, instructions and nutrition information.

The best size depends on the jar capacity, body shape, usable smooth-glass area, lid style and how much information you need to print. Use the recommendations below as practical starting points, then measure and test the actual jar before ordering a large quantity.

Quick Start Guide

Need a recommendation quickly? These are common starting points for standard mason jars.

Mason Jar Recommended Starting Label Popular Material
4 oz 2" circle or 2" × 3" White matte
8 oz 2½" circle or 2" × 3½" White matte
12 oz 3" circle or 3" × 4" White matte
16 oz pint 3" circle or 3" × 4" White matte
24 oz 3½" circle or 3½" × 5" White matte
32 oz quart 4" circle, 4" × 4" or 4" × 6" Matte or gloss
64 oz half gallon 4½" circle or 4" × 8" Matte or gloss

At a Glance

  • Most popular overall shape: circle for lids and simple branding
  • Best shape for ingredients and detailed information: rectangle
  • Best general-purpose material: white matte
  • Best for refrigerated or moisture-prone products: waterproof polypropylene
  • Best rustic appearance: kraft paper
  • Best premium appearance: gloss white
  • Best for desktop printers: sheet labels
  • Best for compatible roll-fed printers: roll labels

LaserInkjetLabels Pro Tip

When you are deciding between two sizes, print both on ordinary paper and tape them to the jar. A slightly smaller label often looks cleaner, leaves more of the contents visible and is easier to apply consistently.

Quick Answer: What Size Label Fits a Mason Jar?

The table below summarizes the most commonly recommended label sizes for standard jars. These are starting recommendations rather than universal guarantees because jar shapes vary.

Mason Jar Size Recommended Circle Label Recommended Rectangle Label Typical Uses
4 oz 2" 2" × 3" Wedding favors, spices, samples and jams
8 oz 2½" 2" × 3½" Honey, jelly, candles and salsa
12 oz 3" 3" × 4" Sauces, preserves and bath products
16 oz pint 3" 3" × 4" Candles, jam, pickles and gifts
24 oz 3½" 3½" × 5" Cookie mixes, soup mixes and pantry storage
32 oz quart 4" 4" × 4" or 4" × 6" Canning, vegetables, sauces and dry goods
64 oz half gallon 4½" 4" × 8" Bulk foods and pantry organization

Mason Jar Dimensions and Usable Label Area

The usable label area is the smooth portion of the container where the full adhesive surface can contact the glass. It is normally smaller than the jar’s total height and width because shoulders, base curves, threads, seams and embossed lettering reduce the available space.

Jar Size Typical Height* Typical Body Width* Common Starting Label
4 oz jelly jar About 2¼" About 2¾" 2" circle or 2" × 3"
8 oz half pint About 3¾" About 2⅜" 2½" circle or 2" × 3½"
12 oz jar About 5¼" About 2⅜" 3" circle or 3" × 4"
16 oz pint About 5" About 2¾" 3" circle or 3" × 4"
24 oz jar About 6⅝" About 3" 3½" circle or 3½" × 5"
32 oz quart About 6½–6¾" About 3¼–3⅜" 4" circle or 4" × 6"
64 oz half gallon About 9" About 4" 4½" circle or 4" × 8"

*Approximate planning dimensions. Actual measurements and usable surfaces vary by manufacturer, jar style and embossing. Always measure your container.

How to Measure Your Mason Jar for a Label

  1. Choose the placement. Decide whether the main label belongs on the front, lid, back, bottom or around the body.
  2. Find the smooth surface. Avoid shoulders, threads, base curves, seams and raised logos.
  3. Measure the usable height and width. Measure only the portion where the label will remain flat.
  4. Leave a small margin. A visible glass border improves centering and helps prevent edge lift.
  5. Test a paper cutout. Print at actual size, cut it out and temporarily tape it to the jar.

For a lid label, measure the flat space inside the raised rim rather than the lid’s total outside diameter. For a wrap label, use a flexible tape or a strip of paper to measure the circumference and decide whether the ends should have a gap or overlap.

Find the Right Label by What You Are Packaging

Product Typical Jar Recommended Starting Label
Honey 8 oz 2½" circle
Jam and jelly 16 oz pint 3" circle
Salsa 16–32 oz 3" × 4" rectangle
Pickles 32 oz quart 4" circle or 4" × 6"
Candles 8–16 oz 3" circle or 2" × 3"
Cookie mixes 24 oz 3½" × 5"
Bath salts 16 oz 3" × 4"
Pantry storage 32–64 oz 4" circle or 4" × 6"

Choosing the Best Label Size for Every Mason Jar

4 oz Mason Jars

Four-ounce jars are commonly used for wedding favors, jam samples, artisan honey, spices, tea, bath salts and mini candles. Compact labels usually produce the cleanest result.

  • 2" circle: popular for the front or lid
  • 2" × 3" rectangle: useful when ingredients or additional branding must fit

8 oz Mason Jars

Eight-ounce jars are widely used for honey, jelly, salsa, relish, candles, sugar scrubs and body butter.

  • 2½" circle: excellent for artisan branding and lids
  • 2" × 3½" rectangle: provides more room for ingredients, QR codes and barcodes

12 oz Mason Jars

Twelve-ounce jars are often used for specialty sauces, coffee products, preserves, dry baking mixes and gift items.

  • 3" circle
  • 3" × 4" rectangle

16 oz Pint Mason Jars

Pint jars are among the most recognizable and versatile mason jars. They are popular for jams, pickles, salsa, candles, cookie mixes, coffee beans and craft supplies.

  • 3" circle: traditional, balanced appearance
  • 3" × 4" rectangle: good for detailed product information
  • 2" × 5" wrap label: leaves contents visible while providing additional width

Wide-Mouth vs. Regular-Mouth Jars

The front-label recommendations are often similar because the body may provide comparable usable space. The larger difference is usually the lid. Regular-mouth lid labels often begin around 2"–2½", while wide-mouth lid labels often begin around 2½"–3". Measure the flat area inside the rim.

24 oz Mason Jars

Twenty-four-ounce jars work well for cookie mixes, soup mixes, granola, snacks, bath salts, pet treats and holiday gifts.

  • 3½" circle
  • 3½" × 5" rectangle
  • 3" × 6" vertical rectangle

32 oz Quart Mason Jars

Quart jars are used for pickles, vegetables, sauces, beans, pantry goods and craft storage.

  • 4" circle
  • 4" × 4" square
  • 4" × 6" rectangle

64 oz Half-Gallon Mason Jars

Half-gallon jars provide substantial space for branding, recipes, storage instructions and large decorative designs.

  • 4½" circle
  • 4" × 8" rectangle
  • 5" × 5" square when the usable surface allows


Shop mason jar labels

Circle Labels vs. Rectangle Labels

Circle and rectangle label comparison on mason jars

Circle Labels Rectangle Labels
Classic farmhouse or artisan appearance More room for text
Excellent for logos and lid labels Better for ingredients and nutrition facts
Popular for candles, favors and gifts Useful for barcodes, QR codes and directions
Minimalist visual style Professional retail presentation

Should You Use Front Labels, Wrap-Around Labels or Lid Labels?

Front Labels

Front labels keep the product visible while presenting the brand name, product name and essential information.

Wrap-Around Labels

Wrap-around labels provide more printable space for ingredients, recipes, directions, nutrition facts, barcodes and company information.

Lid Labels

Round lid labels add branding, flavor names, batch details or decorative messages. Many businesses combine a front rectangle with a matching lid circle.

Professional Design Tips and Common Mistakes

Design Tips

  • Keep the brand and product name readable from several feet away.
  • Use no more than two or three fonts.
  • Use high-resolution graphics.
  • Leave comfortable space around important information.
  • Maintain strong contrast between the text and background.
  • Keep the design system consistent across all jar sizes.

Common Mistakes

  • Choosing a label that reaches onto curved or embossed glass
  • Using low-resolution artwork
  • Printing too close to the label edge
  • Forgetting room for ingredients, barcodes or warnings
  • Using ordinary paper where condensation is expected
  • Applying labels to wet, dusty or oily glass
  • Skipping a full-size print and placement test

Choosing the Best Label Material for Mason Jars

Comparison of blank label materials for mason jars

Material Best For Primary Benefit
White matte Jam, jelly, honey, pantry labels, favors and crafts Versatile, readable and economical
Gloss white Retail foods, candles, gifts and colorful branding Vibrant colors and polished finish
Clear Honey, layered mixes, candles and modern packaging Printed-on-glass appearance
Kraft Rustic, natural, handmade and farm products Warm artisan appearance
Waterproof polypropylene Salsa, pickles, cold foods, beverages and bath products Resistance to moisture, tearing and handling


Shop mason jar labels

Sheet Labels vs. Roll Labels

Sheet Labels Roll Labels
Compatible with appropriate desktop inkjet and laser printers Designed for compatible roll-fed label printers
Good for small batches and frequent design changes Efficient for longer continuous production runs
Easy to store and hand apply Reduce reloading during higher-volume printing
Common starting option for home businesses Useful for established, repeatable production workflows

Inkjet vs. Laser Printing

Inkjet Labels Laser Labels
Excellent photo and color reproduction Sharp text and barcodes
Good for gradients and detailed graphics Fast, smudge-resistant output
Popular for colorful small-business branding Good for variable data and information-heavy labels

Always select materials manufactured for your printer technology. Inkjet and laser printable coatings are not interchangeable.

Buying Guide: Five Questions to Ask Before Ordering

  1. What size and style is the mason jar?
  2. How much information must fit on the label?
  3. Will the product be refrigerated or exposed to moisture?
  4. Will you print on sheets or with a compatible roll-fed printer?
  5. Which shape, color and finish best match the brand?

Our Recommendation

Choose the smallest label that comfortably holds the required information and remains fully inside the smooth usable surface. This normally produces the cleanest application and most professional appearance.

Frequently Asked Questions About Mason Jar Labels

What is the best label size for a pint mason jar?

A 3-inch circle or 3" × 4" rectangle is a useful starting point for many 16-ounce pint jars. Measure the actual body or lid before ordering.

Can I use the same label on regular-mouth and wide-mouth jars?

The same front label may work because the bodies can provide similar usable areas. Lid labels often differ because wide-mouth lids are larger.

Should I use circle or rectangle labels?

Circle labels create a simple artisan look and are natural for lids. Rectangles provide more room for ingredients, directions, barcodes and regulatory information.

Can I print mason jar labels with an inkjet printer?

Yes. Use blank labels manufactured for inkjet printing to produce strong color and detailed graphics.

Can I print mason jar labels with a laser printer?

Yes. Laser-compatible labels produce sharp text, barcodes and smudge-resistant output.

What material works best for refrigerated foods?

Waterproof or moisture-resistant polypropylene is generally the best choice when labels may face condensation, water or frequent handling.

Are kraft labels waterproof?

No. Traditional kraft paper is intended primarily for dry indoor applications. Use a suitable synthetic material when water resistance is required.

Should I use sheet labels or roll labels?

Use sheets for appropriate desktop printers, smaller batches and flexible design changes. Use rolls with compatible roll-fed printers and repeatable production workflows.

Do clear labels work on glass jars?

Yes. Clear labels create a no-label look, but the text and graphics need enough contrast against the jar contents.

Can I use the same label on the lid and the front?

You can, but many products look better with a round lid label and a separate rectangular front label.

How do I prevent bubbling and wrinkling?

Clean and dry the glass, keep the label on a smooth surface and apply from the center outward. A label that is too large for the usable area is more likely to wrinkle.

Can labels be removed later?

That depends on the adhesive. Permanent adhesive is designed to stay in place, while removable adhesive is better for reusable or returnable jars.

What finish looks most professional?

Matte offers a soft handcrafted appearance, while gloss creates brighter colors and a polished retail finish. Both can look professional when matched to the brand.

Do I need separate front, back and lid labels?

Not always. A single front label may be enough for a simple product. Separate labels help when ingredients, warnings, directions or decorative lid branding are needed.

Where can I buy blank labels for mason jars?

LaserInkjetLabels.com offers blank labels on sheets and rolls in numerous shapes, sizes and printer-compatible materials.

Still Not Sure Which Label You Need?

Answer these questions to narrow your options:

  1. What product are you packaging?
  2. What size and style is the jar?
  3. Where will the primary label be placed?
  4. Will the jar be exposed to refrigeration, moisture, oil or frequent handling?
  5. Which printer will you use?

Related Guides

Free Downloadable Mason Jar Label Size Guide


Download the free mason jar label size guide PDF


Download Free Size Guide PDF

Find Blank Mason Jar Labels for Your Project

Choose from blank circle, rectangle, square, oval, clear, kraft, gloss, matte and waterproof options on sheets and rolls.

Browse Blank Sheet Labels
Browse Blank Roll Labels

Why Trust Our Recommendations?

The recommendations in this guide are based on practical experience helping customers select blank printable labels for packaging applications. Because jars vary, we recommend measuring the actual container, testing nearby label sizes and matching the material to the environment and printing process.