How to Print Mailing Labels: 8-Step Guide

How to print mailing labels for envelopes, padded mailers and shipping packages


Learning how to print mailing labels involves more than typing an address into a rectangle. The label must be large enough for the information, match the template and printer, remain flat on the mailpiece and preserve the readability of any postal or carrier barcode. A compact return-address label, a recipient-address label and a complete carrier shipping label serve different purposes and should not be treated as interchangeable.

This guide explains the complete workflow for creating and printing mailing labels at home or in a business: choosing a size, measuring the envelope or package, formatting an address, preparing a mailing list, testing a template, selecting a material and applying the finished label. It covers individual letters, mail-merge projects, padded mailers, ecommerce packages and packing-slip workflows.

If you only need dimension recommendations, use the dedicated Mailing Label Size Guide. This article focuses on the full create-print-apply process.

The most important rule: match the document settings to the exact label product and print at 100% or actual size. Even a small scaling or margin change can move an entire sheet out of alignment.


Quick Start: How to Print Mailing Labels

  1. Identify the label job. Decide whether you need a return address, recipient address, branded mailer label or carrier-generated shipping label.
  2. Choose a size. Use 0.5" × 1.75" for many compact return addresses, 1" × 2.625" for standard address labels and 4" × 6" for many complete carrier labels.
  3. Measure the mailpiece. Keep the label on one flat surface and away from folds, flaps, closures, seams and box edges.
  4. Download the exact template. Match the product number, sheet layout, margins, gaps and label dimensions.
  5. Format or merge the addresses. Use complete, readable address data with a simple typeface and strong contrast.
  6. Print a plain-paper test. Print at actual size, place the test behind a label sheet and hold both to a light to check alignment.
  7. Print one label sheet. Load the correct side and orientation, use a compatible material setting and inspect the first sheet before continuing.
  8. Apply and verify. Place the label smoothly on a clean, flat area and confirm every address and barcode remains unobstructed.
Mailing Task Practical Starting Size Typical Format
Compact return address 0.5" × 1.75" Sheet label
Standard recipient address 1" × 2.625" 30-up sheet layout
Large address or branded mailer label 4" × 1.33" or 4" × 2" Sheet or compatible roll
Large mailer or address-only package label 4" × 3.33" Sheet or compatible roll
Complete carrier shipping label 4" × 6" Two per letter-size sheet or compatible roll

These dimensions are starting points. Use the format produced by the mailing or shipping system and confirm the usable surface on the actual envelope, mailer or package.


At-a-Glance Mailing Label Recommendations

Most common recipient-address size 1" × 2.625"
Common complete shipping-label size 4" × 6"
Best economical material for dry mail White uncoated paper
Best starting point for added moisture and abrasion resistance Printer-compatible white poly
Best format for desktop inkjet or laser printers Blank sheet labels
Best format for packing slip plus peel-off label Integrated label form
Most important print setting 100% or actual size; do not use Fit to Page
Best first quality check Plain-paper alignment test followed by one label sheet

Mailing Labels, Address Labels and Shipping Labels Are Different

The term mailing label is broad. Before opening a template, determine which type of label the job requires.

Label Type What It Contains How It Is Created
Return-address label Sender name and return address Typed once and repeated across a sheet
Recipient-address label One delivery address per piece Typed individually or produced with a mail merge
Branded mailing label Address plus a logo, department, reference or limited message Designed in the matching blank-label template
Carrier shipping label Addresses, service, routing data, tracking number and barcodes Generated by USPS, a parcel carrier or shipping platform
Integrated shipping label Peel-off carrier label attached to a packing slip or invoice sheet Printed from compatible order-fulfillment software

Do not rebuild, crop or decorate a carrier-generated label as though it were an ordinary address label. Select the correct label format in the shipping system and preserve its layout, barcode proportions and clear areas.


Choose the Right Mailing Label Size

The label needs enough room for every address line at a readable size, but it must remain entirely on one flat portion of the mailpiece. A larger label is useful when an address includes a company, attention line, suite, department or international information. It is not useful if the extra size makes the label cross an envelope edge or box seam.

  • 0.5" × 1.75" – compact return addresses on letter envelopes
  • 1" × 2.625" – standard recipient addresses and larger return addresses
  • 4" × 1.33" – extended addresses and narrow branded mailer labels
  • 4" × 2" – large addresses for padded mailers and address-only packages
  • 4" × 3.33" – larger mailers, boxes and information-rich labels
  • 4" × 6" – complete carrier shipping labels and large logistics labels

For a detailed comparison by mailpiece, including envelopes, padded mailers and packages, see What Size Mailing Label Do I Need?

Return-address, standard address, large mailer and 4 x 6 shipping label size comparison


How to Measure an Envelope, Mailer or Package

Use the actual mailpiece, not only the supplier dimensions. Seams, closures, padding and corrugation can reduce the flat usable area.

  1. Choose the address side. Reserve room for postage and any carrier markings before choosing the label location.
  2. Find one flat surface. Exclude envelope flaps, padded seams, tear strips, box folds, tape and strongly textured areas.
  3. Measure usable width and height. Measure inside the boundaries rather than to the physical edges of the mailpiece.
  4. Allow clearance. Keep every label corner on the same surface so it can make full adhesive contact.
  5. Check content at actual size. Confirm the complete address and any barcode fit without shrinking the type or code.
  6. Make a paper mockup. Cut a rectangle to the proposed dimensions, place it on the mailpiece and inspect it from every side.

How to measure the flat usable area of an envelope, padded mailer and box for a mailing label


How to Format a Mailing Address

USPS recommends placing the address and postage on the same side of a mailpiece. On a letter, the address should run parallel to the longest side. USPS also recommends simple type, strong contrast and left-justified lines. Current postal standards should take priority over decorative preferences.

A typical domestic address block follows this order:

RECIPIENT OR COMPANY NAME
STREET ADDRESS AND APARTMENT OR SUITE
CITY STATE ZIP CODE

  • Use complete street, directional, apartment, suite and unit information.
  • Keep the delivery address visually separate from the return address, logo and promotional copy.
  • Use a simple, readable font and dark print on a white or light background.
  • Avoid placing patterns, photographs or fine rules behind the address.
  • Proofread names, numbers, unit designations, city, state and ZIP Code before merging.
  • Use the current address format required for military, territory and international destinations.

For more detail, review the USPS mailing guidelines and the current USPS addressing standards linked near the end of this article.

Mailing address layout showing recipient, street, city, state and ZIP Code lines


Prepare an Address List for Mail Merge

A mail merge takes one label layout and fills it with different records from a spreadsheet, contact list or database. Clean source data prevents most merge errors.

  1. Use one row per recipient. Keep each person, household or business on a separate row.
  2. Use consistent columns. Separate name, company, address line 1, address line 2, city, state and ZIP Code.
  3. Preserve leading zeros. Store ZIP Codes as text when needed so a zero at the beginning is not removed.
  4. Remove unintended blanks and duplicates. Check for empty names, repeated records and incomplete unit numbers.
  5. Preview several records. Inspect short and long addresses, company names and records with a second address line.
  6. Check every label position. Confirm the merge advances to the next record instead of repeating the same address across the page.

Do not reduce all type to accommodate one unusually long record. Correct the data, abbreviate only according to applicable postal standards or move the project to a larger label if several records do not fit.


Choose the Exact Mailing Label Template

A template is defined by more than the nominal label size. Two products may both be described as 4" × 2" but use different margins, gaps, corner radii or labels-per-sheet. Use the template supplied for the exact product number whenever possible.

Before adding addresses, verify:

  • Page size, normally 8.5" × 11" for standard sheet labels
  • Label width and height
  • Number of columns and rows
  • Top and side margins
  • Horizontal and vertical gaps or pitch
  • Portrait or landscape orientation
  • Whether the application adds printer margins or page scaling

Download a matching file from the Label Templates library. Keep the original template as a clean master and save the filled mailing project as a separate file.


How to Print Mailing Labels on Sheets

  1. Design inside the template. Keep text and graphics inside each label boundary and leave comfortable internal margins.
  2. Preview the entire document. Look for blank pages, shifted columns, clipped lines and records that overflow.
  3. Print on plain paper. Choose 100% or actual size. Turn off Fit, Shrink, Scale to Fit and borderless expansion.
  4. Check alignment. Place the plain-paper test behind an unused label sheet and hold both to a light.
  5. Confirm the printable side. Mark a plain sheet, run it through the printer and observe which side and edge print first.
  6. Select a suitable media setting. Follow the printer and label-material instructions for label, heavy paper or comparable stock.
  7. Load a small stack. Keep sheets flat and dry. Fan only when the manufacturer recommends it, and do not force curled or damaged sheets through the printer.
  8. Print one label sheet. Verify alignment, toner or ink adhesion, dryness and legibility before printing the full quantity.
  9. Allow printed sheets to settle. Avoid stacking wet ink surfaces or handling labels before the print is ready.

Use label stock made for the exact printer technology. Inkjet coatings accept liquid ink; laser-compatible materials are built for toner and the heat of a laser printing process. Do not assume one material is safe in both printers unless the product specification says so.


How to Print a 4" × 6" Shipping Label

For a carrier-generated shipping label, choose the 4" × 6" or letter-size option offered by the carrier or ecommerce platform. USPS states that online Click-N-Ship labels should print at approximately 4" × 6". FedEx also uses a 4" × 6" non-document-tab format in its bulk-label program.

With a desktop inkjet or laser printer, a common approach is a letter-size sheet containing two 4" × 6" labels. Select the matching half-sheet or two-per-page setting when the shipping platform supports it. If the platform supplies a full letter-size PDF, use the corresponding sheet format and verify that the label is not being shrunk or cropped.

  • Do not edit the carrier barcode.
  • Do not cover any portion with tape, another label or packaging graphics.
  • Do not place the label across a box seam or over an edge.
  • Remove or fully cover obsolete labels and barcodes when reusing a box.
  • After printing, confirm the tracking number is readable and the barcode is clean and sharply printed.

Four by six inch shipping label printed on a half-sheet label and applied to a package


Choose a Mailing Label Material

Material choice depends on the printer, appearance, mailpiece surface and expected exposure. Most clean, dry indoor correspondence does not require a film label. Packages that may encounter moisture, abrasion or repeated handling deserve a more durable test.

Material Appearance Useful Starting Point
White uncoated paper Bright, simple and economical Letters, invoices, office mail and standard dry packages
Premium white matte paper Smooth, low-glare and refined Branded correspondence and presentation mailers
Semi-gloss paper Brighter color with moderate sheen Promotional mailers and labels with color graphics
White high gloss paper Polished and vivid Branded mail in controlled dry conditions
Brown kraft paper Natural and rustic Decorative branding areas on clean, dry kraft mailers
Printer-compatible white poly Durable white film Packages exposed to moisture, rubbing or heavy handling
Clear material Minimal no-label appearance Decorative address labels where contrast remains strong

Clear does not automatically mean waterproof. Durability depends on the complete construction: facestock, coating, adhesive, printed ink or toner and the actual exposure. Test the printed label on the production envelope or package.

Paper, matte, gloss, kraft, clear and durable white poly mailing label materials


Sheet Labels, Roll Labels or Integrated Labels?

Format Best For Confirm Before Ordering
Blank sheet labels Desktop inkjet and laser printers, address lists, office mail and moderate ecommerce volume Exact template, printer compatibility, sheet orientation and labels per page
Blank inkjet roll labels Compatible dedicated roll-fed inkjet printers and repeated color-label production Width, length, core, outside diameter, gap, sensing and unwind requirements
Integrated label forms Printing a packing slip or invoice and a peel-off shipping label in one pass Label location on the form, software layout, printer type and document workflow

Sheet labels are the most flexible starting point for ordinary address and shipping jobs because they work with common desktop printers. Integrated labels can remove a separate matching step in order fulfillment: the packing document and shipping label are printed together, then the label is peeled from the same sheet and placed on the package.

This guide covers sheet labels, integrated forms and rolls for compatible inkjet label printers. Select media made for the printer you actually use. For packing-slip workflows, see Integrated Labels.

Sheet labels, inkjet roll labels and integrated packing slip label forms for mailing workflows


How to Apply Mailing and Shipping Labels

  1. Prepare the surface. Remove dust, oil, moisture and loose fibers. Flatten flexible mailers before applying the label.
  2. Choose the final position. Keep the label on the address side, away from postage, seams, closures, tape and old barcodes.
  3. Align one edge first. Use a box edge or envelope line as a visual guide without placing the label directly on that edge.
  4. Apply gradually. Lower the label from one side while smoothing toward the other to reduce trapped air and wrinkles.
  5. Press the full surface. Pay particular attention to corners and edges.
  6. Inspect the finished mailpiece. Confirm the label is flat, the address is readable and every barcode is uncovered.

On corrugated boxes, press across the flutes so the adhesive contacts both raised and recessed areas. On padded mailers, choose the least lumpy region and apply the label while the mailer is supported on a flat table.


Troubleshooting Mailing Label Printing

Problem Likely Cause What to Check
Every row drifts farther out of alignment Wrong template pitch, page scaling or page size Exact product template, 100% scale and letter-size document
The whole sheet is shifted equally Printer feed offset or incorrect top/side margin Plain-paper test and small template-margin adjustment
Only the right column clips Wrong sheet layout, excessive content width or printer margin Columns, gap, side margins and internal text padding
Ink smears Wrong material, heavy ink coverage or insufficient drying Inkjet compatibility, media setting and drying time
Toner rubs or flakes Incompatible stock or unsuitable laser setting Laser compatibility and manufacturer-recommended media setting
Labels peel in transit Dust, moisture, texture, an edge placement or unsuitable adhesive Surface preparation, flat placement and a real-use adhesive test
Carrier barcode scans poorly Scaling, low contrast, streaks, wrinkles or obstruction Actual-size print, print quality, flat placement and no covering tape

Make one change at a time and repeat the plain-paper test. Large adjustments can conceal the original cause and create a new alignment problem elsewhere on the sheet.


Common Mailing Label Mistakes

  • Choosing a label before checking the amount of address or carrier information.
  • Using a template with the right nominal size but the wrong margins or gaps.
  • Printing with Fit to Page, Shrink or borderless expansion enabled.
  • Skipping the plain-paper alignment test.
  • Loading the label sheet on the wrong side or with the wrong leading edge.
  • Using inkjet-only stock in a laser printer or laser-only stock in an inkjet printer.
  • Applying a label across a seam, closure, envelope edge or strongly curved surface.
  • Placing decorative graphics behind the delivery address.
  • Shrinking, cropping or redesigning a carrier-generated shipping label.
  • Covering a tracking barcode with tape or another label.
  • Leaving old shipping labels or barcodes visible on a reused box.
  • Assuming clear labels or ordinary paper labels are waterproof.
  • Printing the entire mailing before checking the first label sheet.

Mailing Label Printing Checklist

  • The label type matches the job: return address, recipient address, branded mailer or carrier shipping.
  • The selected size fits on one flat area of the actual envelope, mailer or package.
  • The template matches the exact product number and sheet configuration.
  • The address list is complete, deduplicated and correctly formatted.
  • ZIP Codes with leading zeros remain intact.
  • The document is set to the correct page size and orientation.
  • Printing is set to 100% or actual size.
  • A plain-paper alignment test fits every label position.
  • The material is compatible with the exact inkjet or laser printer.
  • The first printed label sheet is aligned, dry and readable.
  • The finished label lies flat and does not cover postage, tape, seams or barcodes.
  • Carrier labels preserve the original layout and scan cleanly.

Related Mailing, Shipping and Return-Label Guides


Shop Blank Mailing Labels

Choose blank labels in the dimensions, material and printer format that fit your address list or fulfillment workflow. Test the template on plain paper and verify the label on the actual mailpiece before printing a large batch.

Shop Address Labels Shop 4" × 6" Shipping Labels Shop Integrated Labels


Frequently Asked Questions About Printing Mailing Labels

How do I print mailing labels at home?

Choose a sheet-label product compatible with your inkjet or laser printer, download its exact template, enter or merge the addresses, print a plain-paper alignment test and then print one label sheet at 100% or actual size before continuing.

What is the standard mailing-address label size?

A common recipient-address label is 1" × 2.625". It provides room for a typical address and is often supplied in a 30-label letter-size sheet layout.

What size should a return-address label be?

A 0.5" × 1.75" label works for many compact return addresses. Use 1" × 2.625" when the address has an extra line or includes a small logo.

What size label should I use for a package?

A 4" × 2" or 4" × 3.33" label may work for an address-only package label. Use the carrier or shipping platform’s specified format for a complete shipping label; 4" × 6" is common.

Can I print 4" × 6" shipping labels with an inkjet or laser printer?

Yes. A common letter-size layout contains two 4" × 6" labels. Use material made for the exact printer, choose the matching format in the shipping software and print at actual size.

Why are my mailing labels printing out of alignment?

Common causes include the wrong template, an incorrect page size, Fit to Page scaling, different printer margins or a sheet loaded in the wrong orientation. Print a plain-paper test and compare it with the label sheet before making a small correction.

Should I use Fit to Page when printing labels?

No. Fit, Shrink and Scale to Fit can change the label pitch and move content away from the die-cut areas. Start with 100% or actual-size printing.

How do I test a mailing-label template?

Print the completed template on plain paper at actual size. Place it behind an unused label sheet and hold both to a light. Check the first, middle and last rows as well as both columns before using label stock.

Can I reuse a partially printed label sheet?

Only if the label and printer manufacturers permit it and the sheet remains flat, intact and fully backed. Missing labels can expose adhesive and create feed or printer problems. A fresh sheet is the safer choice when there is any damage or curl.

Can I use clear mailing labels?

Yes, when the surface beneath the label provides enough contrast and the material is compatible with the printer. Avoid clear labels over dark, patterned or glossy backgrounds that reduce address or barcode readability.

Are mailing labels waterproof?

Standard paper mailing labels are not waterproof. For packages likely to encounter moisture or abrasion, test a printer-compatible poly material. Clear appearance alone does not establish waterproof performance.

Where should I place a mailing label on an envelope?

Place the delivery address and postage on the same side. For a letter, USPS recommends orienting the address parallel to the longest side. Keep the address clear of decorative copy and follow current postal placement standards.

Where should I place a shipping label on a box?

Use the largest clean, flat surface available. Keep the label away from edges, seams, closures and tape, and make sure no part of the barcode wraps around a corner.

Should I cover a shipping label with clear tape?

Follow the carrier’s current instructions. Never place tape over a barcode if glare, wrinkles or seams could interfere with scanning, and never obscure any address, tracking or routing information.

What is an integrated mailing label?

An integrated label form combines a paper document, such as a packing slip or invoice, with one or more peel-off labels. It lets the document and its matching shipping label print together in one workflow.

Should a small business use sheet or roll mailing labels?

Sheets are practical for desktop inkjet and laser printers, address merges and moderate shipping volume. Rolls are appropriate for compatible dedicated roll-fed inkjet systems and repeated production. Match the label format to the printer and software already used.


Authoritative Mailing and Shipping Resources

Carrier interfaces, services and mailing standards can change. Confirm the current instructions for the carrier, service and destination before printing a production batch.


View all mailing and shipping label sizes

Download blank mailing label templates

See All Label Templates | See All Label Sizes

Browse all label size guides

How Label Sizes Are Measured: Understanding Width vs. Length on Sheet and Roll Labels

Understanding Label Dimensions: Why We List Label Sizes as Width x Length

One of the most common questions we receive is how label sizes are measured and why our part numbers are listed in a specific format. Whether you’re ordering sheet labels or roll labels, understanding label dimensions can help ensure you select the correct product for your application and printer.

How LaserInkjetLabels.com Defines Label Size

At LaserInkjetLabels.com, we define label dimensions as:

Width x Length

The first number is always the width of the label, and the second number is the length (or depth) of the label.

For example:

  • 2″ x 4″ label = 2 inches wide and 4 inches long
  • 4″ x 2″ label = 4 inches wide and 2 inches long

On Sheet Labels

For sheet labels, the width is measured across the sheet from left to right, while the length is measured down the sheet from top to bottom.

For most sheet label applications, the orientation of the label is not critical because sheet labels are typically applied by hand. A 2″ x 4″ label and a 4″ x 2″ label contain the exact same amount of printable area. The difference is simply how the label is positioned on the sheet.

If you’re printing labels on an inkjet or laser printer and applying them manually, the orientation usually doesn’t matter. You can simply rotate your artwork during design or printing to match the label layout.

Why Label Width Matters More on Roll Labels

Roll labels are different.

When ordering roll labels, the width of the label becomes extremely important because it affects both printing compatibility and how the labels feed through the printer.

Unlike sheet labels, roll labels move through the printer in a specific direction. The width of the label remains fixed across the roll while the length runs in the direction the roll feeds through the printer.

Example

A 2″ x 4″ roll label means:

  • Label width = 2 inches
  • Label length = 4 inches

As the roll advances through the printer, the 4-inch dimension travels through the machine while the 2-inch dimension remains across the width of the roll.

This is why a 2″ x 4″ roll label is very different from a 4″ x 2″ roll label. Even though both labels have the same total area, they may not work the same way in your printer.

Printer Width Limitations

Most roll label printers have minimum and maximum print widths.

For example:

  • Some desktop printers may only print up to 4 inches wide.
  • Others may support widths up to 8 inches.
  • Some compact printers may require labels to be at least 1 inch wide.

Before ordering roll labels, it is important to verify your printer’s allowable print width range.

If your printer can only handle labels up to 4 inches wide, a 5-inch-wide label simply will not fit, regardless of the label length.

Common Roll Label Printing Examples

2″ x 4″ Roll Label

  • Width across roll: 2 inches
  • Length into roll: 4 inches
  • Common for shipping labels, product labels, and inventory labels

4″ x 2″ Roll Label

  • Width across roll: 4 inches
  • Length into roll: 2 inches
  • Often used when a wider format is needed for logos, branding, or compliance information

Even though both labels contain 8 square inches of printable space, they feed differently and may require different printer settings.

Why We Use Width x Length in Our Part Numbers

Our part numbering system follows the same standard used throughout the label industry:

Width x Length

This allows customers to quickly determine:

  • Whether the label will fit their printer
  • How the label will feed through a roll printer
  • How much printable area is available
  • Whether the orientation matches their application

Using a consistent width x length format helps eliminate confusion and ensures you order the correct label size the first time.

Need Help Choosing the Right Label Size?

If you’re unsure whether a particular label size will work in your printer, we’re happy to help. Contact our team with your printer model and desired label dimensions, and we’ll help you determine the best size and material for your application.

At LaserInkjetLabels.com, we offer hundreds of blank sheet labels and roll labels in a wide variety of materials, adhesives, and sizes to fit virtually any printer or labeling project. View our list of sizes on our sizes/templates page.

How to Use PNG Label Templates with Canva

Creating professional-looking labels does not require advanced design software. With Canva and PNG label templates from LaserInkjetLabels.com, you can quickly design labels for products, shipping, packaging, branding, and more without needing graphic design experience.

PNG templates are especially useful because they give you a visual guide showing exactly where each label is located on the sheet. You can add text, logos, colors, images, QR codes, and other design elements directly on top of the template before printing.

What Is a PNG Label Template?

A PNG label template is an image file that shows the exact layout of the labels on a sheet. Each label position is outlined so you can align your design elements correctly.

Unlike Word or PDF templates, PNG files work especially well in Canva because you can simply upload the image and use it as a design guide. This makes it easy to create custom labels while ensuring everything lines up properly when printed. You can download templates for any of our sizes here: Templates Page

PNG templates are useful for:

  • Product labels
  • Shipping labels
  • Candle labels
  • Cosmetic labels
  • Food packaging labels
  • QR code labels
  • Barcode labels
  • Thank you stickers
  • Return address labels
  • Promotional labels

Step 1: Download the Correct PNG Template

Start by downloading the PNG template that matches the exact label size you are using. Even small differences in label size can affect print alignment, so it is important to use the correct template for your specific sheet.

For example, if you are printing on a 2″ x 4″ label sheet, make sure you download the 2″ x 4″ PNG template rather than a similar size.

Step 2: Open Canva and Create a New Design

Go to Canva and create a new custom design.

For most full-sheet label templates, you will want to use a custom size of:

  • 8.5 inches wide
  • 11 inches tall

This matches the size of a standard sheet of labels.

If Canva asks for dimensions in pixels instead of inches, you can switch the units to inches before creating the design.

Step 3: Upload the PNG Template

Once your blank Canva design is open, upload the PNG template file to Canva.

After uploading the template:

  1. Drag the PNG file onto the blank canvas
  2. Resize it so it fills the entire 8.5″ x 11″ page
  3. Make sure it is aligned exactly to the edges of the page
  4. Lock the PNG template in place so it does not move while you design

Locking the template is helpful because it prevents accidental shifting while adding text and graphics.

Step 4: Add Your Design Elements

Now you can start designing your labels directly on top of the template.

You can add:

  • Logos
  • Product names
  • Ingredients
  • Scents or flavors
  • Pricing
  • Barcodes
  • QR codes
  • Website URLs
  • Social media icons
  • Decorative graphics
  • Background colors or shapes

When designing, keep important text and graphics slightly inside the edges of each label. This helps avoid cutting off information during printing.

For best results, leave a small “safe zone” around the outer edge of every label.

Step 5: Duplicate Your Design Across the Sheet

Once you create the first label, you can copy and paste the design onto the other label positions shown on the PNG template.

Canva makes it easy to duplicate elements and align them consistently across the sheet.

If every label on the page is identical, this process is very fast. If you need variable information, such as different product names or scents, you can customize each label individually.

Step 6: Hide or Remove the Template Before Printing

Before downloading your finished design, you should hide or remove the PNG template layer.

The template is only meant to help with placement and should not appear in the final printed version.

Once the template is hidden:

  1. Download the design as a PDF Print file for best print quality
  2. Open the file and print at 100% scale
  3. Make sure “Fit to Page” is turned off in your printer settings

Printing at actual size is important so the labels line up correctly on the sheet.

Final Tips for Better Label Alignment

To get the best results when printing labels from Canva:

  • Always use the correct label template size
  • Print a test page on plain paper first
  • Hold the test sheet over your label sheet to verify alignment
  • Keep important text away from the label edges
  • Print at 100% scale with no page resizing
  • Use high-resolution logos and images for sharper printing

Using PNG label templates with Canva is one of the easiest ways to create custom labels for business, product packaging, shipping, and organization. With the right template and a few minutes of setup, you can create professional-looking labels that print accurately and consistently.

Foil Stamping on Clear Laser Labels

How to Foil Stamp Using Clear Laser Labels (8.5″ x 11″)

Foil stamping is a simple yet powerful way to enhance the appearance of your printed materials, giving them a premium, eye-catching finish. At LaserInkjetLabels.com, our 8.5″ x 11″ clear laser labels are a popular choice for DIY foil stamping projects—especially among small business owners, crafters, and designers who want to elevate packaging, invitations, or promotional products.

In this guide, we’ll walk you through how to foil stamp using our clear laser labels, including the types of printers that work best, proper printer settings, and key tips to get the best results.


What Is Foil Stamping?

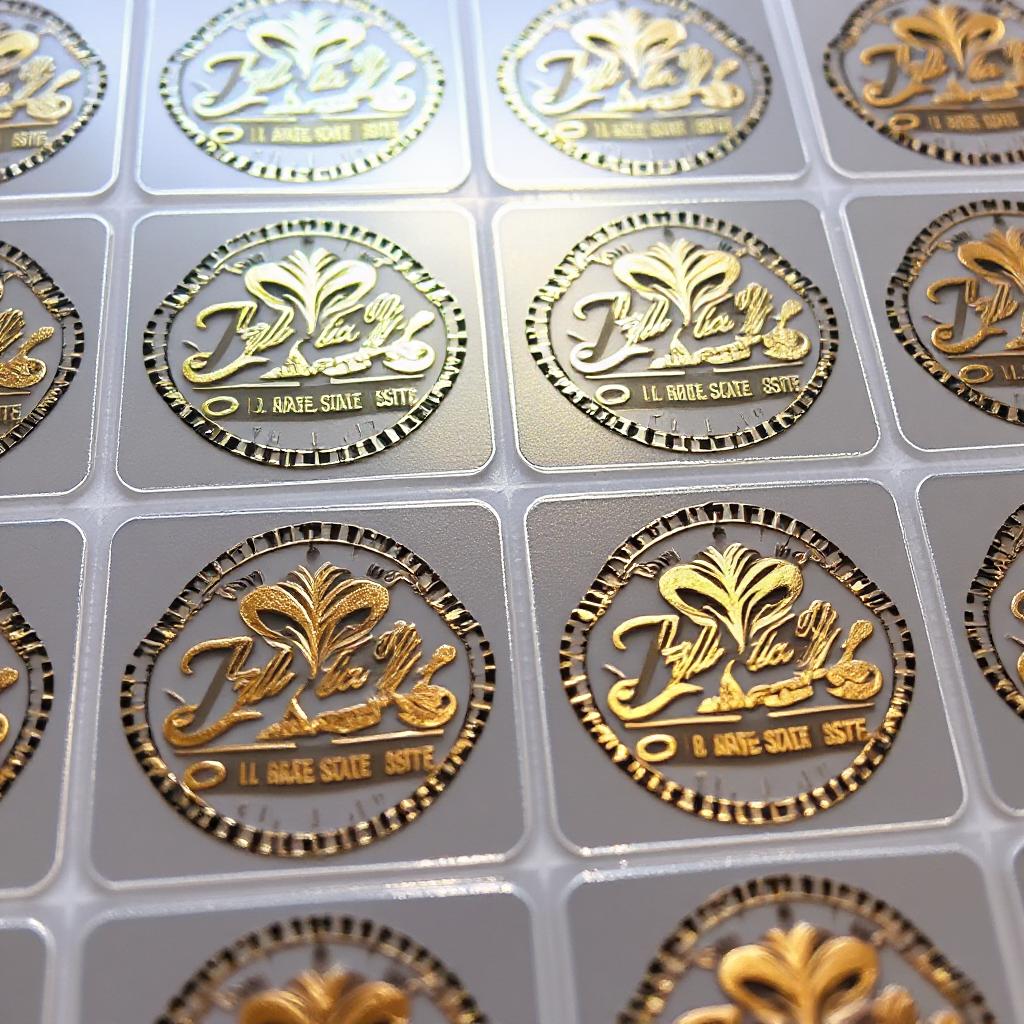
Foil stamping is a process where metallic foil (usually in gold, silver, or holographic finishes) is adhered to printed toner using heat and pressure. When used with clear labels, the effect is especially stunning: the foil appears to float seamlessly on the surface it’s applied to, whether it’s glass, plastic, or product packaging.


Materials You’ll Need

To get started with foil stamping on our 8.5” x 11” clear laser labels, you’ll need the following:

  • Clear Gloss Laser Labels (available by the sheet at LaserInkjetLabels.com)
  • A monochrome laser printer (see recommended types below)
  • Foil transfer sheets (available from craft suppliers in various finishes)
  • A laminator or foil applicator machine (capable of reaching high temperatures)

Best Printers for Foil Stamping

For successful foil transfer, it’s essential to use a laser printer that deposits a thick, even layer of toner, as foil adheres only to the toner (not to ink or unprinted areas).

Recommended printer types:

  • Monochrome Laser Printers – These are ideal for foil stamping because they apply dense black toner without color mixing. Models by HP, Brother, and Canon are commonly used.
  • Color Laser Printers (with caution) – Some color laser printers work well, but results can vary due to differences in toner formulation. If you already own a color laser printer, we recommend testing with our free sample sheets.

Avoid using:

  • Inkjet printers (toner is required)
  • Low-heat or eco-mode laser printers (insufficient toner melting may occur)

Printer Settings for Best Results

Proper printer setup is crucial to successful foil stamping. Follow these steps:

  1. Use the correct media setting
    Set your printer to “Labels,” “Heavy Paper,” or “Transparency” mode. This increases the fuser temperature and slows down the feed, ensuring better toner adhesion to the clear polyester surface.
  2. Set to monochrome (black only)
    Foil transfer only works on black toner. If you’re using a color laser printer, make sure your design is set to print in 100% black.
  3. Print at the highest quality setting
    Choose “Best” or “High Resolution” in your printer preferences to maximize toner density.
  4. Let the toner cool
    After printing, allow the sheet to cool for 1–2 minutes to prevent smudging during foil application.

How to Apply the Foil

Once your label sheet is printed, it’s time to apply the foil:

  1. Place the foil
    Cut a piece of foil slightly larger than the printed area. Lay it shiny side up over the toner design.
  2. Sandwich the label sheet
    Use a protective carrier folder (such as parchment paper or a Teflon sheet) to prevent foil residue from damaging your laminator.
  3. Run through a laminator
    Set your laminator to high heat (around 300°F / 150°C) and slow speed. Run the label sheet with foil through the laminator once or twice to ensure good adhesion.
  4. Peel the foil
    Allow the sheet to cool, then gently peel away the foil. You should see the metallic foil precisely covering the toner areas on your clear label.

Tips for Best Results

  • Always test first: Printer toner and foil results can vary. We strongly recommend ordering a free sample of our clear labels to test your setup.
  • Avoid overly fine lines: Thin fonts or intricate designs may not transfer foil cleanly.
  • Try different foils: Not all foils are equal—some work better with certain toners or laminator heat settings.
  • Laminate for durability: If you’re using the foil-stamped labels outdoors, consider applying a clear laminate for extra protection.

Bring Your Designs to Life

Whether you’re creating luxury product labels, wedding invitations, or custom stickers, foil stamping on our clear laser labels adds a professional, polished look with minimal equipment. With a little practice, you can create standout labels at a fraction of the cost of outsourced foil stamping.

Ready to get started? Browse our clear gloss laser labels and request your free sample sheet today!


How to determine which software program to use to make your labels.

When it comes to label making, choosing the right software can make all the difference. With so many options available, it can be overwhelming to determine which program is best suited for your needs. Here are some key factors to consider when selecting label making software:

  1. Compatibility: Make sure the software is compatible with your operating system and printer.
  2. Features: Look for software that offers the features you need, such as barcode generation, graphic design tools, and database integration.
  3. Ease of use: Choose software that is user-friendly and easy to navigate, especially if you are new to label making.
  4. Support: Consider software that offers technical support and tutorials to help you troubleshoot any issues that may arise.

By taking these factors into account, you can choose the right software program to create professional-looking labels that meet your specific needs.

A Complete Guide on How Barcode Work

How Barcode Work
Photo credit: shutterstock

Barcodes are one of the most widely used ways of identifying stored objects worldwide. Everywhere we go, from clothing purchases to supermarket shopping and even gadgets, we see barcodes. They have emerged as game changers for firms dealing with significant amounts of money by almost removing the margin for error. 

Billions of dollars have probably been saved due to adopting these barcodes, and if you are wondering how barcodes work or what they can do for you, you have come to the correct spot. We will explore barcodes and everything associated with them in-depth in this post.

History Of Barcodes

Bernard Silver invented the barcode. As a graduate student, he overheard a local food chain’s president request research workers at Drexel Institute of Technology to develop automated ways for interpreting product information. As they began their investigation, he discussed this plea with his friend, Normal Woodland.

They created the prototype, inspired by Morse Code, for which they filed a patent in 1949, which was eventually approved in 1952. However, it did not attain commercial success until the 1970s, when supermarkets gradually adopted them. Their idea did not immediately result in cost savings, which deterred firms from the start.

Though further research established that it was highly profitable, it assisted supermarkets in increasing revenue by 10-12 percent and saving 1-2 percent on operational expenditures. In the 1980s, they were accepted by the US Defense Department as they gained popularity.

They have now seized control of everything from grocery shelves to warehouses. Even today, e-commerce behemoths depend on barcodes to maintain their inventories.

How Does Barcode Work?

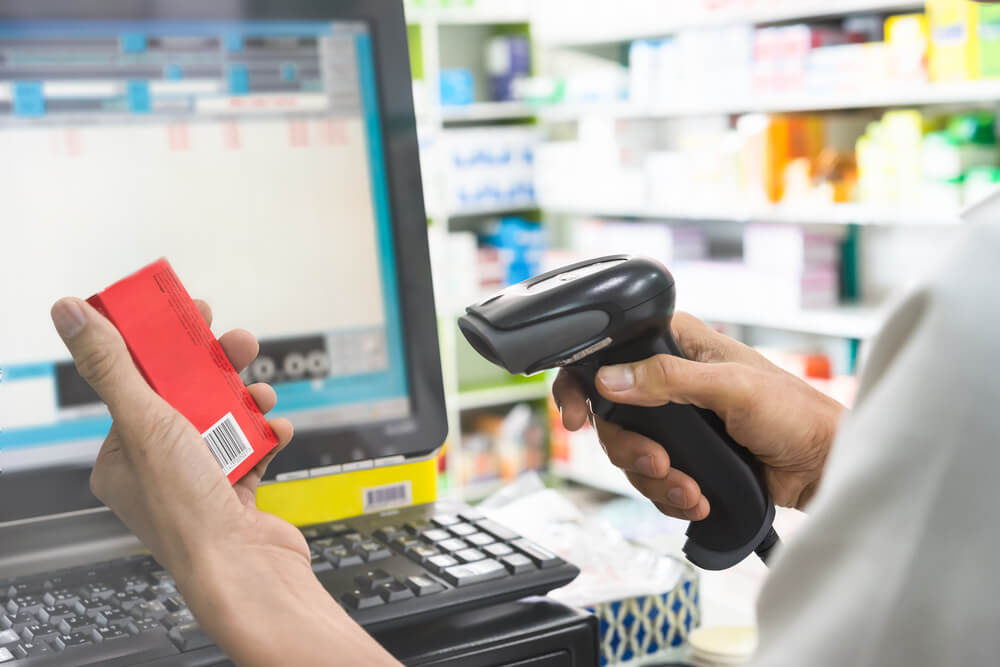
So, you might be thinking about how barcodes work? Barcodes function by combining a symbology (the barcode) and a scanner that can read the symbols and transform them into meaningful information, typically the item’s origin, price, kind, and location. The scanner decodes the barcode and automatically inputs the data into a system, most often a database. This tool provides a plethora of advantages for organizations, which is how barcodes work.

Product Verification

Barcodes laid the groundwork for today’s worldwide networked distribution networks. It enables large firms to verify that their items are correctly stocked and priced globally. Also, it has evolved into a critical tool for assisting small and medium-sized firms, hospitals, and government entities in tracking assets and increasing efficiency. Businesses use barcodes in a variety of ways, including the following:

Inventory Management

A fundamental inventory tracking system is composed of software and a barcode scanner or mobile computer. Inventory goods will all have barcode labels, which means that when you remove an item from stock, you can scan the barcode in your inventory monitoring software to lower the available count rather than typing in an SKU.

Maintaining Inventories

Any firm, regardless of its size, has IT assets and fixed assets. Each asset is labeled with a barcode that can be scanned to check it in or out using your asset tracking software. It is an excellent technique to increase responsibility and simplify audits.

You may also like: How to Print Address Labels

Return Mails

Include a barcode on the return-mail registration postcard that corresponds to the serial number of the product. Then, you can quickly determine which serial numbers have been registered and which you have not.

Tracking

If your company is organizing an event, include barcodes into RSVP cards to keep track of who has answered without attempting to decipher anyone’s handwriting.

Invoices

To return it with payment, include a barcode that reflects the customer number or the individual invoice number. You can quickly retrieve the client account or invoice number for the customer. This avoids issues such as payments being applied to the wrong customer account or invoice.

Now that you know about how a barcode works, let us learn about how a barcode scanner works.

How Do Barcode Scanners Work
Photo credit: shutterstock

How Do Barcode Scanners Work?

What method is used to read a barcode? A barcode scanner. All barcode scanners use a light source and sensors to detect and quantify the amount of light reflected by the white spaces inside the distinctive parallel bar pattern. A photodiode detects the reflected light and generates an electrical signal that matches the barcode pattern.

The electrical signal is converted via circuits to the original numbers for which the barcode was formed.

The technology converts the numbers to intelligible text that interacts with the user’s database, giving critical information quickly. However, certain kinds of barcode readers are better suited to particular applications. In short, a barcode scanner decrypts barcode information.

Types Of Barcodes

Today, barcodes come in a variety of forms. Each of them is tailored to the unique requirements of companies and their stakeholders. However, as a result of globalization and consumerism, they became more standardized. 

They were required to service a diverse range of businesses, distributors, and retail agents. On the other hand, standardization aided in cost reduction by allowing businesses to process various manufacturers using the same equipment.

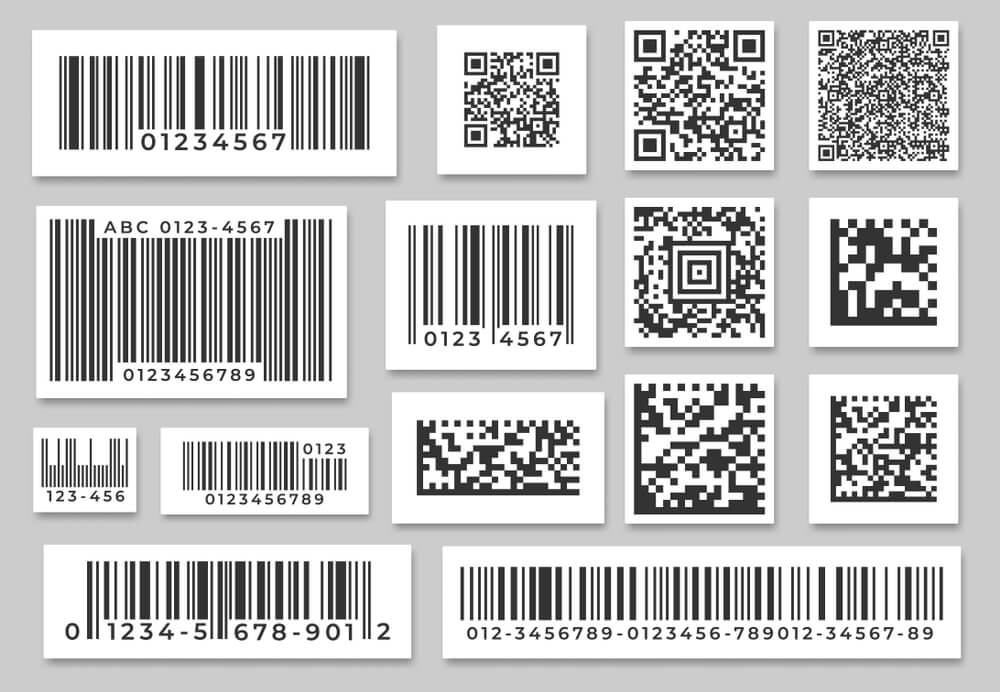
UPC Code, Code 39, EAN Code, ITF, Code 128, Code 93, GS1 Databar, Codabar, MSI Plessey, QR Code, Datamatrix Code, PDF417, Aztec are some of the most frequently used barcodes globally.

What are QR codes?

A QR code (short for Quick Response code) is a matrix barcode, also called a two-dimensional barcode. It is a visual, machine-readable representation of data capable of holding a large amount of data, often for a locator, identifier, or tracker that points to a certain website or application.

These codes are visually represented by black squares placed in a square grid on a white backdrop. The QR code picture has three unique squares at its corners and a smaller square in the fourth corner.

How do QR codes work? QR codes are readily readable by any digital device equipped with a scanning capability, such as a smartphone. When a picture is scanned, the essential data is collected from patterns found in both its horizontal and vertical components. 

What information does a barcode hold? These codes can include URLs, discounts, event details, and other data that people may access immediately or refer to later.

Conclusion

Barcoding is no longer a high-tech tool reserved for high-tech firms; it has evolved into a user-friendly tool that can benefit every business. Scanner prices and associated software requirements have decreased so that practically anybody can justify adopting a barcode system.

Can You Use Laser Labels in an Inkjet Printer? Find Out!

Can You Use Inkjet Labels In A Laser Printer
Photo Credit: George Milton

Curious if you can use laser labels in an inkjet printer? Discover the surprising compatibility of these two printing technologies and make your labeling tasks easier!

Understanding Laser Labels vs. Inkjet Labels

When it comes to labeling your products, packages, or personal items, the type of label you choose can make a significant difference. Laser labels and inkjet labels are the two primary types available in the market, and understanding their distinctions can help you make an informed choice.

Laser labels are specifically designed for use with laser printers. These labels are typically made from materials that can withstand the high heat generated by laser printers during the printing process. Laser printers use a laser beam to produce an image on a drum, which is then transferred onto the paper using toner. The toner, a powder, is fused onto the paper with heat and pressure, resulting in a durable and smudge-resistant print.

Inkjet labels, on the other hand, are formulated for use with inkjet printers. These printers work by spraying microscopic droplets of liquid ink onto the paper to create an image. The inkjet labels are usually coated to absorb the ink quickly, preventing smudging and ensuring sharp, vivid print quality. Inkjet labels are typically not designed to withstand the heat of a laser printer, which can lead to melting or warping.

Understanding the specific needs of your printer and the labels designed for it is crucial to achieving the best print quality and maintaining the longevity of your equipment. Using the wrong type of label can result in poor print quality, printer damage, or both. Therefore, it is essential to match your labels to the appropriate printer technology.

How Inkjet Printers Work

To grasp the compatibility of laser labels with inkjet printers, it is essential to understand how inkjet printers work. Inkjet printers are popular for their versatility, affordability, and ability to produce high-quality prints with vivid colors and sharp details.

Inkjet printers use a printing technology that involves spraying tiny droplets of liquid ink onto the paper. The print head, which contains multiple nozzles, moves back and forth across the paper, depositing ink droplets in a precise pattern to form text and images. These droplets are incredibly small, typically measured in picoliters, allowing for detailed and accurate prints.

The ink used in inkjet printers is usually water-based and can be either dye-based or pigment-based. Dye-based inks are known for their vibrant colors and smooth gradients, making them ideal for photo printing. Pigment-based inks, on the other hand, are more durable and resistant to fading, making them suitable for documents and labels that require longevity.

Inkjet printers come in various types, including single-function printers, all-in-one printers, and photo printers. They are widely used in homes, offices, and businesses due to their ability to handle a wide range of media types, including plain paper, glossy photo paper, and specialized labels. However, the compatibility of these printers with different types of labels, such as laser labels, requires careful consideration due to the differences in printing technology.

The Compatibility of Laser Labels with Inkjet Printers

The question of whether you can use laser labels in an inkjet printer is a common one, and the answer is not as straightforward as a simple yes or no. The compatibility of laser labels with inkjet printers depends on several factors, including the label material, the printer’s capabilities, and the specific printing requirements.

Laser labels are designed to withstand the high heat and pressure of laser printers. These labels are often made from materials like polyester, vinyl, or other heat-resistant substances. While these materials can be durable and produce excellent results in laser printers, they may not be optimized for the liquid ink used in inkjet printers. The coating on laser labels is typically not designed to absorb ink, which can lead to smudging, poor print quality, or slow drying times when used with inkjet printers.

In some cases, manufacturers produce multi-purpose labels that are compatible with both laser and inkjet printers. These labels are specially coated to handle the different printing technologies and provide acceptable results with either type of printer. However, it is essential to check the label packaging or product specifications to ensure they are suitable for use with your inkjet printer.

It is also worth noting that while some inkjet printers may handle laser labels without significant issues, others may struggle with feeding the thicker or more rigid materials through the printer. This can result in paper jams, misfeeds, or damage to the printer components. Therefore, it is crucial to test a small batch of labels before committing to a large print job to ensure compatibility and avoid potential printer damage.

Risks of Using Laser Labels in Inkjet Printers

While the idea of using laser labels in an inkjet printer may seem convenient, it comes with several risks that could affect both your printing quality and the longevity of your printer. Understanding these risks can help you make an informed decision and avoid potential problems.

One of the primary risks of using laser labels in an inkjet printer is poor print quality. Laser labels are not typically coated to absorb ink, which can result in smudging, bleeding, or uneven ink distribution. This can lead to illegible text, blurry images, and an overall unprofessional appearance. Additionally, the ink may take longer to dry on laser labels, increasing the risk of smudging or transferring when handled.

Another significant risk is the potential for printer damage. Inkjet printers are designed to handle specific types of media, and using materials not intended for inkjet printing can cause mechanical issues. Laser labels are often thicker and more rigid than inkjet labels, which can lead to paper jams, misfeeds, or damage to the printer’s feed mechanism. In some cases, the adhesive used on laser labels may not be compatible with inkjet printers, causing labels to peel off inside the printer and create sticky residue that can affect future print jobs.

Using laser labels in an inkjet printer can also void your printer’s warranty. Manufacturers typically specify the types of media that are compatible with their printers, and using non-recommended materials can be considered misuse. If your printer encounters issues due to the use of laser labels, the manufacturer may refuse to honor the warranty, leaving you responsible for repair or replacement costs.

Benefits of Using the Right Labels for Your Printer

Using the appropriate labels for your printer offers several benefits that can enhance your printing experience and ensure the best possible results. By matching the labels to your printer’s technology, you can achieve optimal print quality, maintain the longevity of your printer, and avoid potential issues.

One of the most significant benefits of using the right labels is the superior print quality. Inkjet labels are specifically designed to absorb ink quickly and evenly, resulting in sharp, vibrant prints with crisp text and clear images. This is particularly important for labels that need to convey important information, such as shipping labels, product labels, or barcode labels. By using labels designed for your inkjet printer, you can ensure that your prints are legible and professional-looking.

Another benefit is the reduced risk of printer damage. Inkjet labels are formulated to work seamlessly with the feeding mechanism of inkjet printers, minimizing the chances of paper jams, misfeeds, or other mechanical issues. This helps maintain the smooth operation of your printer and reduces the likelihood of costly repairs or downtime. Additionally, using the correct labels ensures that the adhesive is compatible with your printer, preventing residue buildup that can affect future print jobs.

Using the right labels can also extend the life of your printer. Printers that consistently handle compatible media are less likely to experience wear and tear on their components. This can result in fewer maintenance issues and a longer lifespan for your printer. By investing in the appropriate labels, you can protect your printer investment and enjoy reliable performance for years to come.

Tips for Printing on Laser Labels with Inkjet Printers

If you find yourself in a situation where you need to use laser labels with an inkjet printer, there are several tips you can follow to achieve the best possible results. While this is not the ideal scenario, these strategies can help mitigate some of the risks and improve print quality.

First, consider testing a small batch of labels before committing to a large print job. This allows you to assess how well the ink adheres to the label surface and whether there are any issues with smudging or drying times. Adjust your printer settings to optimize print quality, such as selecting a higher print resolution or adjusting the ink density. This can help improve the appearance of your prints and reduce the likelihood of smudging.

Second, allow ample drying time for the printed labels. Since laser labels are not designed to absorb ink quickly, the ink may take longer to dry compared to inkjet labels. After printing, place the labels in a well-ventilated area and avoid stacking them until the ink is fully dry. This can help prevent smudging and ensure that the labels are ready for use.

Another tip is to handle the labels carefully to avoid smudging or transferring the ink. Use clean, dry hands when handling the labels, and avoid touching the printed areas as much as possible. If you need to apply the labels to products or packages, wait until the ink is completely dry to prevent any transfer of ink.

Finally, consider using a spray fixative to protect the printed labels. A light coating of fixative can help seal the ink and reduce the risk of smudging. Be sure to test the fixative on a small batch of labels first to ensure it does not affect the print quality or adhesive properties of the labels.

Alternatives to Laser Labels for Inkjet Printing

While it is possible to use laser labels in an inkjet printer with some adjustments, there are better alternatives available that are specifically designed for inkjet printing. Exploring these options can help you achieve superior print quality and avoid the risks associated with using incompatible labels.

One of the most straightforward alternatives is to use inkjet labels. These labels are designed to work seamlessly with inkjet printers, providing excellent print quality and quick drying times. Inkjet labels come in various sizes, shapes, and materials, making it easy to find the perfect match for your labeling needs. Whether you need glossy photo labels, matte address labels, or weather-resistant labels, there is an inkjet label option available.

Another alternative is to use multi-purpose labels that are compatible with both laser and inkjet printers. These labels are coated to handle the different printing technologies, providing acceptable results with either type of printer. Multi-purpose labels can be a convenient option if you have both laser and inkjet printers and want to use the same labels for different printing tasks. However, it is important to check the label packaging or product specifications to ensure they are suitable for your specific printer model.

For specialized labeling needs, consider using label materials that are designed for specific applications. For example, if you need durable labels for outdoor use, look for weather-resistant inkjet labels made from materials like polyester or vinyl. These labels are designed to withstand exposure to moisture, UV light, and other environmental factors, ensuring that your labels remain legible and intact.

By exploring these alternatives, you can find the right labels for your inkjet printer and avoid the potential issues associated with using laser labels. Investing in compatible labels can help you achieve the best possible results and maintain the longevity of your printer.

Customer Experiences and Testimonials

Hearing from customers who have experimented with using laser labels in inkjet printers can provide valuable insights and help you make an informed decision. While individual experiences may vary, these testimonials can highlight common challenges and potential solutions.

One customer, Sarah, shared her experience of using laser labels in her inkjet printer for a small batch of address labels. She found that the print quality was initially acceptable, but the ink smudged easily when handled. To mitigate this issue, Sarah allowed the labels to dry for several hours before using them. While this approach worked for her short-term project, she ultimately decided to switch to inkjet labels for future printing tasks to avoid the drying time and potential smudging.

Another customer, Mark, attempted to use laser labels in his inkjet printer for product labeling. He encountered issues with the labels feeding through the printer, resulting in frequent paper jams and misfeeds. After several frustrating attempts, Mark realized that the thicker material of the laser labels was not compatible with his inkjet printer’s feeding mechanism. He switched to inkjet-compatible labels and noticed an immediate improvement in print quality and printer performance.

On the other hand, Lisa, a small business owner, successfully used multi-purpose labels with both her laser and inkjet printers. She appreciated the convenience of using a single type of label for different printing tasks and found that the multi-purpose labels provided satisfactory results with both printer types. Lisa’s experience highlights the potential benefits of using labels specifically designed for compatibility with multiple printing technologies.

These customer experiences underscore the importance of using the right labels for your printer and the potential challenges of using incompatible materials. While some customers found temporary workarounds, the overall consensus is that using inkjet-compatible labels provides the best results and minimizes potential issues.

Frequently Asked Questions about Labels and Printers

To further clarify the topic of using laser labels in inkjet printers, here are some frequently asked questions and their answers:

Can I use laser labels in an inkjet printer?

While it is possible to use laser labels in an inkjet printer, it is not recommended due to potential issues with print quality, drying times, and printer compatibility. Inkjet labels are specifically designed for use with inkjet printers and provide better results.

What happens if I use the wrong type of label in my printer?

Using the wrong type of label can result in poor print quality, smudging, paper jams, and potential printer damage. It is essential to use labels that are compatible with your printer’s technology to achieve the best results and avoid issues.

Are there labels that work with both laser and inkjet printers?

Yes, there are multi-purpose labels that are designed to be compatible with both laser and inkjet printers. These labels are coated to handle different printing technologies and provide acceptable results with either type of printer.

How can I improve print quality when using laser labels in an inkjet printer?

If you need to use laser labels in an inkjet printer, consider testing a small batch first, adjusting printer settings for higher resolution, allowing ample drying time, and handling the labels carefully to avoid smudging. Using a spray fixative can also help protect the printed labels.

What are the benefits of using inkjet labels with an inkjet printer?

Using inkjet labels with an inkjet printer ensures superior print quality, reduces the risk of printer damage, and extends the life of your printer. Inkjet labels are designed to absorb ink quickly and evenly, resulting in sharp, vibrant prints with minimal drying time.

Can using the wrong labels void my printer’s warranty?

Yes, using labels that are not recommended by the printer manufacturer can void your printer’s warranty. Manufacturers specify compatible media types, and using incompatible materials can be considered misuse, leading to warranty denial.

What should I do if my printer jams when using laser labels?

If your printer jams when using laser labels, stop the print job and carefully remove the jammed labels. Switch to inkjet-compatible labels to prevent future jams and ensure smooth printer operation. If the problem persists, consult your printer’s user manual or contact the manufacturer for assistance.

Conclusion: Making the Right Choice for Your Printing Needs

In conclusion, while it is technically possible to use laser labels in an inkjet printer, it is not the ideal solution due to potential issues with print quality, drying times, and printer compatibility. Laser labels are designed for the high heat and pressure of laser printers, whereas inkjet labels are formulated to work seamlessly with the liquid ink used in inkjet printers. By using the correct labels for your printer, you can achieve superior print quality, maintain the longevity of your printer, and avoid potential problems.

When selecting labels for your printing needs, consider the specific requirements of your printer and the type of labels best suited for your tasks. Inkjet labels provide the best results for inkjet printers, offering sharp, vibrant prints with quick drying times. Multi-purpose labels can be a convenient option if you use both laser and inkjet printers, but it is essential to ensure they are compatible with your printer model.

Customer experiences and testimonials highlight the challenges and potential solutions associated with using laser labels in inkjet printers. While some customers found temporary workarounds, the overall consensus is that using inkjet-compatible labels provides the best results.

By making informed choices and investing in the right labels for your printer, you can achieve professional-looking prints, protect your printer investment, and enjoy reliable performance for all your labeling tasks.

As always, if you are not certain what label you need, contact us at LaserInkjetLabels for free samples to test or to speak with a trained professional.

Laser Printer Vs Inkjet Printer: a Comprehensive Guide

Laser Printer Vs Inkjet Printer
Photo Credit: George Milton

Most potential customers researching for a new printer for regular use end up with one final decision: whether to buy a laser printer or an inkjet printer. These are very different devices that operate in their own dynamic ways and we are going to explore laser printers vs inkjet printers. Both specialize in specific aspects of printing and have proven their efficiency in doing so over the years. A proper understanding of their functionalities is necessary if you want perfect results based on your criteria.

Luckily, printers are not rocket science! Even a minimal understanding of printer characteristics is enough to prepare you for exploring the market. Unlike personal computers or mobile phones, only a few specifications in printers are important for users to worry about. 

After designing a label, it is important to print them. This article provides a comprehensive guide on inkjet vs laser printers to help you find the ideal printing solution for your home or business. Let us begin with a brief description of inkjet and laser printers.

The Basics of Inkjet Printers

Founded in the early 1950s, inkjet printers are the traditional way to go. They work similarly to typewriters and are the most used these days. These devices operate by finely spraying minuscule ink droplets onto the paper and producing crisp results efficiently. Inkjet printers are great for printing sharp images and are relatively compact in size, making them slightly more portable. We will discuss more of these advantages later in this article.

The glaring problem with inkjet printers lies at their lower price ranges, as they tend to get overly expensive to operate and maintain down the line. We suggest you purchase at least a moderately-priced inkjet. If you do, you’ll reap the full rewards without worrying about unwanted expenses in the future.

The Basics of Laser Printers

Laser printers were introduced a couple of decades after their inkjet counterparts – in 1969 to be precise. These devices use toner cartridges containing toner powder that is applied to the paper after processing it. Thus the results of printing graphics and images are not as sharp as the inkjet printer. They are more expensive and bulky compared to inkjet printers but are capable of producing mass batches unmatched in the printing industry without compromising on quality or performance. Purchasing a high-end laser printer can set you up for years of effortless printing.

Laser printers did bring solutions to some of the shortcomings of inkjet printers, like the speed of operation and overall page yield. Laser printers introduced key features unique to them as well, but more on that later.

Laser Printer vs Inkjet Printer: The Mechanisms Involved

The major difference between laser and inkjet printers comes down to the core technology in charge of the mechanism. Below is a detailed explanation of their operating mechanisms.

Laser Printing Technology

As mentioned before, laser printers use toner powder stored in toner cartridges to print on paper. Initially, the printer needs digital information containing the blueprint for the document. This is relayed through an ethernet cable mostly, but can also be transferred wirelessly if the printer has that feature. Once the data is captured by the printer, a drum unit is used to control the overall charge of the surface. Laser printers use a hot wire to make the entire drum positively charged. This is necessary as these charges will then be reversed to mark the spots to be printed accordingly.

A laser is coursed through the sea of positive electrical charges to revert their polarising power in particular places on the surface. Anything that needs to be printed, be it a text or a graphical image, requires a negative charge in their dedicated spots, which is ensured by the laser.

Once the laser has completed the conversion, the printer then drives an ink roller all across the drum unit. This enables the toner to attach the powder to the negatively charged portions where the print is supposed to form. The drum unit should now be ready to transfer the toner powder to a piece of paper or label.

The paper provided is positively charged which ensures that the toner ink, being negatively charged, will stick to it rapidly and easily. Heat and pressure are used to thoroughly infuse the toner powder onto the paper before it is ready to come out from the other end of the printer. For this purpose, a laser sheet can be a perfect choice.

The clever use of charges, a laser, and toner ink greatly speeds up the printing process but is also responsible for the apparent lack in image quality compared to inkjet printers of similar features and price range. Getting a laser printer should be planned based on specific user requirements.

Inkjet Printing Technology

We already took a small glance at the mechanism involved with inkjet printing but now we will explain in detail. Inkjet printers are traditional printers that operate in a way similar to typewriters but in a more advanced form.

Numerous holes are present in the inkjet printer’s print head. Minute ink droplets are sprayed through these tiny chambers onto the paper with perfect placement and eventually form the desired images or texts. The ink used in inkjet printers can be of various forms: latex, oil-based, water-based, solvent-based, and so on. The user must make sure the ink is suitable for the printer as using any random dye might bring undesirable results or damage the printer permanently. The appropriate ink will always be specified in the manual.

The page is carried through the interior of the inkjet while a print head rapidly moves square to it. While moving, the print head actuates its holes to let spurts of ink through them when required. As the paper progresses, the image or text visibly begins to form on it. All the printer does is shoot ink in precise spots to create a physical version of the digital input you provided. A printout produced by inkjet printers is basically the systematic formation of millions, if not billions, of microscopic ink dots that represent a meaningful and sharp text or image. 

Fortunately, the initiation of the entire process is similar to that of laser printers. You need a computer or mobile device to transfer your message to the printer through a cable or wirelessly. The quality of output from inkjet printers is extremely high due to the mechanism of using tiny dots of ink. Imagine using a thousand dots to print a single English letter like “W” or “B”! You would be amazed to see how sharp they look compared to printing them using laser printers. For this purpose, an inkjet sheet can be a perfect choice.

Laser Printer vs Inkjet Printer: The Differentiating Features

Certain types of printers are ideal in different situations. Some people might look for printers that don’t use ink to avoid the hassle of refilling every now and then. Others may simply be looking for the most economical color printer available in the market. A select few may find the advantage of a laser printer perfect for their tasks. It is essential to understand the fundamental differences between an inkjet printer vs laser printer before opting to purchase one. Below is a comprehensive list of differentiating features between them.

Speed and Volume of Operation

There is a clear difference between the speed of operation between laser and inkjet printers. Due to the use of repeated print head movement to print on the paper, inkjet printers are considerably slower than their laser counterparts. Users who need to make tons of printouts every day due to the nature of their work usually prefer laser printers due to their swift operations. Large organizations and businesses generally tend to use laser printers solely because of the sheer volume of output they can produce without overworking the machines. Whereas, choosing between a laser or inkjet printer for a small business doesn’t make much of a difference since both can do small jobs with ease.

A typical laser printer can print anywhere between 15 to 100 pages every minute while inkjet printers tend to deliver 15 to 16 pages on average. The difference is clear. Make sure you are aware of your needs and priorities before deciding on a printer.

Quality of Printouts

Printout quality is also an apparent difference between laser and inkjet printers. Inkjet printers are the market leaders when it comes to color printing in high resolution. Laser printers, however, stand-alone in the competition for producing extremely fast monochromatic outputs. Make no mistake: both are really good at their tasks and can create extremely fine details if needed.

To print vibrant colors and pixel-perfect graphics, inkjet printers utilize liquid ink. This means that color ranges across the spectrum can be used and produce an output that looks picture-perfect. These printers are also great for printing monochromatic content that is rich in detail. If the aim is to print mostly black and white, inkjet printers can prove to be an expensive ordeal.

On the other hand, laser printers shine in the field of black and white. The absence of wet ink means there is no bleeding of the colors or any smudges occurring after you handle a fresh printout. Close inspection of printed letters from an inkjet reveals a lack of preciseness compared to a laser printer’s black and white printouts. Organizations needing a bulk amount of textured printouts every working day should clearly opt for a laser printer.

Overall Costs Involved

It is always a good idea to plan ahead before purchasing a printer – or any other device for that matter. While it might not seem feasible to buy a laser printer upon looking at the costs upfront, it certainly makes up for this down the line. Extremely cheap inkjet printers are available for purchase in the market. It may feel like a smart deal, however, these variants eventually bring more plight than benefits. Ink cartridges are quite expensive and run out fast depending on use. The time will arrive when you realize you have already paid more for cartridges than your initial payment for purchasing the printer itself!

The simple fact that toner is a form of powder makes it significantly easier to produce, store, and ship compared to liquid ink. A great amount of engineering and expertise is needed to manufacture ink, making it a fairly expensive product. Additionally, the ink in the cartridge may start to dry out over time if left unused for a long time. In case that does happen, the entire cartridge loses its usefulness and turns into a complete waste of money.

On average, the minimum active lifespan of a laser printer is 2 years more than an inkjet printer. This in itself is a factor indicating a better return on investment (ROI) for a laser printer over its inkjet counterpart. Furthermore, some variants of laser printers come with scanning and faxing features, increasing their cost prices even more. In conclusion, although laser printers tend to have a higher initial cost, the operating costs are lower than inkjet printers because the powder is more resilient than ink.

FAQs:

Below is a list of frequently asked questions on the dilemma: laser printer vs inkjet printer.

I am looking for the most economical color printer available. What printer should I purchase?

While this depends on your usage volume, a general suggestion would be to get a color inkjet printer. This would produce lucid colors and come at cheaper rates relative to a laser printer.

I need printers that don’t use ink in order to avoid smearing fresh printouts. What printer is the best option?

Laser printers do not use ink and still produce crisp results that can be handled right after they are out of the printer.

My primary concern is durability. Which printer should I opt for?

Laser printers have a track record of operating longer than inkjet printers. They have a minimum average lifespan of 5 years while inkjets fall short with only 3 years.

Final Thoughts

The advantages of a laser printer do not necessarily make an inkjet printer obsolete. Both have their pros and cons. An inkjet printer vs laser printer is an age-old argument that might go on until a superior alternative arrives in the future. But for now, know their differences and what your needs and priorities are!

How to Make Labels for Bottles

How to Make Labels for Bottles
Photo Credit: shutterstock

Simply selling something in a bottle will not be enough to ensure success in your niche market. Consumers look at the bottle label first to determine the contents. To all consumers, the label is very important. There are many competitors in your field of business. In order to be unique, the design of your bottle labels must be exceptional. Consumers will definitely be drawn to such labels, and the brand message will be communicated as well. So, how to make labels for bottles? Let’s Find out!

Insight

Bottle labeling should not be done just for the purpose of labeling the bottles. Several businesses require that it should follow a certain set of rules and regulations established by the government. For example, the Alcohol and Tax Bureau establishes the guidelines for including information on alcohol bottle labels.

In order to comply with regulatory requirements and standards, you will need to consider these factors while creating the label. The reason being, customers first read the label to determine what is inside the bottle. Therefore, designing your label to include all the information that must be legally declared on the label is important.

Every label design is unique in its own way. This is because every business wishes to have a distinct identity in the marketplace. Therefore, the primary goal of redesigning a bottle label is to ensure that it is immediately visible to consumers while they are shopping. 

When consumers are standing in front of a rake at a retail store, the label design should grab their attention immediately. Consequently, a label’s design should be distinctive in terms of its design topic, idea, color scheme, font, and picture selection, among other things. Custom printed, durable, and eco-friendly kraft labels can be a unique option.

Why Is It Necessary to Have a Unique Bottle Label Design?

When purchasing mineral waters, wines, or soft beverages, most of us are drawn to visually appealing and stimulating labels.  That shows how the design and packaging of bottles significantly impact the sale of a specific product.

Even the most passionate fans of popular beverages such as coke and ice wine like seeing something unique on their eye-catching bottles. In order to make the bottle label design stand out, make it distinctive and exciting. It can completely transform any company’s reputation.

In this article, you will learn about three effective elements of innovative bottle label design that will help to maximize the sales of your company’s brand value.

How to Make Perfect Labels for Bottles?

Theme Consistency

You must keep the consistency of theme throughout all label design components if you want to establish your brand as easily recognizable, acceptable, and innovative. In addition, your brand should be easily distinguishable, even if a customer is looking at many variations of your products.

The use of themes is an excellent method of increasing marketing strategy. The procedure of designing your bottle labels to correspond to a specific concept is not complicated at all. The design of the bottle label can be in a classic style that is unique. However, all of the components should be based on the same concept. Also, the design should include a theme that has appeared in the company’s other aspects of the fundamental design elements, like the logo.

Outstanding Graphics

In terms of label design, graphics are probably the essential component since they significantly improve the overall appeal of your products (bottles). Realistic photos and graphic representations of the components in your products can be included in the design.

Color Clarity

Use appropriate colors in your bottle label to ensure that it conveys your brand message. However, you must choose the label colors with care and ensure that they are seamlessly integrated into the design. The colors should highlight the unique characteristics of your beverage.

Types of Label Materials

Coated Paper

This is perhaps the most fragile label grade you will come across. This label is composed of paper with one side coated. The coating may be drab, glossy, or matte. Coated paper creates pictures that are typically clearer, brighter, and more reflective than uncoated paper.

Laminated paper

This label material is a little better than the coated paper. The laminated label is composed of paper that has been constructed by combining two or more layers of thin plastic. These paper labels are often seen on low-cost bulk water, available at cheap warehouse shops. While this kind of label may rip, the ink will remain intact.

Polypropylene

A thermoplastic substrate-based label material. This label is resistant to extreme heat and cold, wetness, ripping, and bending. It is a durable substance that works well for labeling bottled water. These labels retain their colors because it is transferred to the label using high heat.

Synthesized Composites 

This material is new to the market and is composed of a blend of polyolefin and silica filler. This material appears like heavyweight paper and even prints like paper, but it is stronger, durable, and water-resistant. In addition, waterproof labels for bottles can also be made from these papers.

Additional Information

Now that you know how to make labels for bottles, consider these factors while designing bottle labels. Are you searching for an innovative label design for a new venture for your company? You may be considering hiring a professional graphic designer. However, this may have certain drawbacks.

To start, the designer will provide you with two to three water bottle labels template. This limits your options for the design idea. Even if you do not like the ideas, you are probably forced to accept them since you paid the fees. But then, there is no way of knowing when the designer will complete the job. It may also be postponed for many months. However, you can make your own water bottle labels even if you are a beginner.

Conclusion

Apart from providing essential information about the bottle’s contents, the bottle label design must create a favorable first impression on the consumer. Therefore, consistency and alignment with other graphic design elements of the business are essential for a successful design theme. When it comes to conveying a company’s brand message effectively, the use of visuals is recommended. Colors should also be chosen in such a way that they represent the ideals that the company wants to convey.

How To Print Shipping Labels With Laser Inkjet Labels

Laser Inkjet Labels gives you the option to print beautiful, functional shipping labels with your laser inkjet printer.

How to Print Shipping Labels | Laser Inkjet Labels

Laser Inkjet Labels gives you the option to print beautiful, functional shipping labels with your laser inkjet printer.

It does not matter what sort of business you run, if you send products to people, you need to consider the process of doing so very carefully. One thing you need to think about is how you are going to present your parcels. As a business, you continually need to be looking for ways to save money, effort, and time, and one of the most effective ways of doing this is by printing labels for shipping. Below, we will take a look at the benefits associated with this, as well as revealing how you can go about doing so. So, let’s take a look.

What are the benefits of printing shipping labels?

There are a number of different benefits that are associated with printing shipping labels. We will take a look at them below so that you can get a better understanding:

  • It streamlines the process – One of the main reasons why so many business owners decide to have labels printed today is because it streamlines the packaging and posting procedure. You are able to print a large quantity of sleek and stylish labels. By doing this, and being able to simply stick them onto your parcels every week, it makes the process a lot easier and quicker. In fact, did you know that you will save 20 seconds on every parcel? That makes a big difference overall; meaning you save more than 30 minutes per day if sending 100 parcels. So, you do not have to worry about wasting unnecessary time.
  • Save money by having shipping labels printed – A lot of people do not realize that they can save a considerable amount of money by having shipping labels printed. Firstly, time is money. If you decide to simply hand-write everything on the shipping packages, not only does it look unprofessional, but it will take you a lot of time as well. Therefore, it makes sense to go down the professional printing route, as time equates to money at the end of the day! Not only this, but by having shipping labels printed in bulk, you can lock in some excellent savings in the process too, as most printing companies will offer discounts when bulk payments are made.
  • Shipping labels are more secure – Another benefit is that shipping labels are more secure. Not only are you going to have a lot of hassle when using sticky tape, but there is always the risk that this could end up being ripped off or torn throughout the shipping process, which would mean that your parcel would not be delivered. This inefficiency would only cause frustration for you and your customers, which is why printing shipping labels makes a lot more sense.
  • Make your packaging look professional – Aside from the benefits that we have mentioned so far, we cannot overlook the fact that shipping labels will make your packages look a lot more professional. You do not need to fret about handwriting every address label. With a professional shipping label, it really helps to enhance your brand and create a sleek and stylish image, which is something that all businesses are looking to achieve.

You can print shipping labels with the help of Laser Inkjet Labels

Now that you know about all of the different benefits that are associated with shipping labels let’s take a look at how you can get the shipping labels you need. There are companies like Laser Inkjet Labels that make it easy for you to get your hands on professional and premium quality shipping labels. There are a number of different options that you can select from. This includes blank sheet labels or blank roll labels, which you will fill in and write yourself. The other option is to have some custom printed labels made just for your business. You may assume that this is going to be incredibly expensive, but that is not the case. Plus, this is an excellent way of branding your business and ensuring you make a positive impression on all of your customers.

When it comes to having custom printed labels, you can add so many different options. There are tamper evident labels and weatherproof labels that are important when it comes to safe and secure sending. Aside from this, you are able to add your logo to your shipping labels or any other message that you wish. For example, you may want to have a shipping label created that has the return address on the back of the package. Or, why not have some fragile stickers added to your package for items that need it? There are plenty of different options, and stickers keep everything looking professional.

At Laser Inkjet Labels, we have made sure that you are able to easily and effectively upload your custom design so that you can have the right shipping label created for your specific needs. All you need to do is add your artwork and then we will do the hard work for you. If you do not have a design just yet, do not panic. We have a design center on our website, which you can make the most of. Our Inkscape label software is very easy to use and makes it possible for you to create any sort of label that your business needs without having to worry about using expensive software or getting your shipping labels professionally designed, which will, of course, end up costing a lot of money. There is no need for this with our design center!

As you can see, there are many different benefits that are associated with printing shipping labels for the parcels that you send. Not only does this add a professional element to your business, but it presents you with a great way of saving time and money. This is especially the case when you use the service provided by a professional company like Laser Inkjet Labels. We can make sure that you get the high-quality shipping labels you require for the products you send so that you can always make a positive impression.