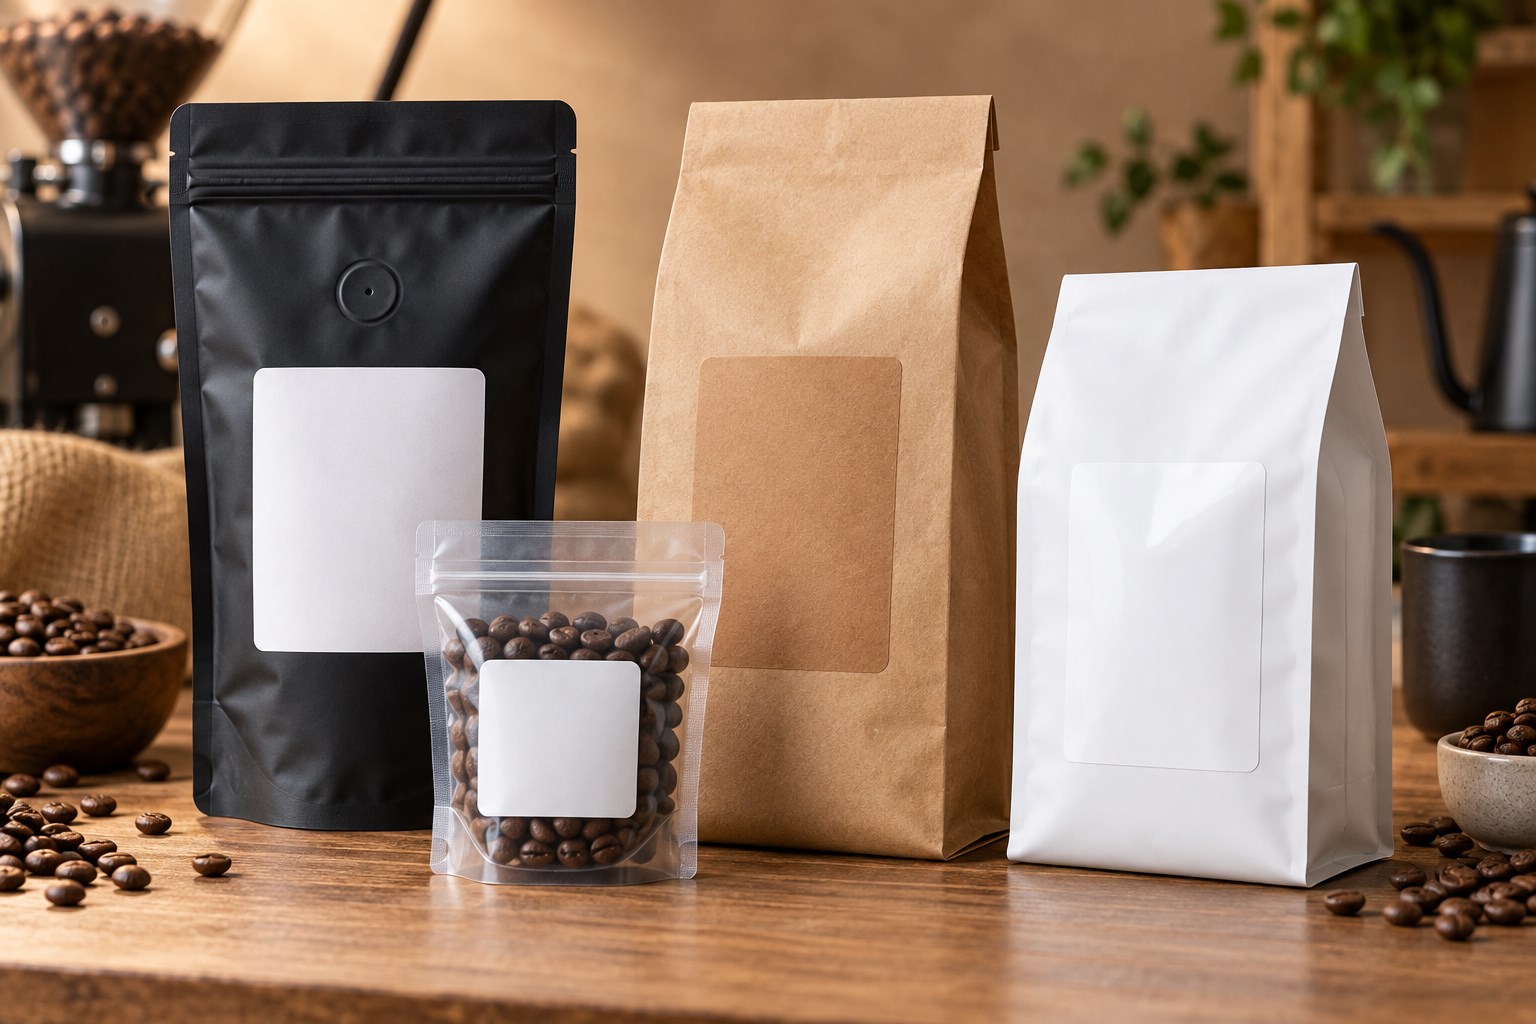
Coffee bag labels turn a plain pouch into retail-ready packaging, but the right choice depends on more than the bag’s stated weight. Zippers, heat seals, side seams, gussets and one-way degassing valves all reduce the smooth area available for a label. The label also needs enough space for the coffee name, roast level, origin, tasting notes, net weight, barcode and variable information such as the roast date.
This buying guide explains how to choose a workable size, material and printing method for sample bags, 4 oz, 8 oz, 12 oz, one-pound and bulk coffee packages. Start with our Coffee Bag Labels page to browse available options. If you already know your package capacity and want a more detailed size lookup, use the Coffee Bag Label Size Guide.
Quick Start Guide
Use these recommendations as starting points, not universal specifications. Bags with the same stated capacity can have different dimensions and valve locations. Measure the filled package, then tape a paper mockup to the bag before ordering.
| Package | Starting label sizes | Good starting material | Typical format |
|---|---|---|---|
| 2 oz sample bag | 2" × 3" or 2" × 4" | White matte or kraft | Sheet labels |
| 4 oz coffee bag | 2.5" × 4" or 3" × 4" | White matte, gloss or kraft | Sheet or roll |
| 8 oz coffee bag | 3" × 4", 3" × 5" or 4" × 4" | Matte, gloss, clear or kraft | Sheet, roll or printed |
| 12 oz coffee bag | 3" × 5", 4" × 5" or 4" × 6" | Matte, gloss, clear or kraft | Sheet, roll or printed |
| 16 oz / 1 lb bag | 4" × 5", 4" × 6" or 5" × 5" | White matte, gloss or kraft | Sheet, roll or printed |
| Bulk coffee bag | 5" × 6" and larger | Match material to the surface and handling | Roll or custom printed |
At-a-Glance Recommendations
- Best versatile finish: white matte.
- Best for colorful retail graphics: white gloss or semi-gloss.
- Best for a natural artisan presentation: brown kraft.
- Best minimalist appearance: clear film, provided the package color supports the design.
- Best for added moisture resistance: a compatible synthetic film.
- Best for short runs and frequent flavor changes: blank sheet labels.
- Best for a compatible roll-fed production workflow: blank roll labels.
- Best when you do not want to print in-house: custom printed labels.
LaserInkjetLabels Pro Tip
Do not choose a label from the bag’s stated weight alone. Fill the actual package, close the zipper, let the gussets expand and test a full-size paper label. This reveals fit problems that are easy to miss when measuring an empty, flattened bag.
Quick Coffee Bag Label Size Chart
The usable panel matters more than the nominal capacity. Choose a label that leaves an uncovered border on every side and does not bridge a structural feature. When two sizes fit, the smaller option is often easier to apply smoothly; the larger option provides more room for branding and required information.
| Bag capacity | Compact option | Balanced option | Maximum-information option |
|---|---|---|---|
| 2 oz | 2" × 3" | 2" × 4" | Front and back labels |
| 4 oz | 2.5" × 4" | 3" × 4" | Front and back labels |
| 8 oz | 3" × 4" | 3" × 5" | 4" × 4" |
| 12 oz | 3" × 5" | 4" × 5" | 4" × 6" |
| 1 lb | 4" × 5" | 4" × 6" | 5" × 5" |
| Bulk | 5" × 6" | Size to the flat panel | Separate branding and information labels |
For additional package-specific examples, visit the complete coffee bag label size guide or browse all label size guides.
How to Measure the Usable Label Area
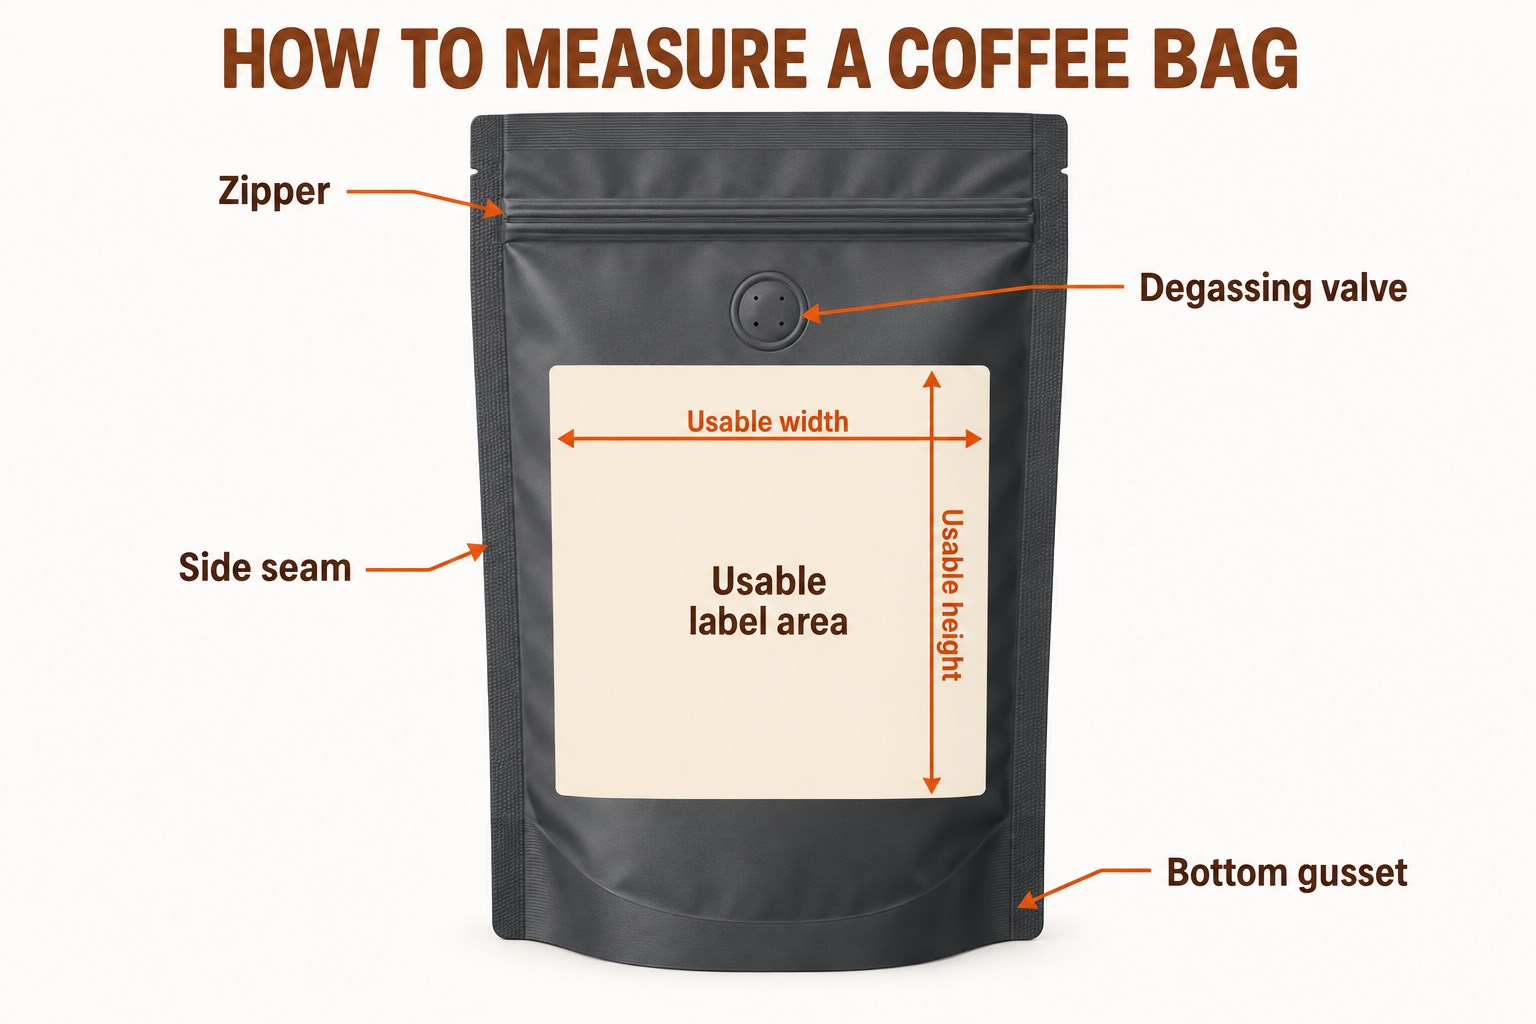
Measure the smooth rectangle where the label will actually make full contact. Do not measure the total width and height of the flattened package.
- Fill and close the bag. A filled pouch expands and its gussets change the front-panel dimensions.
- Mark every no-label zone. Identify the zipper, top heat seal, side seams, bottom gusset and degassing valve.
- Measure usable width. Measure between the left and right boundaries of the smooth panel, then subtract a small safety margin.
- Measure usable height. Measure between the zipper or valve clearance and the point where the bottom gusset begins to curve.
- Test with paper. Print or cut the proposed size at 100% scale, tape it in place and flex the filled package.
Download the matching layout from our label templates library and print it on ordinary paper before using label stock.
Stand-Up Pouches vs. Side-Gusset and Flat-Bottom Bags
Stand-Up Pouches
Stand-up pouches usually have a broad front panel but lose usable height to the zipper and bottom gusset. Apply the label after the pouch is filled so the expanding base does not pull the label around a curve.
Side-Gusset Bags
Traditional side-gusset bags often have a narrower front face and long vertical folds. Keep the label entirely on the center panel unless the material and adhesive have been tested to flex across the gusset.
Flat-Bottom Bags
Flat-bottom bags can provide a stable rectangular face, but corner folds and upper closures still reduce the labelable area. Their structured shape often supports a larger front label and a separate information label on the back.
For broader pouch, box and container guidance, see our Packaging Labels resource.
Recommended Labels by Coffee Bag Size
2 oz Sample Bags
A 2" × 3" or 2" × 4" label usually provides enough space for the coffee name, roast and a small logo. If the sample pouch is narrow, a tall 2" × 5" label may work only when the usable panel and valve placement allow it.
4 oz Bags
Start with 2.5" × 4" or 3" × 4". A compact label keeps more of a premium pouch visible, while the wider option supports origin, tasting notes and a QR code.
8 oz Bags
Common starting points are 3" × 4", 3" × 5" and 4" × 4". Check the filled bag carefully because short, wide 8 oz pouches and tall, narrow pouches need different proportions.
12 oz Bags
Start with 3" × 5", 4" × 5" or 4" × 6". The 4" × 5" size balances branding and information on many retail bags; 4" × 6" is useful when the package has a large uninterrupted front panel.
16 oz / One-Pound Bags
Start with 4" × 5", 4" × 6" or 5" × 5". Large labels can look balanced on one-pound packaging, but leave enough uncovered space for the bag to flex during filling, shipping and customer handling.
Bulk Coffee Bags
Use 5" × 6" or a larger format sized to the actual panel. For wholesale packaging, consider separating the permanent brand label from the variable product, lot and roast information.
How to Avoid Zippers, Seams, Gussets and Degassing Valves
- Zippers: leave space so customers can open and reseal the package without rubbing the label edge.
- Heat seals: do not apply across the thick or uneven sealed band.
- Side seams: keep all label edges on the smooth center panel to reduce lifting.
- Bottom gussets: position the label above the area that unfolds when the bag is filled.
- Degassing valves: never cover the valve or place adhesive against its edge.
Front-Only vs. Front-and-Back Labels
A single front label can work for a minimalist product with limited copy. Use separate labels when the design must accommodate origin, variety, process, tasting notes, brewing suggestions, business information, ingredients, net quantity, barcode and QR code. Splitting the content usually improves hierarchy: branding and buying information stay on the front, while supporting and variable information moves to the back.
White Matte vs. Gloss, Kraft, Clear and Waterproof Materials
| Material | Best for | Watch for |
|---|---|---|
| White matte | Versatile branding, readable text and understated packaging | Standard paper is less suitable for repeated moisture exposure |
| Semi-gloss or high gloss | Vibrant color, photography and polished retail presentation | Confirm printer compatibility and allow ink to dry as directed |
| Brown kraft | Natural, handmade and small-batch positioning | The brown background changes printed colors; dark, high-contrast artwork works best |
| Clear film | A minimalist no-label appearance and visibility of the bag underneath | Desktop printers generally do not print white; package color affects contrast |
| Waterproof or water-resistant film | Moisture, condensation, spills and frequent handling | Match the film to the printer and test the printed ink as well as the face stock |
Material performance depends on the complete system: face stock, adhesive, ink or toner, package surface and storage conditions. Compare options on the Waterproof Labels page and request samples before a large order.
Sheet vs. Roll vs. Custom Printed Labels
| Format | Best fit | Main advantage | Confirm before ordering |
|---|---|---|---|
| Blank sheet labels | Short runs, startups, seasonal coffees and frequent design changes | Print on a compatible desktop inkjet or laser printer | Printer type, material and sheet layout |
| Blank roll labels | Growing production with a dedicated roll-label printer | Efficient one-at-a-time or batch printing | Maximum width, core, outside diameter, sensing and unwind direction |
| Custom printed labels | Consistent designs and businesses that do not want to print in-house | Finished labels arrive ready to apply | Artwork, quantity, material, proof and lead time |
Printing Coffee Labels In-House
- Match the material to the printer. Use sheet stock specifically rated for laser or inkjet printing, or rolls that meet the specifications of the roll printer.
- Use the correct template. Design at the exact label dimensions and keep critical text away from the cut edge.
- Print at 100% scale. Disable fit-to-page, shrink-to-fit and other automatic scaling.
- Run a paper alignment test. Hold the test behind a label sheet or place it on the bag before using label stock.
- Test color and drying. Printer, ink, toner and coating combinations can change color and durability.
- Apply to a clean, dry surface. Remove coffee dust, oil, moisture and fingerprints, then smooth the label from one edge to the other.
Browse blank labels by printer type and use the free label templates to check alignment.
What Information Belongs on a Coffee Label?
The exact requirements depend on the product, ingredients, package, sales channel and jurisdiction. A practical coffee label commonly reserves space for:
- Brand and coffee name
- Origin, region, farm or blend name when used
- Roast level, variety and processing method
- Tasting notes and brewing suggestions
- Net quantity
- Business name and contact information
- Ingredients and allergen information when applicable, including flavored or blended products
- Roast date, best-by date, lot code or batch identifier
- UPC barcode, SKU or QR code
- Storage or handling instructions when useful
Compliance note: This guide provides packaging and label-selection information, not legal advice. Verify the current federal, state, local, retailer and marketplace requirements that apply to your product before printing production labels. For related packaging options, see Food Labels.
Roast-Date and Variable-Information Labels
Coffee businesses often keep the main brand design constant while changing the origin, roast date, lot number or grind. Three workflows are common:
- One fully variable label: print the complete label for each batch. This is flexible but requires careful color and inventory control.
- Permanent brand label plus a small variable label: order or print the main branding in volume, then add a smaller date or product-identity label as needed.
- Writable or stampable field: reserve a high-contrast area for a date stamp or appropriate permanent marker and test for smearing.
Choose a workflow that prevents old dates, origins or lots from being applied accidentally. Keep variable data legible and separate from decorative elements.
Barcode and QR-Code Considerations
- Use dark code elements on a light, plain background.
- Preserve the required quiet zone around the code.
- Avoid seams, folds, strong curves, gussets and reflective glare.
- Do not reduce a code below the size supported by its specification and scanner environment.
- Export artwork at sufficient resolution and avoid resampling that softens edges.
- Scan several printed samples on the filled package using the devices customers or retailers will use.
- For QR codes, test the final destination and keep it maintained for the life of the package.
Common Coffee Bag Label Mistakes
| Mistake | Why it causes trouble | Better approach |
|---|---|---|
| Choosing by bag weight alone | Capacity does not reveal the usable panel dimensions | Measure the filled, closed package |
| Using the largest label that technically fits | Edges may reach curves, seams or gussets and begin lifting | Leave a visible safety margin |
| Covering the valve | The one-way valve may not function as intended | Keep the label and adhesive clear of the valve |
| Using the wrong printer material | Ink may smear, toner may not fuse or sheets may feed poorly | Match the stock to the printer technology |
| Designing before choosing the size | Important copy may become too small or crowded | Choose and test the physical label first |
| Skipping an adhesion test | Coated, textured or flexible bags can behave differently | Request samples and test during storage and handling |
| Applying to a dusty bag | Coffee dust and oils reduce adhesive contact | Clean and dry the package before application |
| Failing to test barcodes | A code can look correct but fail after printing or application | Scan final production samples on filled bags |
How These Recommendations Were Developed
These starting sizes reflect common coffee-bag capacities, typical uninterrupted panel areas and label formats available from LaserInkjetLabels.com. They are intended to narrow the choices, not replace a physical test. Packaging construction, coatings, storage, filling and application conditions can change fit and adhesion, so the final recommendation should always be confirmed on the actual bag.
Frequently Asked Questions About Coffee Bag Labels
What size label works best for a 12 oz coffee bag?
Common starting sizes for a 12 oz coffee bag are 3" × 5", 4" × 5" and 4" × 6". The best choice depends on the bag width, zipper, gussets, seams and degassing-valve position, so measure the smooth usable panel before ordering.
What size label should I use for a one-pound coffee bag?
For many 16 oz or one-pound coffee bags, 4" × 5", 4" × 6" and 5" × 5" are useful starting points. Test a paper mockup on the filled bag to confirm that the label stays flat and does not cross a seam or gusset.
Which label material is best for coffee packaging?
White matte is a versatile all-around choice, gloss white makes colorful graphics look more vibrant, brown kraft supports a natural artisan appearance, clear labels create a minimalist look and waterproof film provides additional moisture resistance.
Can I print coffee bag labels in-house?
Yes. Blank sheet labels work well with compatible desktop laser or inkjet printers for short runs and frequent flavor changes. Blank roll labels are intended for compatible roll-fed printers, while custom printed labels are a practical choice when you do not want to print them yourself.
Where should a label be placed on a coffee bag?
Place the label on a smooth, flat panel and leave clearance around the zipper, heat seal, side seams, bottom gusset and degassing valve. Apply a full-size paper sample to the filled package before committing to a production run.
Should coffee bags use one label or separate front and back labels?
A front-only label can work when it has enough space for branding and required product details. Separate front and back labels provide more room for origin, tasting notes, brewing information, company details, barcodes and QR codes.
Can a coffee label cover the degassing valve?
No. Keep the label and adhesive away from the one-way degassing valve so it can release gas as intended. Measure from the valve edge when calculating the usable label area.
What should I consider when adding a barcode or QR code?
Use strong contrast, preserve the required blank quiet zone and avoid placing the code across a seam, curve or gusset. Print and scan a test at the final size on the actual package before production.
Need More Help Choosing Coffee Bag Labels?
Test the label on your actual packaging before committing to a larger quantity. Send the bag dimensions, usable panel size, printer model, preferred finish, expected moisture exposure and approximate quantity when requesting help.
- Shop Coffee Bag Labels for application-specific options.
- Shop Blank Sheet Labels for compatible desktop printers and short runs.
- Shop Blank Roll Labels for compatible roll-fed printers.
- Explore Custom Printed Labels when you want finished labels ready to apply.
Contact LaserInkjetLabels.com or request samples to check size, material, print quality and adhesion on the actual coffee bag.
