How to Use PNG Label Templates with Canva

Creating professional-looking labels does not require advanced design software. With Canva and PNG label templates from LaserInkjetLabels.com, you can quickly design labels for products, shipping, packaging, branding, and more without needing graphic design experience.

PNG templates are especially useful because they give you a visual guide showing exactly where each label is located on the sheet. You can add text, logos, colors, images, QR codes, and other design elements directly on top of the template before printing.

What Is a PNG Label Template?

A PNG label template is an image file that shows the exact layout of the labels on a sheet. Each label position is outlined so you can align your design elements correctly.

Unlike Word or PDF templates, PNG files work especially well in Canva because you can simply upload the image and use it as a design guide. This makes it easy to create custom labels while ensuring everything lines up properly when printed. You can download templates for any of our sizes here: Templates Page

PNG templates are useful for:

  • Product labels
  • Shipping labels
  • Candle labels
  • Cosmetic labels
  • Food packaging labels
  • QR code labels
  • Barcode labels
  • Thank you stickers
  • Return address labels
  • Promotional labels

Step 1: Download the Correct PNG Template

Start by downloading the PNG template that matches the exact label size you are using. Even small differences in label size can affect print alignment, so it is important to use the correct template for your specific sheet.

For example, if you are printing on a 2″ x 4″ label sheet, make sure you download the 2″ x 4″ PNG template rather than a similar size.

Step 2: Open Canva and Create a New Design

Go to Canva and create a new custom design.

For most full-sheet label templates, you will want to use a custom size of:

  • 8.5 inches wide
  • 11 inches tall

This matches the size of a standard sheet of labels.

If Canva asks for dimensions in pixels instead of inches, you can switch the units to inches before creating the design.

Step 3: Upload the PNG Template

Once your blank Canva design is open, upload the PNG template file to Canva.

After uploading the template:

  1. Drag the PNG file onto the blank canvas
  2. Resize it so it fills the entire 8.5″ x 11″ page
  3. Make sure it is aligned exactly to the edges of the page
  4. Lock the PNG template in place so it does not move while you design

Locking the template is helpful because it prevents accidental shifting while adding text and graphics.

Step 4: Add Your Design Elements

Now you can start designing your labels directly on top of the template.

You can add:

  • Logos
  • Product names
  • Ingredients
  • Scents or flavors
  • Pricing
  • Barcodes
  • QR codes
  • Website URLs
  • Social media icons
  • Decorative graphics
  • Background colors or shapes

When designing, keep important text and graphics slightly inside the edges of each label. This helps avoid cutting off information during printing.

For best results, leave a small “safe zone” around the outer edge of every label.

Step 5: Duplicate Your Design Across the Sheet

Once you create the first label, you can copy and paste the design onto the other label positions shown on the PNG template.

Canva makes it easy to duplicate elements and align them consistently across the sheet.

If every label on the page is identical, this process is very fast. If you need variable information, such as different product names or scents, you can customize each label individually.

Step 6: Hide or Remove the Template Before Printing

Before downloading your finished design, you should hide or remove the PNG template layer.

The template is only meant to help with placement and should not appear in the final printed version.

Once the template is hidden:

  1. Download the design as a PDF Print file for best print quality
  2. Open the file and print at 100% scale
  3. Make sure “Fit to Page” is turned off in your printer settings

Printing at actual size is important so the labels line up correctly on the sheet.

Final Tips for Better Label Alignment

To get the best results when printing labels from Canva:

  • Always use the correct label template size
  • Print a test page on plain paper first
  • Hold the test sheet over your label sheet to verify alignment
  • Keep important text away from the label edges
  • Print at 100% scale with no page resizing
  • Use high-resolution logos and images for sharper printing

Using PNG label templates with Canva is one of the easiest ways to create custom labels for business, product packaging, shipping, and organization. With the right template and a few minutes of setup, you can create professional-looking labels that print accurately and consistently.
Commercial Label Printing

Commercial printing refers to the process of printing high-quality materials for businesses, organizations, and individuals. It involves producing large quantities of printed materials such as brochures, business cards, flyers, posters, label materials, and banners using advanced printing equipment. Commercial printers utilize various printing techniques such as digital, offset, and letterpress to create visually appealing and engaging printed products. With the advent of digital technology, commercial printing has evolved significantly over the years offering faster turnaround times and cost-effective solutions to meet the unique needs of clients.

This subtopic will explore the world of commercial printing in detail.

The beginnings of commercial printing can be traced back to the 15th century with the invention of the printing press by Johannes Gutenberg. Prior to this, books were hand-copied by scribes and were expensive and time-consuming to produce. Gutenberg’s press revolutionized the industry by allowing for mass production of printed materials, making them more affordable and accessible to a wider audience.

The first commercial printers focused on producing religious texts, but as demand grew, they expanded into other areas such as newspapers, pamphlets, and eventually advertising materials. This marked the beginning of modern commercial printing.

Advancements in printing technology have revolutionized the commercial printing industry, making it faster, more efficient and cost-effective. The introduction of digital printing has allowed for on-demand and variable data printing, enabling businesses to print smaller quantities with personalized content at a lower cost. The use of UV and LED curing technologies have also improved the quality and durability of printed materials while reducing drying time.

Modern commercial printing techniques have revolutionized the way businesses print their marketing materials. Digital printing is now the most popular technique, which uses inkjet or laser printers to produce high-quality prints with excellent color accuracy. This method is ideal for short runs and variable data printing, such as personalized direct mail campaigns. Offset printing still has its place in long-run projects that require precise color matching and consistent quality.

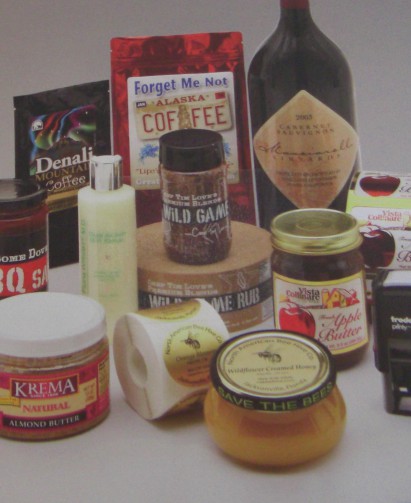
Commercial label printing offers numerous benefits to businesses, including cost-effectiveness, high-quality printing, and customization options. By outsourcing printing needs to a professional printer, businesses can save money on equipment and supplies while ensuring that their marketing materials are produced with the highest quality standards. Additionally, commercial printers can offer customization options such as variable data printing, which allows for personalized marketing campaigns.

Finally, commercial printers often have quick turnaround times and can handle large volume orders efficiently, allowing businesses to focus on other aspects of their operations.

The future of commercial printing is exciting, with several trends and innovations emerging. One of the most significant changes is the shift towards digital printing, which offers greater flexibility and faster turnaround times. Automation and artificial intelligence are also transforming the industry, making it easier to manage complex print jobs with fewer errors. Personalization and customization are becoming increasingly important, with companies offering tailored solutions for individual clients.

Finally, eco-friendly practices such as using sustainable materials and reducing waste are gaining traction in the industry as customers become more environmentally conscious.

Check out our Custom Label Printing Section here

Custom Capabilities

LaserInkjetLabels.com Custom Label Capabilities

High-gloss-adhesive-labels

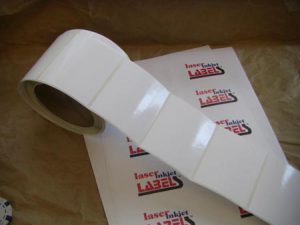
LaserInkjetLabels.com can custom create just about any size or shape of labels on 8.5 x 11  sheets of Inkjet and laser printable labels as well as any sized labels on Laser or Inkjet rolls.

Blank roll label sizes ranging from 1”-8” wide by 1” to 14” long (repeat). Millimeters within those ranges as well (about 25-200mm W x 25-350mm L). On millimeters, repeats will be in 1/8” divisible repeats label to label. Most devices “see” special gap repeats within .125” – .50” without any production hiccups.

Materials with general purpose permanent unless otherwise specified (subject to availability):

  • ViVid Gloss InkJet
  • Semi-Gloss InkJet
  • Semi-Gloss laser
  • Uncoated Plain White
  • Matte White with Removable adhesive
  • White Laser Polyester
  • Gloss White Poly Gloss (BOPP)
  • Matte White BOPP
  • 5 Fluorescent colors – Red, Green, Orange, Chartreuse, Pink
  • Premium Matte White
  • Natural Brown Kraft
  • Clear Laser
  • Clear Inkjet

Other materials and adhesives are available for custom applications. Minimum order quantity may apply. Contact sales to discuss. Adhesive applications include all temp freezer grade.

Black bar printing on back of liner for sensor pick-up when needed.

Standard roll lengths of 100, 240 and 480 feet. (Approximate OD 4.25”, 6” and 8” respectively).

Custom lengths from 100’ to 5000’. ( Max finished OD of 24”)

Label rolls can be finished on 1” (cored or coreless), 1.5”, 2” and 3” ID cores. Labels can be wound in or out.

1 to 3 color with spot Pantone color matching and  flexo printing on label sizes .5” to 6” width by 1” to 12” long. Additional tooling/set-up charges may apply. We can laminate with a clear polypropylene add durability or a more appealing finish to a label.

UPC and 3 of 9 barcode creation and printing. (We do not register or obtain UPC registration but can create code from numbers supplied.)

CMYK aqueous full color short-run (generally less than 10,000 labels depending on label size and configuration) digital label printing. Printed label sizes ranging from 2” – 8” wide by 2” – 12” length. (Note: sheets can be longer but corners will be squared)

Sequential numbering and barcoding available when digitally printed on roll label stock.

Preprinted Labels

Did you know LaserInkjetLabels also can print labels for you? Whether you need a one color label for your products, a bumper sticker or even a full color heavy duty weatherproof label, we can do it for you!

Our custom printed labels start with a low minimum of just 500 labels. We have a variety of materials to choose from that will give your label a distinctive look that your job deserves. All our labels can be printed with one spot color up to full CMYK printing.  Start your custom printed label job now by starting here:  Custom Printed Labels

We have a large variety of sizes listed on our site but can do any rectangular size you need. We also have a large collection of shapes that we print on. If you don’t see what you need, just contact one of our Representatives today and get a quote using this handy form: Get a Printed Label Quote