Can You Use Inkjet Labels In A Laser Printer Without Any Drawbacks?

Can You Use Inkjet Labels In A Laser Printer
Photo Credit: George Milton

The use of inkjet and laser printers is nothing new. Nowadays, it is hard to find a corporate organization that maintains its operations without using at least one of them. The technology involved with printers has come a long way since it was founded back in 1938. These days, we have different types of printers available in the market, laser and inkjet being the most common. In fact, the paper and labels used in these printers are also functionally different from each other. Hence, the question arises: can you use inkjet labels in a laser printer?

Before delving into the finer details of this, a proper understanding of the characteristics of printer-specific labels is essential. The way these printers process the paper inside and the mechanisms involved in ink absorption vary greatly between printers. While it is true that using inkjet paper in laser printers is certainly possible, it does require particular mechanisms when being handled. This article provides an in-depth guide on the difference between inkjet and laser labels as well as the ways inkjet labels can be used in a laser printer.

The Difference Between Inkjet and Laser Labels

Inkjet printers use a method of ink dispersal on the label’s surface in precise proportions. The ink is usually hot and wet upon dissemination and requires time to cool off and register permanently into the label. The user needs to allow time for the ink to settle, which is aided by the nature of the label itself. Inkjet labels are great in absorbing ink from the surface due to their porous texture. This helps the ink dry faster without the danger of smearing all over the label. The outputs are generally of the desired quality if an inkjet label is used in an inkjet printer.

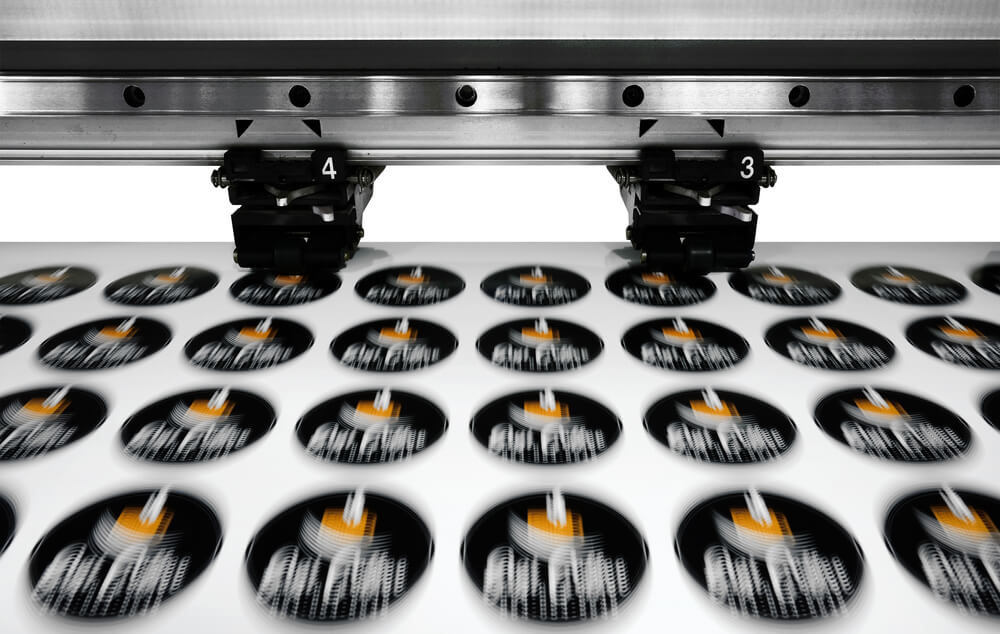
Laser printers, however, use a different approach to printing and are significantly faster than inkjet printers. They use toner along with pressure and heat to bring out crisp results. The pressure is used to integrate the toner, which is a form of powder, into the label. Heat accelerates the process by making the label more susceptible to pressure. Hence, specific laser labels are required to print in laser printers with maximum efficiency and get quality outputs. These papers have high resistance to deterioration from the heat and pressure and are usually wet with moisture on the inside initially. This prevents the heat from completely drying the paper out before any printing is done.

Can You Use Inkjet Labels In A Laser Printer? If So, How?

While it is not recommended to use inkjet paper in a laser printer, or vice versa, it certainly can be done. A disclaimer here would be to not try bulk amounts as it is not ideal to print even one piece of the label in the wrong printer in the first place. However, in case you do attempt it, a comprehensive guide is provided below as a reference.

Step 1

It is wise to check the type of label you purchased before attempting to run it through a printer. As mentioned before, the build quality of these labels varies between different printers. Make sure you have standard inkjet labels that do not require any added processes to make them print-ready. You can choose from a selection of inkjet labels made of glossy, semi-glossy, or matte materials on the market.

Step 2

The laser printer for use in this procedure must also be a standard version without any added intricacies. Extra functionalities in a printer, like scanning, might change the printing mechanism slightly, which may ruin the entire plan. For testing purposes, try printing a blank sheet of paper and check the quality of the output.

Step 3

Place the inkjet labels on the tray of the laser printer. You should not have any problems in doing this if you have already performed a test print in the previous step. Do not overfill the tray with a stack of labels. You have to realize this is not an ideal scenario, and any form of extra pressure in the procedure can permanently damage your printer.

Step 4

Once the label is placed correctly in the printer’s tray, you are ready to set printing specifications on your computer. Make sure you apply all of the information and designs properly. Only start printing once you are satisfied with the layout. Also, beware of the label getting stuck inside as it is not an ideal printing material for a laser printer. If it is successfully out with your desired design, do not start any rough handling. Give it some time to dry before using it.

FAQs

Below is a list of frequently asked questions about printing inkjet paper in laser printers. We have tried to include the most obvious confusions regarding this topic.

Can you use inkjet labels in a laser printer?

Yes, you can but with certain criteria to look out for. They have been mentioned above.

Can you use laser labels in an inkjet printer?

Yes, you can but with similar problems as mentioned in the question above.

The print is smearing every time I touch the label after it comes out. Why is this happening?

Since you are not using the correct label in your printer, the ink is not being absorbed fast enough. Try not to touch the print immediately after the label comes out and give it some time to dry.

Is it possible to recover the labels that are stuck inside the printer?

It is indeed possible to do so. However, you would need to open the outer layer of the printer and manually pull the stuck label out of the device. Try consulting a professional if you are not confident in attempting this.

Final Remarks

We may not always have dedicated printing paper on hand but might need to use some other variants if an emergency arrives. The functional difference between inkjet and laser labels means it is not convenient to print inkjet paper in a laser printer. However, as discussed in this article, it is definitely not impossible and can be attempted based on necessity.

Laser Printer Vs Inkjet Printer: a Comprehensive Guide

Laser Printer Vs Inkjet Printer
Photo Credit: George Milton

Most potential customers researching for a new printer for regular use end up with one final decision: whether to buy a laser printer or an inkjet printer. These are very different devices that operate in their own dynamic ways and we are going to explore laser printers vs inkjet printers. Both specialize in specific aspects of printing and have proven their efficiency in doing so over the years. A proper understanding of their functionalities is necessary if you want perfect results based on your criteria.

Luckily, printers are not rocket science! Even a minimal understanding of printer characteristics is enough to prepare you for exploring the market. Unlike personal computers or mobile phones, only a few specifications in printers are important for users to worry about. 

After designing a label, it is important to print them. This article provides a comprehensive guide on inkjet vs laser printers to help you find the ideal printing solution for your home or business. Let us begin with a brief description of inkjet and laser printers.

The Basics of Inkjet Printers

Founded in the early 1950s, inkjet printers are the traditional way to go. They work similarly to typewriters and are the most used these days. These devices operate by finely spraying minuscule ink droplets onto the paper and producing crisp results efficiently. Inkjet printers are great for printing sharp images and are relatively compact in size, making them slightly more portable. We will discuss more of these advantages later in this article.

The glaring problem with inkjet printers lies at their lower price ranges, as they tend to get overly expensive to operate and maintain down the line. We suggest you purchase at least a moderately-priced inkjet. If you do, you’ll reap the full rewards without worrying about unwanted expenses in the future.

The Basics of Laser Printers

Laser printers were introduced a couple of decades after their inkjet counterparts – in 1969 to be precise. These devices use toner cartridges containing toner powder that is applied to the paper after processing it. Thus the results of printing graphics and images are not as sharp as the inkjet printer. They are more expensive and bulky compared to inkjet printers but are capable of producing mass batches unmatched in the printing industry without compromising on quality or performance. Purchasing a high-end laser printer can set you up for years of effortless printing.

Laser printers did bring solutions to some of the shortcomings of inkjet printers, like the speed of operation and overall page yield. Laser printers introduced key features unique to them as well, but more on that later.

Laser Printer vs Inkjet Printer: The Mechanisms Involved

The major difference between laser and inkjet printers comes down to the core technology in charge of the mechanism. Below is a detailed explanation of their operating mechanisms.

Laser Printing Technology

As mentioned before, laser printers use toner powder stored in toner cartridges to print on paper. Initially, the printer needs digital information containing the blueprint for the document. This is relayed through an ethernet cable mostly, but can also be transferred wirelessly if the printer has that feature. Once the data is captured by the printer, a drum unit is used to control the overall charge of the surface. Laser printers use a hot wire to make the entire drum positively charged. This is necessary as these charges will then be reversed to mark the spots to be printed accordingly.

A laser is coursed through the sea of positive electrical charges to revert their polarising power in particular places on the surface. Anything that needs to be printed, be it a text or a graphical image, requires a negative charge in their dedicated spots, which is ensured by the laser.

Once the laser has completed the conversion, the printer then drives an ink roller all across the drum unit. This enables the toner to attach the powder to the negatively charged portions where the print is supposed to form. The drum unit should now be ready to transfer the toner powder to a piece of paper or label.

The paper provided is positively charged which ensures that the toner ink, being negatively charged, will stick to it rapidly and easily. Heat and pressure are used to thoroughly infuse the toner powder onto the paper before it is ready to come out from the other end of the printer. For this purpose, a laser sheet can be a perfect choice.

The clever use of charges, a laser, and toner ink greatly speeds up the printing process but is also responsible for the apparent lack in image quality compared to inkjet printers of similar features and price range. Getting a laser printer should be planned based on specific user requirements.

Inkjet Printing Technology

We already took a small glance at the mechanism involved with inkjet printing but now we will explain in detail. Inkjet printers are traditional printers that operate in a way similar to typewriters but in a more advanced form.

Numerous holes are present in the inkjet printer’s print head. Minute ink droplets are sprayed through these tiny chambers onto the paper with perfect placement and eventually form the desired images or texts. The ink used in inkjet printers can be of various forms: latex, oil-based, water-based, solvent-based, and so on. The user must make sure the ink is suitable for the printer as using any random dye might bring undesirable results or damage the printer permanently. The appropriate ink will always be specified in the manual.

The page is carried through the interior of the inkjet while a print head rapidly moves square to it. While moving, the print head actuates its holes to let spurts of ink through them when required. As the paper progresses, the image or text visibly begins to form on it. All the printer does is shoot ink in precise spots to create a physical version of the digital input you provided. A printout produced by inkjet printers is basically the systematic formation of millions, if not billions, of microscopic ink dots that represent a meaningful and sharp text or image. 

Fortunately, the initiation of the entire process is similar to that of laser printers. You need a computer or mobile device to transfer your message to the printer through a cable or wirelessly. The quality of output from inkjet printers is extremely high due to the mechanism of using tiny dots of ink. Imagine using a thousand dots to print a single English letter like “W” or “B”! You would be amazed to see how sharp they look compared to printing them using laser printers. For this purpose, an inkjet sheet can be a perfect choice.

Laser Printer vs Inkjet Printer: The Differentiating Features

Certain types of printers are ideal in different situations. Some people might look for printers that don’t use ink to avoid the hassle of refilling every now and then. Others may simply be looking for the most economical color printer available in the market. A select few may find the advantage of a laser printer perfect for their tasks. It is essential to understand the fundamental differences between an inkjet printer vs laser printer before opting to purchase one. Below is a comprehensive list of differentiating features between them.

Speed and Volume of Operation

There is a clear difference between the speed of operation between laser and inkjet printers. Due to the use of repeated print head movement to print on the paper, inkjet printers are considerably slower than their laser counterparts. Users who need to make tons of printouts every day due to the nature of their work usually prefer laser printers due to their swift operations. Large organizations and businesses generally tend to use laser printers solely because of the sheer volume of output they can produce without overworking the machines. Whereas, choosing between a laser or inkjet printer for a small business doesn’t make much of a difference since both can do small jobs with ease.

A typical laser printer can print anywhere between 15 to 100 pages every minute while inkjet printers tend to deliver 15 to 16 pages on average. The difference is clear. Make sure you are aware of your needs and priorities before deciding on a printer.

Quality of Printouts

Printout quality is also an apparent difference between laser and inkjet printers. Inkjet printers are the market leaders when it comes to color printing in high resolution. Laser printers, however, stand-alone in the competition for producing extremely fast monochromatic outputs. Make no mistake: both are really good at their tasks and can create extremely fine details if needed.

To print vibrant colors and pixel-perfect graphics, inkjet printers utilize liquid ink. This means that color ranges across the spectrum can be used and produce an output that looks picture-perfect. These printers are also great for printing monochromatic content that is rich in detail. If the aim is to print mostly black and white, inkjet printers can prove to be an expensive ordeal.

On the other hand, laser printers shine in the field of black and white. The absence of wet ink means there is no bleeding of the colors or any smudges occurring after you handle a fresh printout. Close inspection of printed letters from an inkjet reveals a lack of preciseness compared to a laser printer’s black and white printouts. Organizations needing a bulk amount of textured printouts every working day should clearly opt for a laser printer.

Overall Costs Involved

It is always a good idea to plan ahead before purchasing a printer – or any other device for that matter. While it might not seem feasible to buy a laser printer upon looking at the costs upfront, it certainly makes up for this down the line. Extremely cheap inkjet printers are available for purchase in the market. It may feel like a smart deal, however, these variants eventually bring more plight than benefits. Ink cartridges are quite expensive and run out fast depending on use. The time will arrive when you realize you have already paid more for cartridges than your initial payment for purchasing the printer itself!

The simple fact that toner is a form of powder makes it significantly easier to produce, store, and ship compared to liquid ink. A great amount of engineering and expertise is needed to manufacture ink, making it a fairly expensive product. Additionally, the ink in the cartridge may start to dry out over time if left unused for a long time. In case that does happen, the entire cartridge loses its usefulness and turns into a complete waste of money.

On average, the minimum active lifespan of a laser printer is 2 years more than an inkjet printer. This in itself is a factor indicating a better return on investment (ROI) for a laser printer over its inkjet counterpart. Furthermore, some variants of laser printers come with scanning and faxing features, increasing their cost prices even more. In conclusion, although laser printers tend to have a higher initial cost, the operating costs are lower than inkjet printers because the powder is more resilient than ink.

FAQs:

Below is a list of frequently asked questions on the dilemma: laser printer vs inkjet printer.

I am looking for the most economical color printer available. What printer should I purchase?

While this depends on your usage volume, a general suggestion would be to get a color inkjet printer. This would produce lucid colors and come at cheaper rates relative to a laser printer.

I need printers that don’t use ink in order to avoid smearing fresh printouts. What printer is the best option?

Laser printers do not use ink and still produce crisp results that can be handled right after they are out of the printer.

My primary concern is durability. Which printer should I opt for?

Laser printers have a track record of operating longer than inkjet printers. They have a minimum average lifespan of 5 years while inkjets fall short with only 3 years.

Final Thoughts

The advantages of a laser printer do not necessarily make an inkjet printer obsolete. Both have their pros and cons. An inkjet printer vs laser printer is an age-old argument that might go on until a superior alternative arrives in the future. But for now, know their differences and what your needs and priorities are!

How to Print Address Labels

How to Print Address Labels
Photo credit: Liza Summer

Are you planning to send invites for a special occasion? Looking for ways to send creative letters that stand out? Maybe you need to consider customized address labels! By printing your own address labels, you can add a personal touch.

If you own a small business, chances are you have to send your products by mail. With the advent of technology and the pandemic, more people are opting for home deliveries.

Placing unique mailing labels on your products can make them more appealing and memorable. The receivers will also appreciate the effort and special touch. We will show you how to print address labels to add a creative twist to your mail and packages.

Text Selection

Let’s look at some tips on how to make address labels. The lettering on the tag is very important. It is crucial to decide what is written on the label. Keep in mind where to place your name and address on the label so that it’s not too cluttered.

Assess whether you want to give your full name or your business’ name. Decide the type of font you will use. You need to also determine whether you want to keep the details casual or formal with the captivating title.

If you are creating an address label for your business, then ensure that you place its name properly. If you have a business slogan, you can also place it on the label.

Ensure that the business logo is also placed on it. Last but not least, check and correct any spelling and grammatical errors before printing them out.

Decide on a Theme

The next vital step is choosing an alluring theme. You can opt for a sleek, minimal layout if you desire a sophisticated label. Alternatively, you can opt for a funky and whimsical theme with bright colors that makes the label pop.

You can also try out elegant floral backgrounds or embossments. There is a wide range of themes and color combinations you can choose from. Deciding on a style will make the process easier and smoother going forward.

If you like a certain color scheme but not the layout, you can experiment with different themes but with the same color combinations. If you feel like a theme is missing something, you can alter the color scheme.

You can find the ideal theme when you mix and match the different themes with various colors.

Clear Details

When designing a label, it is very tempting to go all out with many pictures and text. Address labels can be quirky and fun, but they need to be readable. Everyone should be able to read the important details on the label like the address and the name of the receiver.

You need to ensure that the text you use is clear and easy to read. Make sure that all the texts fit well into the layout and frames. Shorten text or opt for another design if any is too close to the edge or does not fit within the frame. Weatherproof labels are more durable and the texts or details remain intact. 

Create and Print Labels with Office Software

You can either use Microsoft Word, Excel, or PowerPoint to create your customized labels. Based on your convenience, you can employ one of these programs to print address labels. Below are the steps to take for using MS Word and Excel.

MS Word

Learning how to make labels in MS Word is easy. Open a blank document and click “Mailings” on the top taskbar. Then click on “Labels” in the “Create” section. A dialog box named “Envelopes and Labels” will pop up.

Click on the Labels tab and select “Options”. Another box named “Label Options” will appear. Change the “Printer Information” settings to “Page Printers”. If your printer has a tray, set it to the media bypass tray. 

Then click on the correct Label Vendor, e.g., A4/A5. The next step is to choose a suitable template from the list and press “OK”. It must be noted that the A4 labels don’t have an appropriate template. You have to click on “New Label” and set your custom label template in that case.

The next step is to enter your address details in the “Address Box”. If you desire a plain sheet of address labels, you can simply load your A4 labeling pages into the printer and then hit “Print”.

If you want to add a background, border, image, or any other changes to the design of the address labels, press “New Document”. This will load a new document with a label template containing the address you entered earlier. The address input will appear in each blank label.

After setting the personalized template design, click on “File” and then hit “Print” to load the preview of the page. Then press “Printer Properties” and verify the following:

  • Page size settings are A4.
  • Ensure no scaling options like “Fit to Page/Sheet” are set.
  • Make sure no options like “Ignore Printer Settings/Use Default” are set. 

Afterward, run a test print of your labels after ensuring the printer has the paper loaded. Hold your test print over the blank labels sheet and raise them against a light source to check their alignment.

Make the necessary tweaks and adjustments before you finalize the printouts. After the final changes, print out your address labels. Using this method, you will have more control over the printing process and will be able to change any misalignments.

MS Excel

The first step with MS Excel is to choose your mailing address labels. There are a variety of address label options you can choose from. There are numerous color, size, and dimension options.

You can use ‘Avery 5160 Mailing Address Labels’ if you are going for standard, white, peel, and stick labels. You can get the Avery ones from any local stationery shop. Once you have selected the mailing labels, you need to set up the address list in Excel.

Input the names and addresses of the receivers and create your mailing list. You need to ensure that the correct headers are applied. The headers are the description at the top of each column in the spreadsheet. It is crucial to properly assign the column and header with each detail you want on your labels.

The details on address labels generally include the title (your name or your company’s name), last and first names of the receiver, address, and phone number. After sorting out what information should be displayed on the labels in MS Excel, you need to organize them in MS Word.

Open a blank Word document, then select Mailings on its top taskbar. Then click on “Start Mail Merge” and then select “Labels”. The next step is to click “Label Vendors” and then select Microsoft. Then press  “30 Per Page” and finally click OK.

The following step is to do a mail merge. To initiate the mail merge, click “Select Recipients” then press “Use an Existing List”. Open the address list you will use. Then press on “Edit Recipient List” and then check the list. Make any last-minute changes if needed and then click OK.
Now you have to select the items you would like to merge from your list with the Word document. Navigate to the top left corner of the first label and then press “Insert Merge Field”.

Then, press “First Name” and add space by using the space bar on the keyboard. Afterward, select “Last Name” and hit Enter to move the next line of the label.

Then press “Address” and press Enter again to move to the next line. Select “City”, then press comma, then select State and add another comma. After setting up the first label, select “Update Labels”.

This will make all the other labels have the same format as the first label. The final step of the mail merging is to select “Finish & Merge”. This will link your address list with all the labels.

Upon clicking “Finish & Merge”, a new file with all the newly merged labels will open. After finishing the merging, the last step is to print them out. Do not forget to run a test print before printing all of them as mentioned earlier.

Overview

Whether you are sending a letter or a package, adorning it with a customized label makes it stand out. Personalized address tags are both functional and appealing. Besides, printing your own address labels is a fun project. Hope you have fun sending out your very own labels.

How to Make Labels for Bottles

How to Make Labels for Bottles
Photo Credit: shutterstock

Simply selling something in a bottle will not be enough to ensure success in your niche market. Consumers look at the bottle label first to determine the contents. To all consumers, the label is very important. There are many competitors in your field of business. In order to be unique, the design of your bottle labels must be exceptional. Consumers will definitely be drawn to such labels, and the brand message will be communicated as well. So, how to make labels for bottles? Let’s Find out!

Insight

Bottle labeling should not be done just for the purpose of labeling the bottles. Several businesses require that it should follow a certain set of rules and regulations established by the government. For example, the Alcohol and Tax Bureau establishes the guidelines for including information on alcohol bottle labels.

In order to comply with regulatory requirements and standards, you will need to consider these factors while creating the label. The reason being, customers first read the label to determine what is inside the bottle. Therefore, designing your label to include all the information that must be legally declared on the label is important.

Every label design is unique in its own way. This is because every business wishes to have a distinct identity in the marketplace. Therefore, the primary goal of redesigning a bottle label is to ensure that it is immediately visible to consumers while they are shopping. 

When consumers are standing in front of a rake at a retail store, the label design should grab their attention immediately. Consequently, a label’s design should be distinctive in terms of its design topic, idea, color scheme, font, and picture selection, among other things. Custom printed, durable, and eco-friendly kraft labels can be a unique option.

Why Is It Necessary to Have a Unique Bottle Label Design?

When purchasing mineral waters, wines, or soft beverages, most of us are drawn to visually appealing and stimulating labels.  That shows how the design and packaging of bottles significantly impact the sale of a specific product.

Even the most passionate fans of popular beverages such as coke and ice wine like seeing something unique on their eye-catching bottles. In order to make the bottle label design stand out, make it distinctive and exciting. It can completely transform any company’s reputation.

In this article, you will learn about three effective elements of innovative bottle label design that will help to maximize the sales of your company’s brand value.

How to Make Perfect Labels for Bottles?

Theme Consistency

You must keep the consistency of theme throughout all label design components if you want to establish your brand as easily recognizable, acceptable, and innovative. In addition, your brand should be easily distinguishable, even if a customer is looking at many variations of your products.

The use of themes is an excellent method of increasing marketing strategy. The procedure of designing your bottle labels to correspond to a specific concept is not complicated at all. The design of the bottle label can be in a classic style that is unique. However, all of the components should be based on the same concept. Also, the design should include a theme that has appeared in the company’s other aspects of the fundamental design elements, like the logo.

Outstanding Graphics

In terms of label design, graphics are probably the essential component since they significantly improve the overall appeal of your products (bottles). Realistic photos and graphic representations of the components in your products can be included in the design.

Color Clarity

Use appropriate colors in your bottle label to ensure that it conveys your brand message. However, you must choose the label colors with care and ensure that they are seamlessly integrated into the design. The colors should highlight the unique characteristics of your beverage.

Types of Label Materials

Coated Paper

This is perhaps the most fragile label grade you will come across. This label is composed of paper with one side coated. The coating may be drab, glossy, or matte. Coated paper creates pictures that are typically clearer, brighter, and more reflective than uncoated paper.

Laminated paper

This label material is a little better than the coated paper. The laminated label is composed of paper that has been constructed by combining two or more layers of thin plastic. These paper labels are often seen on low-cost bulk water, available at cheap warehouse shops. While this kind of label may rip, the ink will remain intact.

Polypropylene

A thermoplastic substrate-based label material. This label is resistant to extreme heat and cold, wetness, ripping, and bending. It is a durable substance that works well for labeling bottled water. These labels retain their colors because it is transferred to the label using high heat.

Synthesized Composites 

This material is new to the market and is composed of a blend of polyolefin and silica filler. This material appears like heavyweight paper and even prints like paper, but it is stronger, durable, and water-resistant. In addition, waterproof labels for bottles can also be made from these papers.

Additional Information

Now that you know how to make labels for bottles, consider these factors while designing bottle labels. Are you searching for an innovative label design for a new venture for your company? You may be considering hiring a professional graphic designer. However, this may have certain drawbacks.

To start, the designer will provide you with two to three water bottle labels template. This limits your options for the design idea. Even if you do not like the ideas, you are probably forced to accept them since you paid the fees. But then, there is no way of knowing when the designer will complete the job. It may also be postponed for many months. However, you can make your own water bottle labels even if you are a beginner.

Conclusion

Apart from providing essential information about the bottle’s contents, the bottle label design must create a favorable first impression on the consumer. Therefore, consistency and alignment with other graphic design elements of the business are essential for a successful design theme. When it comes to conveying a company’s brand message effectively, the use of visuals is recommended. Colors should also be chosen in such a way that they represent the ideals that the company wants to convey.

Which is the Best Sticker Paper to Use

Best Sticker Paper
Photo Credit: Javon Swaby

Are you looking for ways to customize your belongings? As a small business owner, are you thinking of ways to make your products more appealing? Or are you simply looking for creative DIY projects?

Consider making personalized stickers. Making your own stickers is a fun experience and has numerous benefits. You can adorn your possessions with decals you made yourself. You can also make stickers for planners and make everyday tasks less mundane.

Be it for personal projects or business, self-made stickers are a great way of adding a personal touch. You need the best sticker paper for making the ideal labels. An ideal sticker paper should be printer-friendly and easy to apply.

This article will discuss different types of sticker paper to help you decide which one is the most suitable for you.

Color

Sticker paper can be clear, white, or metallic, depending on the look you want to create. If you are intending to make defined stickers, you should opt for clear paper. For professional labels, white paper is more traditional. 

The opacity of the sticker background will help you determine the color of the paper you should use.

Texture

Sticker paper is usually available in either a matte or glossy finish. If you want your sticker to have a rustic or paperlike finish, go for matte. This sticker paper looks like standard paper but has an adhesive back.

You can write on this material, and the ink will not smudge unless it comes in contact with water.  You need to keep in mind that matte paper will not be as lustrous and vivid as glossy paper.

For the best glossy sticker paper, look for the high-end ones. They might be a bit more expensive, but they will not be flimsy, and the shine will last longer.

Printed stickers made with glossy sticker paper look more professional and resemble the ones manufactured in factories. This material has a glossy and smooth texture. It is difficult to write on this medium as the ink tends to slide off the surface and can smudge easily.

Temporary vs Permanent

There is a wide range of adhesive options. While there are some permanent stickers, there are also some stickers that are re-peelable. Re-attachable stickers can be removed and placed elsewhere without damaging the sticker.

It will also not ruin the surface it was previously attached to. This is very handy when you make an error and need to move a sticker. Many individuals do not prefer stickers that are detachable, but in some cases, they are suitable and necessary.

If you are opting for repositionable stickers, ensure that the material is high quality and will not destroy the surfaces you put it on. You need to keep in mind that re-attachable sticker paper costs more than the permanent kind.

Permanent sticker paper is useful when you have confidence in your ability to place them correctly the first time. They also have long durability.

Vinyl

Vinyl sticker paper has numerous benefits. It is stretchable, which allows easier application on both uniform and curved surfaces. It also has higher longevity and a nice, smooth texture.

Opt for printable vinyl sticker paper to make the process easier. You can find many versions that are compatible with your printer. The most commonly used vinyl materials are listed here.

White Glossy Re-attachable Vinyl

The smooth application of this material is easy as they have strong adhesive properties. It is resistant to water and outdoor conditions. It can also be removed easily and doesn’t leave behind any sticky residue. 

The uses and implementation of this type of sticker paper are incredibly versatile. It can be applied almost everywhere.

White Matte Re-attachable Vinyl

Matte vinyl stickers provide a more subtle and minimal finish. This material is also water-resistant, durable outdoors, and has no bubbles. 

White Glossy Permanent Vinyl

This is the best sticker paper for industrial use such as warning and identification labels. The application is also easy. However, it is not bubble-free. It is ideal for outdoor use as it is very resistant and has high longevity.

Clear Removable Vinyl

This material is perfect for making clear stickers, window adornments, and stickers for business promotions. It is most suitable when you don’t want any visible background.

It has a transparent outlook. You can apply it to glass surfaces and improve the aesthetics. The vinyl makes it resistant to abrasion.

Metallic Vinyl

Metallic vinyl gives a more aesthetically pleasing appearance. It has a reflective surface and can literally make your object look shiny. It is also quite durable. If you want to make holographic stickers that are also durable, you can use this material.

You can also opt for this material if you are planning to make glitter stickers. Metallic vinyl’s quality is high, and the stickers made using it will last a long time.

BOPP

BOPP stands for biaxially oriented polypropylene. It is a plastic-derived material and is suitable for attaching to objects that are subject to constant wear and tear.

White Permanent Glossy BOPP

This material is very resilient. It is resistant to scratches, heat, and oil. Its glossy finish gives it a sophisticated appearance. The details of the writing and the art of the sticker will be very vivid when this material is used. It also generally costs less than the white vinyl versions.

White Permanent Matte BOPP

This is ideal for making labels that can be written on without ink smudging. You can write with pens, pencils, or markers on this sticker. This gives you more freedom to add a handcrafted finish with your own calligraphy and drawing.

As it does not have any protective layer like a laminate, it offers reasonable longevity. This material allows you to give a natural, organic appeal to your products.   

Transparent BOPP

Transparent BOPP has all the qualities and benefits of the regular white BOPP with the addition of having a clear background. If you desire the object to be visible through the sticker, then this will be the most suitable option.

Overview

Stickers have many functions and are very useful in making objects look more appealing. They are incredibly useful and are very handy when you are organizing your things.

Making your own stickers is an exhilarating experience where you can put your creative juices to good use. One of the essentials of DIY stickers is sticker printer paper.

Make sure to opt for one that is compatible with your printer. Hope this article helped you in finding the best sticker paper for you.

How to Make Transparent Stickers

How to Make Transparent Stickers
Photo Credit: Sarah Chai

Have you ever wanted to make DIY gifts but weren’t sure how to make transparent stickers? Many people love the idea of labeling their possessions with DIY clear stickers, saving money in the process, as these clear printed stickers do not come cheap. Read this article for a comprehensive analysis of transparent stickers and the ways they can be made at home.

What Are Transparent Stickers?

Transparent stickers, as the name suggests, are clear labels that contain pressure-sensitive adhesive on one side. This allows the strip of paper or thin plastic to stick to surfaces. There aren’t any particular shapes or sizes of generic clear sticker paper. If you want to label, say, a jar, clear labels can be made quite easily. Attempting to make one for the first time will be an interesting and fun experience.

Why Make Transparent Stickers?

Creative personalities are always on the hunt for innovative DIY ideas. With their usefulness ranging from gifts to personal and professional organization, DIY clear labels can add a personal touch to everything in our daily lives.

  • They can be used to label and design beautiful things and keep the design clean and almost spotless.
  • With careful application, small cracks or breaks in glass containers can be hidden and effectively repaired.
  • Stickers can remain invisible to the eye and maintain the consistency of the item’s design.
  • They are great gifts that you can give your friends and loved ones.
  • Collectors are very passionate about maintaining their personal scrapbooks or wall displays.

How to Make Transparent Stickers at Home

Necessary Materials

The following materials are the minimum requirements. Fancier equipment can certainly accelerate the procedure along with better outcomes, but might not entirely be DIY.

  • Printouts or photocopies of your design. (A laser printer is suggested for printouts.)
  • Transparent tape. (Make sure the adhesive is strong enough to withstand getting wet and will stick well on the surface.)
  • Clean water. (You can use dirty water, but why would you?)
  • Spoon. (Other rigid materials like scissors, cards, or a piece of lego may be used. Avoid using your fingernails.)
  • The object to paste the cute transparent stickers on.

Procedure

Following is a brief, step-by-step tutorial on how to make stickers with tape.

  1. Take your time in choosing the design that you want on your sticker if you are attempting this for the first time. A successful result will go a long way in building your confidence.
  2. Print or make photocopies of your design. Make sure the ink is settled in.
  3. Carve out the design from the paper according to your requirements. We recommend you cut out multiple pieces as options in case the initial attempt is not successful for some reason.
  4. Paste the paper onto the sticky surface of the clear tape. Make sure the design is facing the sticky side.
  5. Cut the tape off at a point slightly away from the paper.
  6. Trim the edges of the tape that are extensions from the perimeter of the paper.
  7. Use the spoon to strongly rub on the label in order to ensure every point on the paper is stuck to the tape. Any trapped air bubbles will also have a chance to escape during this process.

    At this point, you should have a well-shaped label. You can make multiple copies of the same prototype by following the same steps. Only the transition to the sticker’s transparent background is what remains.
  8. Submerge your label in a jar of water. Give it some time, as the water needs to seep into the paper and make it soft and loose. This process usually takes around five minutes. However, depending on the size of the paper used, the time may vary. Check the softness of the paper to determine if it is ready to be taken off.
  9. Take the label out when you feel it is ready. Let the water drain before you touch the paper, as an accidental rough scratch might destroy the consistency of the design, if not the whole project altogether.
  10. Gently use your thumb to rub on the paper. Make sure you do not press overly hard, or the scenario mentioned in step 9 might occur. Rubbing too hard might start removing the design from the tape. Remember, you can always put the label back into the water if you feel any portion of the label is not properly soaked and might require extra force to scrub off.
  11. Once the paper is completely scraped off, the design should remain elegantly displayed on the tape.
  12. Give the newly created stickers time to thoroughly dry. Wet stickers might not be completely adhesive, and prematurely attaching them might lead to a catastrophic failure.
  13. Upon drying, the sticker is now ready to be pasted on the desired container.

FAQs:

Does the sticker lose its adhesive property permanently once it is wet?

Although it does lose its stickiness while being wet, the adhesion will return as the sticker dries.

Once crafted, how durable are the stickers?

The durability of the stickers totally depends on the material used. Stronger adhesives last longer, and vice versa.

What ensures the sticker’s transparent background?

Removal of the paper leads to the transparent background.

Can I choose any design I wish and make clear printed stickers with them?

Yes you certainly can, although a loss of detail can be an issue for complicated graphic designs.

Can I print clear stickers at home?

Of course, you can. After all, this is an indoor DIY project.

Final Words

DIY clear stickers are lovely additions to objects that need labeling at home or work. There is no end to the possible designs that you can print on clear sticker paper. As long as you have the knowledge of how to make transparent stickers, you can be assured to never misplace the sugar and salt jars at home anymore!

How to Make Your Own Stickers for Marketing

How to Make Your Own Stickers
Image credit: shutterstock

If you are considering how to make your own stickers to promote your company (or just for fun), you have probably already realized that there is a lot more to the design process than you might have initially thought.

With the proper use and design, stickers can be an excellent marketing tool for almost any company. The issue is that most individuals have no idea where to begin when it comes to creating stickers. And even graphic designers with little or no expertise in sticker design can make a complete mess of the process.

If you want to use the stickers for marketing or promotional purposes, it is not enough to just design a visually appealing sticker; you must also consider several additional factors. For example, you must consider the message you want to convey, the physical copy of the sticker, the size, the shape of the sticker, the font, and, of course, the printing process itself. If you have not done any print designing before, this can be the most challenging part of the process for new designers. Designing labels or stickers can be a wholesome process if you know what needs to be done.

To take you through the process of making and printing a perfect sticker, we have put up the following tutorial.

Select the Appropriate Size and Shape

How to make stickers that look amazing? Choosing the appropriate size and shape for your sticker should be the first step in creating your design before moving on to other considerations. In the vast majority of instances, the intended purpose of the sticker will be the determining factor.

The standard rectangular and square pattern is maybe the most popular form for a sticker because it does not need any extra die-cutting or special shaping. It is by far the most cost-effective sticker to manufacture.

If you want to know how to make stickers with a much more custom-shaped design, printing your sticker on clear vinyl is the most cost-effective choice. By doing so, you will be able to make a unique design for your custom vinyl stickers. However, the sticker will still be a standard square or rectangle in form.

Further, if you are planning to put them on window panes or another clear surface, you might need to have them printed in reverse.

It is also important to remember that you are not restricted to sticker designs with a diameter of just a few centimeters. Modern printing businesses will allow you to produce stickers up to a few feet in length and a few inches wide. If you are trying to make a wall sticker, this can be highly beneficial.

Make It Vibrant and Eye-Catching

It does not matter where you intend on putting your sticker; the goal is typically to draw the interest of others.

The problem is stickers are typically seen from a considerable distance, making them difficult to read. The intended audience for the sticker can be anywhere from just a few feet to a couple of hundred yards away, depending on whether it is attached to a laptop cover, a vehicle bumper, a lamppost, or any of the countless other possible places.

For this reason, you should ensure that your sticker is as bright and colorful as possible in the majority of instances. Making your sticker bright and eye-catching will guarantee that it captures the attention of its audience and gets the recognition it deserves.

Keep in mind that making your sticker vivid and colorful does not always mean that you must include every color of the rainbow into your design. Usually, one or two colors will be enough.

Using too many colors may result in an unorganized and downright unattractive design. So stick to only two or three primary colors in your design instead of using more than that. You can also make custom stickers or make your own sticker book if you want to (for reference purposes). 

Now that you know how to make your own stickers, let us give you some more information.

Image credit: shutterstock

Use Bold Font

When designing your sticker, one of the most important aspects to consider is the kind of font you want to include. Your sticker will almost certainly convey a message, and if this is the case, you must make sure that the message is readable by the audience. 

If you were designing a leaflet or a flyer, it would be entirely acceptable to have paragraphs of text printed in a tiny font. However, it would be a significant mistake if you were designing stickers. The purpose of stickers is not to tell the audience about your life; instead, they are intended to increase brand exposure and draw attention.

Pick a font that is both strong and clear and that it will be readable from a distance. Due to the usage of just capital letters and big font size, the readability and impact of the text will be enhanced significantly.

Using contrasting colors can also help enhance the boldness and readability of the sticker text. Keep in mind that when written in tiny font sizes, sans serif font can sometimes look bolder and more readable than serif type.

Don’t Overuse Text

As we briefly stated in the previous point, the purpose of a sticker is not to tell the audience about your life story or to teach them about any product you provide but to draw attention to your brand and build brand awareness. If your company has already established its identity, using just a logo and no text may be a fantastic approach to promote it.

On the other hand, text might well be required in certain instances. It can even be beneficial in drawing attention. 

Incorporate Your Brand

Color schemes, font, and other design elements are essential considerations. However, your brand logo or name must remain at the center of your design.

However, the uppercase characters and specific contrasting colors can have the most considerable effect on being noticed. Therefore, you should never include colors or fonts that do not represent your brand or your already-existing brand image in your sticker design.

When it comes to promotional stickers, one of the primary goals is to enhance brand awareness. If your sticker does not accurately reflect your company, it will not have the intended effect or provide a return on your investment. 

The selection of a color scheme representing your brand throughout all other visual media is essential (leaflets, banners, website, etc.). In addition, the presence of your logo on the sticker is also usually seen as a good idea since it should be the most instantly recognizable element of your brand image.

Keep Things Simple and to the Point

You may have noticed that almost every suggestion we gave in this article is straightforward and to the point. It is something that you should bear in mind while designing nearly any sticker.

Although leaflets, pamphlets, and flyers may include a lot of information, stickers should be as basic and minimalistic as possible. When it comes to communicating the desired information and increasing brand recognition, your company’s logo may be all that is required in most cases.

Aim for simplicity and effectiveness when designing stickers to convey your idea as clearly and briefly as possible. 

Printing Your Stickers
Image credit: shutterstock

Printing Your Stickers

After the designing phase is done, now the question arises: How to print stickers? The material on which your stickers are printed is a factor when it comes to the actual printing of your stickers, and you have a few different choices. Although almost all stickers are printed on PVC/vinyl, the specific characteristics of that vinyl may significantly differ in the final product. 

One option is to print your stickers on matte or glossy material. Almost all printing companies nowadays will provide you with a selection, and ultimately, the option is yours. Glossy papers will have a high shine, while matte stickers will have a lower shine. 

Matte or glossy is almost entirely a matter of personal taste. However, a matte finish may give your stickers a more quality appearance and feel in certain instances. You can use Cricuts to print as well. So, you might have a question on how to make stickers with Cricut? Cricut is a machine that cuts paper according to a given design. They are a great resource if you want to make homemade stickers. Also, you can use laser inkjet printers to print any type of sticker perfectly. 

So, now you have an overall idea about how to make your own stickers.

Conclusion

If you follow the above advice correctly, you are almost likely to develop an excellent sticker design and achieve the desired effect. To get the desired result when printing your stickers, choose a reliable printing company with expertise in sticker printing.

Although these instructions should serve as a starting point for your design, the success of your sticker will ultimately depend on your own creativity. Follow this advice, and make your own stickers.

How to Choose the Best Font for Labels: 7 Things to Consider

Image credit: Shutterstock

The typography on the label of your product is more than just mere words; it is style and personality too. It is a way to communicate with your customers and represent your brand.

Therefore the font design, style, size, color are all important things to consider. You can also have a combination of fonts. But choosing the Best font for labels is tricky. You want something that is functional but also has a hint of uniqueness to make your label stand out.

Difference Between Typeface and Font

You will hear both terms ‘typeface’ and ‘font’ when choosing a font for the label. A typeface is a font family. For instance, Helvetica is a typeface whereas Helvetica italic, narrow, and light are fonts of that particular typeface. 

Put simply, the typeface is the overall design of the characters, and fonts are variations of the typeface. However, for this article, the term font will be used instead of typeface, and the accessories instead of the font.

7 Things to Consider When Choosing the Best Font for Labels

Fonts are expressive. They can be fun, bold, tacky, elegant, and even loud. 

Just think about the TIME magazine logo. The classic, thin-lined font represents authority. Now, think about the typography of Coca-Cola. Those swirly letters indicate a more fun persona. Almost every popular brand tries to use a unique font that people can remember.

To choose the Best font for labels, consider the following factors.

1. Your Brand Persona

After coming up with your product, you must think about your brand’s persona and identity. You have to clearly identify what your brand stands for. 

Is it something fun, sporty, eco-friendly, or sophisticated? You have to be the judge of that. For instance, if you are selling high-end cosmetic products, then your brand persona should reflect luxury and beauty. In that case, use an elegant font.

If your brand is all about weddings, then consider a calligraphic font that is perfect for formal events and looks amazing on monogram envelope seals and invitations. 

For organic food and beverage labels, use clean fonts as they represent simplicity. But for indulgent food, use something more visual and loud.

If you are already using a font on your brand logo, try to use the same or similar font for your label. This makes the brand more recognizable and consistent.

2. Your Audience

Researching your target audience will give you a better idea of what font you should choose. If your label caters to children, you can use bubbly, swirly, or fun fonts. If you have a sophisticated audience, use simple and elegant fonts to grab their attention.

Once you have narrowed down your demographic, it will be much easier for you to choose. However, you still need to do research on font personalities.

3. Understand the Font’s Personality

It may sound surprising but fonts really do have personalities and their font trait has to match with your brand. For instance, a bubbly font on the label of a fancy champagne bottle will never look good.

If you want to portray something elegant, use classic fonts with narrow lines such as Garamond, Lola, BodoniAnt, Script, or Verdana.

Choose fonts that are quirky and fun for personable or playful products. Fonts such as Pacifico, Lobster Two, Gasoline Alley, and Princess Sofia are perfect for this. They have plenty of curves with oscillated highs and lows.

For a bold and modern vibe, choose anything between Gills San, Julius Sans One, Bernhard Fashion, Raleway, or Scada. These forms have a more uniform structure and angular look.

Handwritten fonts may not seem conventional but are very attractive and warm. Fonts such as Loved by the King, Waiting for the Sunrise, Bella Donna, and Homemade Apple look friendly and offer a rustic vibe.

These are only a few personality types. You might have to do a lot more research to find the perfect one for your label but your effort will pay off.

4. The Font Size

Font Size
Image credit: Shutterstock

If the text is too small, your audience will have a hard time reading it but if it’s too big, it might crowd your label design. Asa rule of thumb you should never use a font smaller than size 5. And remember, the text on a computer screen is more readable than on the label so consider going a size larger.

It can be very hard to choose the right size. To find the right balance, you have to go through trial and error. Print out a draft with different sizes of the same font and compare. This way you can also check the spacing.

Sometimes font sizes will be dictated for you. Government warnings, ingredient lists for beer, and other alcohol labels have a minimum size requirement that you must follow. For these, always use simple fonts and avoid using fancy fonts because they are less readable in smaller sizes.  The easiest font to read is Helvetica and Georgia. Other easy to read fonts are-

  • Arial 
  • Verdana
  • Calibri
  • Rooney
  • Open Sans
  • Lato

These fonts are clean, take less space, and remain readable even in smaller sizes.

5. Combination of Fonts

Using only one font for everything on your label might seem boring. A combination of fonts can do wonders for your product. But never use more than three types of fonts.

All your favorite fonts can be categorized into Serif and San Serif. 

Serif

Serif fonts have a formal design and most of them have a finishing stroke on the letter. Times New Roman is a classic example. Serifs are eye-catching and perfect for the title section of your label as they are the most readable font for print.

San Serif

San Serif fonts are cleaner and do not have any finishing stroke such as Verdana and Helvetica. Serif fonts are easily recognizable and are great choices if your audience is visually impaired or small children. 

San Serif fonts are great for the ingredient or important information section of your label because of the readability.

If you are using two fonts, your best choice would be to choose one from each category and see if they complement each other. If you want to choose three types of fonts, then choose one Serif and two San Serif fonts for a good combination.

Your primary font can be whatever you want, but your secondary font should be basic. 

The main purpose of the label maker fonts is to be legible to the audience. This is also the reason you should not use over three fonts. The more fonts you combine, the more difficult it becomes for the reader.

No matter how cool the font looks, readability is the key for label fonts. So make sure your combination of fonts looks good and doesn’t overwhelm the reader.

6. Font Accessories  

We have quite a few options to accessorize our fonts. We can make them bold, italic, or even underlined. But these embellishments might make your font less readable so be careful. 

Using too much bold or italic can create extra noise and take unnecessary space. Underlining can make it difficult for readers to differentiate the letters. A rule of thumb is that if your primary font is fancy, do not use these embellishments; it will only be distracting.

7. The Visual Hierarchy 

No one reads everything on a label – at least not all at once. So, your product label should have a visual hierarchy to help people skim through all the information. If your label has a story to tell, then an effective visual hierarchy is even more important to communicate with the customer.

Your label will have a beginning, middle, and end part and in those three sections, there will be some information more important than others. If you use the same font, it will be harder for the customer to distinguish which is more important to read.

You will have to carefully decide which information deserves a heading and which is just going to be printed on the body copy with the secondary font. Big, bold, unique fonts are great openers for your visual hierarchy and introduce your product to the customer. Make sure it is readable, do not over accessorize, and highlight key information in order to help your readers skim through in an orderly manner.

Also, you need to know which kind of label really fits your items. There are uncoated labels, semi-gloss labels, high-gloss labels, inkjet only labels, laser labels, colorful labels, and many more to select from.

Final Thoughts

Inappropriate fonts make your label bland and won’t portray your brand’s message effectively. On the other hand, the right font can enhance your label design and speak to your viewers in more ways than you can imagine. Researching fonts can take time so be patient, create a list of your favorite fonts, and find the one that matches all the criteria listed in this article.

The Average Bumper Sticker Size

Bumper Sticker Size

Perhaps the most crucial question to ask before determining the average bumper sticker size is “what is a bumper sticker?” Bumper stickers are defined as any durable exterior sticker that can be applied to the bumper of vehicles. It includes a wide variety of forms and sizes. However, traditionally, a “bumper sticker” has been defined as a large, rectangular sheet of printed vinyl with a design on it.

What is a Bumper Sticker?

The modern bumper sticker originally belonged to Forrest P. Gill, a screen printer in Kansas City, Missouri. As a result of World War II technology surpluses, Gill found himself with an excess of two items: fluorescent paint and adhesive-backed paper.

So, what really is a bumper sticker? It is a message on an adhesive sticker or label that is meant to be applied to the bumper of a vehicle and read by the drivers of other vehicles. Bumper stickers are also often applied to other things. The majority of standard bumper sticker dimensions are approximately 25.4 cm × 7.6 cm (10 in by 3 in) in size and are frequently made of PVC.

Bumper stickers can promote a business, a religion, a secular cause, or show support for a sports franchise or other group. The perspective they take on a specific philosophical or political issue could be either supportive or antagonistic. During election years in certain countries, like the United States, bumper stickers are a popular method to express support for a candidate running for a government position. In other countries, like the United Kingdom, they are not really seen in any shape or form.

Bumper stickers are more than just an advertising tool; they are a cult classic of pop culture. Durable and designed for outdoor use, bumper stickers have decorated millions of automobile bumpers and windscreens. As a result, they are the preferred option for almost any vehicle sticker application.

However, bumper sticker printing is not limited to automobiles. They are often used on computers, bicycle frames, office equipment, file cabinets, equipment bags, and luggage. Not all bumper stickers are for drivers. The stickers sizes may vary on the usage purpose of individuals. You can get an idea by looking at the bumper sticker template that is available online.

What is the Average Bumper Sticker Size?

You might wonder what size to use when buying custom-made bumper stickers. In that case, the answer depends on several variables, including how the sticker will be disseminated and the message or design that will be put on it. Bigger is not necessarily better, as shown by the fact that the average size of vehicle stickers has decreased over the past several decades. As more individuals have shown a reluctance to display big and distracting bumper stickers on their vehicles, the typical size of a bumper sticker has reduced. As a result, the usage of alternative sticker shapes, sizes, and designs has grown in popularity.

The simple answer is that there is no standard size if you are looking for a bumper sticker size. However, the 3” X 11.5” bumper sticker is the most popular or standard bumper sticker size. Even while we have the biggest stock size available, 3.75” X 15”, these bigger sizes are becoming more seldom utilized. While many online retailers mention the 11.5″ x 3″ size as the most popular, this is hardly true. While the average height remains 3 inches, the average size is closer to 10 inches, with relatively few designs exceeding 11 inches in length due to the limitations of home printing and the requirement for full-bleed artwork.

Standard Car Decal Size

The standard car decal sizes and shapes are:

  • Rectangles: 5″ x 7″, or 3″ x 11.5″
  • Ovals: 5″ x 8″
  • Circles: 6″ – 8″ diameter
  • Octagons: cut from 8″ x 8″
  • Squares: 6″ – 8″
  • Triangles: cut from 8″ x 8″

What is “Full Bleed”?

In printing terms, “full-bleed” refers to an image that extends entirely to the medium’s edge, leaving no blank space on the borders. It is less of a problem when printing a picture with a white background. However, a white border (or line) around the image will seem cheap and unprofessional when printing an image with a bright color scheme. Now that you know about bumper sticker size, let’s discover the printing process.

Printing Bumper Stickers

Only the biggest and most costly printers can print complete bleed on media without trimming the paper’s edges. These enormous printing machines cost several hundred thousand dollars and often fit only in warehouse-sized areas. However, the vast majority of printing is done on smaller, less costly printers. These printers’ mechanical operations need a tiny quantity of unlabeled medium around the printed artwork/image. To circumvent this, print industry experts simply print an image on bigger media than required and then trim the excess border to produce a full-bleed artwork.

Home-based bumper sticker printing is no different. In the United States, the typical home printer prints on standard letter paper, which measures 8.5″ x 11″. Due to these specifications, no bumper sticker measuring 11.5 inches in length may be printed. Likewise, no sticker measuring 11 inches in length will have full-bleed color. Due to these limitations, many small artists print bumper stickers in 3″ x 10″ proportions and then cut them down from letter size to get a full bleed design.

There is little to no difference in functionality between a 10 inch and 11.5-inch bumper sticker. The artwork’s and design’s quality will take priority over the length, and as more boutique artists make their customized bumper stickers, the 3″ x 10″ style is becoming increasingly popular. Also, you can get preprinted bumper sticker labels online, which can save you the designing process.

Removing Bumper Stickers

On the back of the detachable liner of the first bumper stickers, written instructions were attached to the car’s bumper. Because of the vehicle’s movement and the fluctuating climate conditions, the sticker had to stick effectively to the surface of the bumper.

There are specific bumper stickers that are “simple to remove” and magnetic bumper stickers. With a sharp knife, penetrating oil, or a heat gun, you can remove bumper stickers from your vehicle. Home remedies may also involve using everyday materials found in the home, like paint thinner or WD-40.

Obscene Bumper Stickers Laws

Several states have enacted legislation prohibiting the exhibition of indecent bumper stickers. For instance:

  • The exhibition of “obscene or blatantly objectionable bumper stickers” is prohibited under Tennessee law.
  • Alabama law bans the use of “obscene terminology of erotic or excretory acts” on bumper stickers.
  • Likewise, a South Carolina statute bans the exhibition of vulgar or “indecent” bumper stickers. Violations may result in a fine of up to $200.
  • The legality of criminalizing bumper stickers remains highly controversial since it is difficult to conceive a bumper sticker that fits the legal criteria of obscenity.

Conclusion

More bumper sticker sizes and ideas are available today than ever before, so you do not have to rely on costly printing services to create your own. There are customizable and printable vinyl sheets that work with practically any home printer, allowing you to create your own unique stickers to share with the world.

How to Make Waterproof Stickers

How to Make Waterproof Stickers
Image Credit: CHUTTERSNAP

Are you looking for ways to personalize your belongings? Do you want to make your products look more aesthetically pleasing? Or are you simply searching for a new hobby? 

How about creating your own personalized stickers? Applying customized stickers to your possessions and products is a great way of adding your own personal touch. You can express your quirkiness and creativity through unique DIY decals.

As a sticker enthusiast, it is quite frustrating when your decals get ruined by water or sun exposure. Waterproof stickers are durable and can hold up to various conditions. Learn how to make waterproof stickers by using these simple techniques.

1. Design Format

Whether it is your own design or a printable available on the internet, you need to decide on the artwork you want on your sticker. Ensure that the image you will use for making stickers are in an SVG file format like png.

These formats are scalable and have a high resolution. This will give the assurance that your waterproof stickers will be of superior quality.

2. Decide on the Material

Depending on where the stickers will be applied, you need to ensure their durability and suitability. For creating the ideal custom waterproof stickers, you need to stock up on the appropriate materials.

There are two main types of sticker bases: sticker paper and printable vinyl. Aerosol sealers and laminating sheets are used to waterproof sticker paper.

The standard sticker paper is usually made of paper. This means it will absorb moisture. The resulting sticker might have ink bleeding through and create an unreadable mess when exposed to water.

Hence, it is best if you use printable vinyl for making stickers that are impervious to moisture. The vinyl will repel it, making your decal water-resistant.

Despite the manufacturer’s claims, some ink will still bleed through the vinyl after some washes. The top of the vinyl needs to be properly sealed or laminated to make it more durable.

The aerosol sealant will also act as a protectant against UV rays and water. It will also make the colors appear vivid and remain vibrant for years.

Lamination also makes the stickers resistant to scratches. Moreover, it will make the stickers dishwasher safe and be resilient over the years.

3. Decide on the Method

The thermal laminating method can be used to print waterproof stickers. However, the resulting stickers are not completely impervious to water. Moreover, it requires a special laminating machine, which is quite cumbersome.

There are two effective methods of making DIY waterproof stickers. Based on your resources, sticker goals, and capabilities, decide on the method you will go with. Weigh out the pros and cons of each type of procedure and decide the one you deem the best.

A. Self-adhesive Laminating Method

You can use this method if you are thinking of making dishwasher-safe and weatherproof decals. For instance, if you want to make customized wall decals and weatherproof water bottle labels. This technique also takes less time.  

Self-adhesive laminate sheets are basically two plastic films that are bigger than standard-sized paper. One of the sides is adhesive and adheres to the surface of the sticker. This seals the sticker paper and protects it. You can substitute the film with Silhouette clear sticker paper.

However, laminating sheets give you room to recover from mistakes. The sheets are larger and can encase the entire paper. This makes the whole process a bit easier. 

It must be noted that self-adhesive laminating and thermal laminating are not the same. Heat laminating does not make your stickers fully resistant to water.

You can use the standard sticker paper as your base, but you need to be very careful. If any water droplets get underneath the sticker, it will compromise the longevity of the paper under the laminate sheet. Ensure that the sticker paper or vinyl is compatible with your printer. The packaging of the product usually specifies whether it is made for inkjet or laser printers.

You can opt for either glossy or matte finishes on your sticker base. It should be noted that the lamination will give the matte base a lustrous finish. On the other hand, the glossy base will make the colors pop and look more vibrant.

The advantages of this procedure are listed in the following:

  • The application process does not need any special instruments. You can use a credit card to push the air bubbles out and apply the laminating sheet evenly.
  • You can work with different thicknesses and opacity.
  • This process is less stressful as the laminating films are larger than the standard paper.
  • The laminating materials are easily accessible. You can find them in local or online office supplies stores.
  • This method does not require any heat. It does not produce any toxic fumes and odors. It also does not require any electricity.

The disadvantages of this procedure are as follows:

  • The sheets might be expensive.
  • Scraping with a card to push out the air bubbles may leave scratch marks.

 B. Aerosol Sealant Method

Aerosol sealants can work well as transparent protectants if used carefully. Based on the brand, the finish can be either matte or glossy. You should keep in mind that you need to wait for at least 24 hours for the ink of the stickers to dry after being printed.

After 24 hours, you can safely spray the sealant over your stickers. You should always ensure that you follow the safety precautions required in this method. The manufacturer’s directions should always be strictly followed.

The pros of this method are the following:

  • The aerosol is light and does not add weight to your stickers.
  • You can waterproof multiple sheets at the same time.
  • The sealant spray is also a UV protectant.
  • The method is affordable and does not break the bank.
  • Generic models of both laminating equipment and pouches are easily accessible.

The cons of this procedure are as follows:

  • It is a very hazardous procedure. Following safety precautions is mandatory.
  • It requires the application of multiple coats. It might be necessary to wait for 10 to 30 minutes between each coat. 
  • You need proper ventilation to avoid the health risks associated with the VOC fumes from the aerosol.
  • The weather may affect the coating process. You need to spray at optimum temperatures. Hence, you might not always be able to spray outside. Also, there are inexpensive ways to make weatherproof labels.

Happy Sticking!

Whether you are making your stickers with spray sealants or laminating sheets, ensure that your working space is kept clean. You do not want any lint or any other unwanted bits on your sticker. Keep everything organized and within your reach before starting the project.

Align your sticker base and lamination properly before the laminating process. Be patient and take your time to work your way from the center to the edges. Most importantly, have fun making your own unique stickers!