We have been using your waterproof labels for many years now and they are exceptional!!! As a small family business, we have always sought to keep costs down so we print and label a lot of our product by hand. Thank you for providing such a great product at a great price.
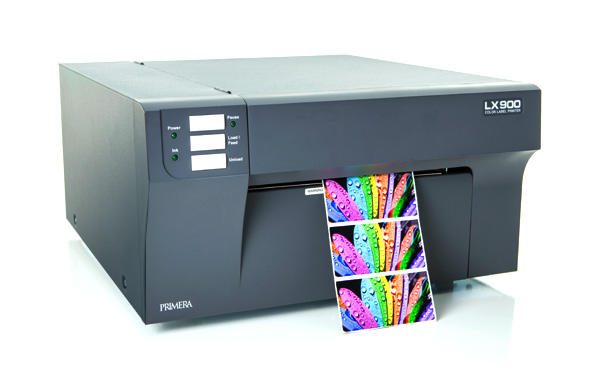
Roll label printers are becoming more popular due to the ease of use, low cost and ability to print on demand. But not all label printers are made the same. Prior to purchasing your roll label material, there are a few things you will need to know.
You will need to go online or find the hard copy of your printer specifications. The first thing you will need to check is, can my printer print the label size that I need for my project. You can find this out by looking for the Minimum Media Print Width. (Please note that when looking at sizes, the label width is the first number followed by the label depth into the roll). These widths will vary widely from printer to printer going from minimum width of 0.5″ all the way up to 8.5″. What Minimum Media Print Width means is the overall width of the roll. Typically you will have 1/16″ to the left and the right of a label on a roll. This means that if you have a 1″ label, your media width will be 1.125″. So if the printer has a Minimum Media Print Width of 1.5″, the smallest label you could use is 1.375″
There is also a Maximum Media Print Width that you will need to be aware of. These also have a wide range of sizes depending on the type of machine you purchased. These sizes can range from 4.25″ to 48″. What Maximum Media Print Width boils down to is basically how wide of a label can the printer fit inside, print and roll out of the front. If your Maximum Media Print Width is say, 8.375″, then using the same 1/16″ on left and right of a label, your maximum label size would be 8.25″.
Using the dimensions from above with a minimum media width of 1.5″ and maximum media width of 8.375″, then we know that you can only use the printer to print labels that are between the widths of 1.375″ and 8.25″.
Another important factor you will need to look up in the manual is if your printer takes the media on a 2″ core or 3″ core. What this is telling you is what size spool your printer uses to hold the rolled up labels. Machines that use a 2″ core are typically smaller printers.
The last detail you will have to look up in the manual is what is the maximum roll diameter that can be used in the printer. These also have a wide range of dimensions. If you have a printer that uses a 2″ core, the typical maximum roll diameter is 4″ to 5″. On printers with 3″ cores, the maximum roll diameter ranges from 6″ all the way up to 18″.
Taking a few seconds to learn the specifications of the media width a printer uses will help you determine what printer is right for you as well as saving time and money by purchasing the correct labels the first time.
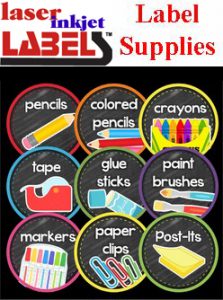
Below is how LaserInkjetLabels.com categorizes our Roll Labels.
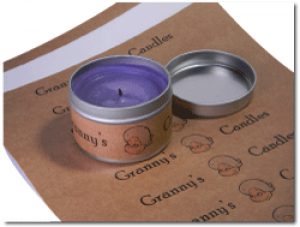
Let’s face it, sometimes labels just have a hard time sticking to your application. Some surfaces just need a more aggressive adhesive, be it because of a tight turning radius on a bottle or because the material the label is being applied to is not as receptive to adhesive as others.
These Kraft Labels have a slightly lighter color and more of a matte look and feel than our normal adhesive brown kraft product. The adhesive uses a new technology that keeps it from being absorbed by the sheet as well as keeping it from oozing out the sides.
If you have used brown kraft labels in the past but had to switch due to peeling or falling off, give these new labels a test!
Aggressive Adhesive labels are perfect for:
Small Hot Sauce / Woozy Bottle
Tight Radius Candle Tins
Mason Jars with Raised Artwork or Letters
Waxy Cardboard Boxes
Cold (Not Frozen) Applications
Used as Security Labels for Closing Boxes
Any other Non-Flat Surface
Free Samples are always available and encouraged prior to ordering. Request yours here: Customer Service
No one likes to write on a label and then have a spill occur that renders the label no longer useful. Middle Schoolers may have water bottles for sports, band equipment in plastic cases, and plastic coated binders that are labeled to be identified. So, why shouldn’t those labels also be water-resistant? And, as homeschoolers we often let our children drink water freely while doing school work at home. Then there are our high schoolers that may be driving. How many times have we had a spill in our own vehicles while driving? Now our teens are driving around alone and their cars SOMETIMES look worse inside than our mobile homeschooling vans. LOL Half drank beverage containers everywhere with missing lids, opened cans of Red Bull when they have had to stay up all night for a test, (yes, I know, Red Bull is not good for them LOL), not to mention sports drinks, etc. All of those spill possible items are intermingled with their school books, binders, and science products. Those items are labeled, and those labels need to be water resistant. At Laser Inkjet Labels, we can help you with your needs for water-resistant labels. You can browse those labels here.[/caption]
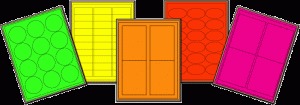
In these grade levels children are beginning to learn how to organize their own workbooks, notebooks, and binders. This is also the ages you want to keep their enthusiasm for learning growing. That is why our Fluorescent Labels are such a good choice! They are eye catching, and each child can choose a color to code all of their books separating theirs from their siblings. Fluorescent sheets come in green, yellow, orange, red and pink. They are top coated so they can be used through inkjet printers with an instant “dry to the touch” finish. No smearing with these labels so one less reason to have to clean up messy hands! So hop on over to our page here that offers these awesome labels and don’t forget to order some samples!
Matching games are a great tool when your little ones are learning their letters, numbers and colors. Make a chart with numbers 1-10 in a column down the side of a poster board, but not in order. Make another column the width of a reusable Laser Inkjet Label next to it. Place the numbers 1-10 on ten labels. Have your child peel off a number label and place it into the second column in the correct row that corresponds to the number they have chosen. If you have toddlers at the same level this can be a really fun game of racing to see who places all ten labels in the correct place. When they are finished they can peel them off the poster board and save them for the next round. This can also be done with ABC’s, and learning to recognize written names of colors by coloring each row in the first column a different color and then writing the names of the colors on the labels.
1
Label 1 here
6
Label 6 here
9
Label 9 here
You get the idea. It can also be done with the words one, two, three…as they begin to recognize those. The options are endless!
Congratulations on your upcoming wedding! Here at LaserInkjetLabels.com we understand how busy this time is for you. We can help make your life easier as you prepare for one of the most important days of your life. LaserInkjetLabels has many different styles of labels to help you create that wedding of your dreams. One of our most popular items is our Crystal Clear Glossy address labels. What makes these items unique is that they are truly crystal clear and not “transparent” or “frosty” that you find from other label companies. Crystal Clear Glossy labels are great for addressing your wedding invitations because they let the color of your envelope show through while still displaying the address. This makes the label look like it matches the envelope color perfectly. Why use bland, ordinary white labels when you can enhance your envelope using Crystal Clear Labels? View our products here.
At Laser Inkjet Labels we know that homeschooling is a full time job. We also know how important organization is to that process. We want to make that job easier. Trips to the store for purchases can take valuable time away from in-home learning. Wouldn’t you appreciate your labels being delivered right to your door? Not sure which labels would be best suited for different tasks? Ask for samples to be mailed to your home before choosing your purchases. Browse our list of labels in unique sizes and materials to find the labels you would like to try. Then just go to our Contact Us page and request which sample labels you would like us to deliver directly to your home. Have questions? Don’t hesitate to contact us! We are here to make your homeschooling life a little simpler.
LaserInkjetLabels.com can custom create just about any size or shape of labels on 8.5 x 11 sheets of Inkjet and laser printable labels as well as any sized labels on Laser or Inkjet rolls.
Blank roll label sizes ranging from 1”-8” wide by 1” to 14” long (repeat). Millimeters within those ranges as well (about 25-200mm W x 25-350mm L). On millimeters, repeats will be in 1/8” divisible repeats label to label. Most devices “see” special gap repeats within .125” – .50” without any production hiccups.
Materials with general purpose permanent unless otherwise specified (subject to availability):
Other materials and adhesives are available for custom applications. Minimum order quantity may apply. Contact sales to discuss. Adhesive applications include all temp freezer grade.
Black bar printing on back of liner for sensor pick-up when needed.
Standard roll lengths of 100, 240 and 480 feet. (Approximate OD 4.25”, 6” and 8” respectively).
Custom lengths from 100’ to 5000’. ( Max finished OD of 24”)
Label rolls can be finished on 1” (cored or coreless), 1.5”, 2” and 3” ID cores. Labels can be wound in or out.
1 to 3 color with spot Pantone color matching and flexo printing on label sizes .5” to 6” width by 1” to 12” long. Additional tooling/set-up charges may apply. We can laminate with a clear polypropylene add durability or a more appealing finish to a label.
UPC and 3 of 9 barcode creation and printing. (We do not register or obtain UPC registration but can create code from numbers supplied.)
CMYK aqueous full color short-run (generally less than 10,000 labels depending on label size and configuration) digital label printing. Printed label sizes ranging from 2” – 8” wide by 2” – 12” length. (Note: sheets can be longer but corners will be squared)
Sequential numbering and barcoding available when digitally printed on roll label stock.
We’ve all heard the phrase, “a picture is worth a thousand words.” Nowhere is this more important than when you are trying to sell products online. It’s hard enough just to get people to your site to see your products, so when they do get there, why not show them the best possible images of your products. You don’t need to hire a professional photographer or marketing firm to accomplish it either. Here’s how to create your own White Box and produce your own professional looking product images.
What you’ll need:
Cardboard Box
Box Cutter
Tape Measure
2 Small Lamps
White Pillow Case or Bed Linen
White or Colored Poster Board
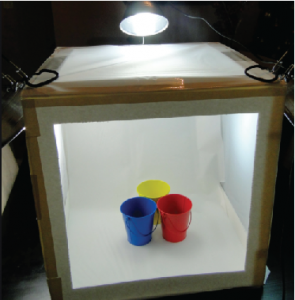
The first thing you will want to do is decide on the size of the area you will need to hold and photograph your products. You’ll need to know the Length, Width and Height of the products you want to photograph. Once you have know this (or at least the average L x W x H of your products) you can start building the frame of the White Box. I always like to go a little bigger than product I am photographing so that I have more room to play with. You can always crop your photo’s later. At the same time, I always worry about space and storage requirements for when I’m done so I try not to go to big. I recently purchased a new inkjet printer and I find that this box will work perfectly for my my needs and the best part is that I won’t have to spend any extra money. Look around and see if you have any cardboard boxes that will fit your needs. Assuming that you found a box that will fit your needs, we can now move on to the cutting stage. What we are looking for here is to create a box with 4 openings, the two sides for the lights to shine through, the top and the front face opening for viewing the product. You’ll want to create an open frame on the 2 sides, the top and the front by cutting the centers out. Starting with the top left end of any one of three sides you will cut, make a mark about an inch or two in from the edges of all four corners. Use your box cutting tool and score the cardboard from point to point. The center should now be cut out and can be thrown away. Repeat this process for the others sides as well as the and front. Cuts do not need to be precise, so you don’t have to measure or use a straight edge to mark the lines unless you feel more comfortable doing it that way.
Now you should have a box that looks like this. Next, insert your white or colored poster board to the interior of the box. Tape the poster board near the top of the box. Let the paper lay naturally and then push the front edge back but do not create a crease. You are looking to end up with a gentle curve in the back corner and a flat surface for the products to sit. The poster board can be white or any color that you think helps make your product stand out best. Feel free to experiment with different colors.
Once the poster board is in place, take your white linen and drape it over the top and the left and right sides. You’ll want to keep the front open, as this opening that you will take the pictures through.
Finally, place one of the lamps on the left side and on on the right side of the box so that the bulb is pointing toward the middle of the box. I prefer to use a 40 watt frosted bulbs in lamps that have a back shade that directs the light in one direction. Be sure that the bulb is not touching the linen, as this could start a fire.
Now turn on your lamps, place your product on the poster board and start taking those pictures. If you frame your shots well, you won’t even have to crop your images. It’s a good thing to experiment with different style and wattage light bulbs to get the exact look you are going for. Good luck and happy shooting!


 Click
Click 
 We’ve all heard the phrase, “a picture is worth a thousand words.” Nowhere is this more important than when you are trying to sell products online. It’s hard enough just to get people to your site to see your products, so when they do get there, why not show them the best possible images of your products. You don’t need to hire a professional photographer or marketing firm to accomplish it either. Here’s how to create your own White Box and produce your own professional looking product images.