Bath Bomb Labels: How to Choose the Right Size, Material & Printing Method

Choose bath bomb label sizes, packaging formats and materials for handmade bath products. Learn how to measure bags, boxes, jars and tins, then compare sheet, roll and custom printing.

Bath bombs are often brightly colored, textured and individually shaped, but their labels belong on the finished package—not on a hypothetical standard-size bath bomb. A round bath bomb in a clear bag needs a different layout from a boxed bath bomb, a jar of minis, or a four-piece gift set. The right label should fit the package, remain readable, and hold up during storage, shipping and retail handling.

Quick answer: To choose bath bomb labels, first select your packaging, measure its flat printable area, leave clearance from seals and folds, then print a full-size paper test. White or kraft paper often works for dry cartons and gift boxes; printer-compatible synthetic film is worth testing on packages likely to encounter humidity or damp hands. Use sheet labels for flexible small batches, compatible blank rolls for roll-fed printing, or custom printing when you prefer ready-to-apply labels.

This guide covers sizes, materials, design, print methods, application tests and practical U.S. cosmetic-labeling considerations. For product options, browse Soap Labels (which also supports artisan bath products), Blank Labels and Packaging Labels.

At a Glance: Best Bath Bomb Label Starting Points

Package or surface Starting size to test Best use Measure before ordering
Small cello or heat-sealed bag 1.5″ circle, 2″ circle or 2″ × 2″ Logo, fragrance or front identity Flat area below the seal, wrinkles and gusset
Medium clear bag or pouch 2″ × 3″ or 3″ × 3″ More branding and product information Flat filled face, not empty bag width
Single bath bomb carton 2″ × 2″, 2″ × 3″ or 3″ × 3″ Front identity on a rigid panel Distance from folds and opening flap
Gift box for several bath bombs 3″ × 4″ or 4″ × 3″ Collection name, scent mix and branding Actual top or front panel after closure
Jar or tin lid 2″, 2.5″ or 3″ circle Lid branding Flat diameter inside any rim or bevel
Ingredient or direction panel 2″ × 3″, 2″ × 4″ or larger Supporting information Amount of copy, font size and legibility

These are cutout test sizes, not guaranteed fits. A package’s stated dimensions do not necessarily equal its usable label area. Use a sample of the exact bag, carton, jar or tin you intend to sell.

Quick Start: Choose the Label Location First

A bath bomb does not offer a stable adhesive surface. Fragrance oils, powders, uneven texture and fragile edges make direct adhesive application unreliable in many situations. Start with a bag, wrapper, box, label band, tag, jar or tin instead. Packaging also gives customers a place to find fragrance, product identity, directions and other information without printing on the bath bomb itself.

For a clear bag, decide whether the front label will cover the product. If the bath bomb’s colors and texture are part of the attraction, a smaller round or rectangular label might work better. For a carton or tin, use the flat panel rather than wrapping important text around curved corners. For a multi-pack, consider a generous gift-box label plus an information panel rather than squeezing everything onto a tiny sticker.

One useful question

Does the buyer need to see the bath bomb through the package? If yes, prioritize a smaller front label and give ingredient or instruction text a separate readable panel. If no, a larger rectangular label can carry a more developed brand design.

How to Measure Bath Bomb Packaging for Labels
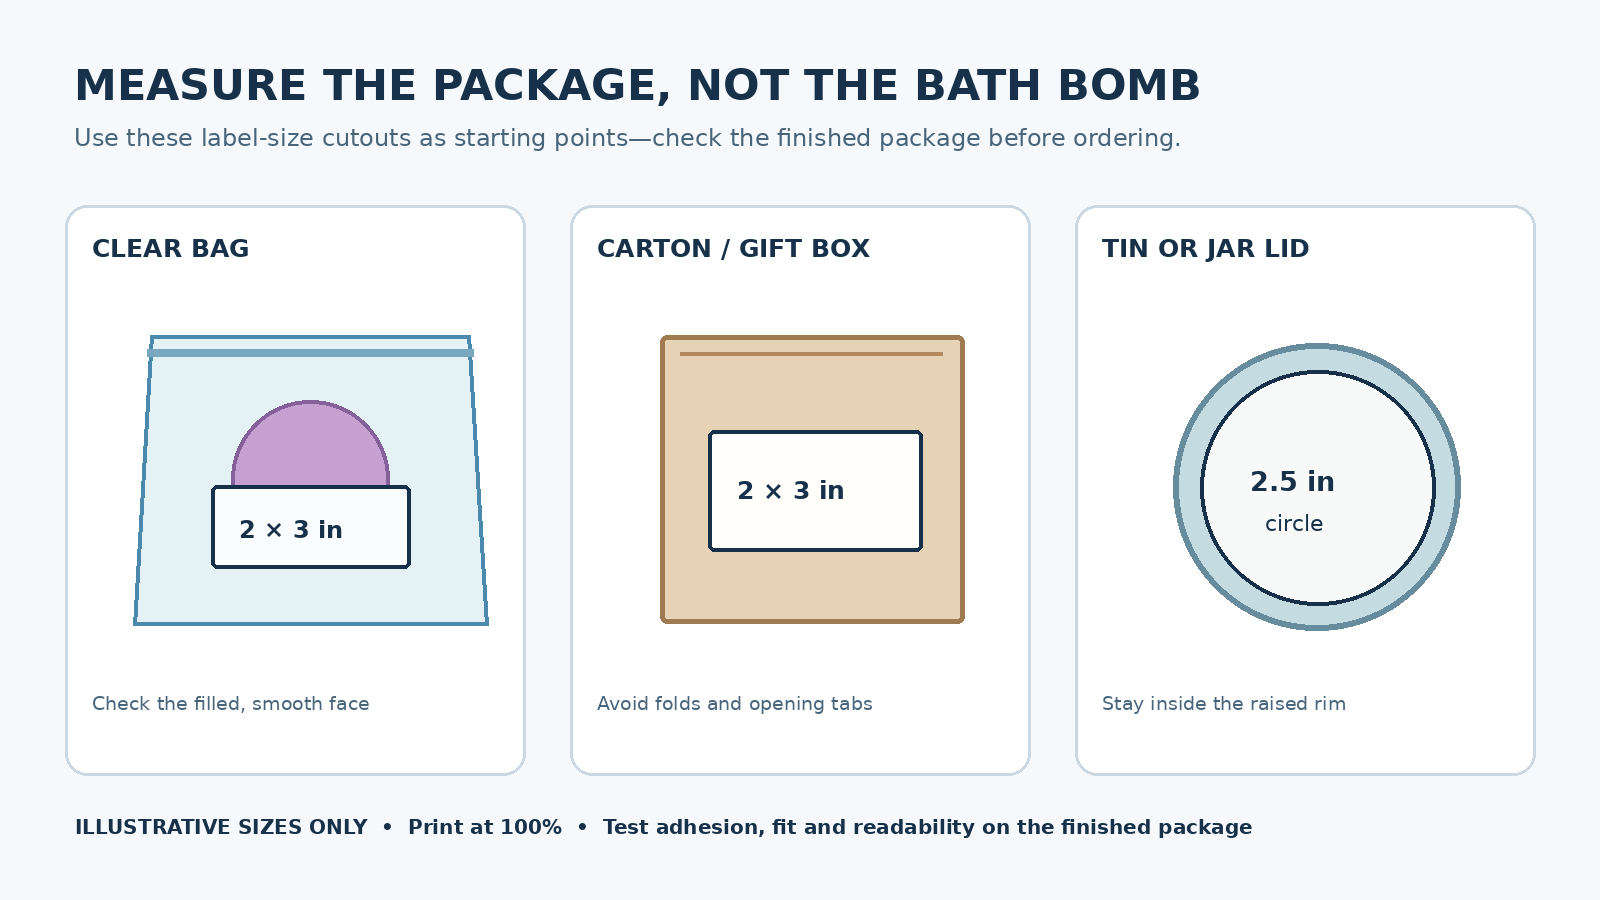
Bath bomb label packaging size guide for bags, boxes, jars and tins
Measure the finished package and test label sizes before ordering. Select the image to view the guide at full size.

There is no reliable conversion from a bath bomb’s weight or diameter to the label size. A 2.5-inch ball can be wrapped in several different bags or placed in cartons with very different flat panels. Measure the exact finished package, ideally after it has been filled and closed.

Bags, shrink wraps and clear pouches

  1. Fill and close a sample using the same number and size of bath bombs as the retail product.
  2. Find the flattest usable face; do not measure across a heat seal, zipper, folded gusset or tightly wrinkled film.
  3. Record the usable width and height and subtract a little room for alignment and visible packaging around the sticker.
  4. Make paper cutouts in two or three candidate label sizes. Tape them onto the package to compare the view of the product, artwork space and readability.
  5. Apply a real label sample and check whether it stays flat through ordinary handling and temperature changes.

A package labeled as 4″ × 6″ might have substantially less label-ready space when filled with a round bath bomb. A smaller sticker centered on the smoothest front portion is often more dependable than a label extending across a wrinkle.

Boxes, cartons and gift sleeves

Measure the actual flat panel between fold lines. Keep important text away from the opening flap, seam and lid edge. A label that fits a box top when the lid is open may crease once the box is closed. For a folding carton, apply a sample before and after final assembly. If a graphic has to cross a fold, test a material and adhesive designed for that bend rather than assuming any stock will work.

Jars and tins

A round lid label is measured by the usable flat diameter, not the advertised diameter of the jar. Raised rims, recessed centers and bevels can reduce space. A 3-inch lid may need a circle smaller than 3 inches. For the sidewall, measure straight usable height and consider the curvature and seam allowance before choosing a wrap label. See our Round Labels options for common circle formats.

An easy physical size test

Print the proposed label outlines at 100% or Actual Size on ordinary paper. Cut them out, tape them to the real package and view the result from a normal shopping distance. This test quickly reveals issues that screen mockups miss: crowded copy, hidden product, wrinkles, folds and poor contrast.

Choose the Right Packaging Format

Individually bagged bath bombs

Clear bags are useful for showing color and texture. They are also sensitive to wrinkles and heat-sealed edges, so choose labels with a moderate footprint and test adhesion on the actual film. A small front circle can carry the scent and brand, while a second information label may be placed on the back when needed. Clear film material should not be assumed compatible with every adhesive.

Single-bomb cartons

Cartons offer a flat surface and room for stronger shelf branding. A front panel might feature the bath bomb scent, illustration and quantity, while a side or back panel provides the information appropriate for the product. White uncoated, semi-gloss and kraft materials can all be attractive on a dry carton when printer-compatible.

Jars of mini bath bombs or bath fizzies

Clear plastic or glass jars work for multiple small bath products. Common choices include a circular lid label and a rectangular side label. Use the lid for quick brand identification and the side for details. If jars will be handled near a sink, consider a moisture-resistant synthetic film and test the complete printed label, including edges and adhesive.

Resealable pouches and stand-up bags

Pouches give a larger front panel for branding, but the zipper, gusset and product fill can cause curvature. Choose a label that stays on a reasonably flat area when the pouch is fully filled. Test both the front and the back if you plan separate product identity and information labels.

Bath bomb sets and seasonal gift boxes

Multiple scents and different bath bomb colors create an opportunity for a unified collection label. A main sticker can show the set name and brand, while a larger back label or insert carries product-specific information. Do not assume a decorative insert automatically replaces any label required for the particular product and market; review the applicable requirements.

Packaging format Branding advantage Practical risk Good first test
Clear bag Bath bomb remains visible Wrinkles, seals and flexible film Small round or 2″ × 2″ label
Folding carton Flat, easy-to-align panel Folds and opening tabs 2″ × 3″ rectangle
Jar with lid Repeatable lid branding Rim clearance and moisture 2″–3″ lid circle
Resealable pouch More design space Gusset and zipper interference 3″ × 3″ or 3″ × 4″ cutout
Gift box Premium collection presentation Variable contents and info space 3″ × 4″ front plus info panel

Best Label Materials for Bath Bomb Packaging

Bath bombs are usually stored dry, even though they are ultimately used in water. That distinction matters. A dry display box doesn’t necessarily need the same label as a jar that will repeatedly be opened with damp hands. Humidity, oils, shipping friction and package surface can be more important than the word “waterproof” on a material name.

White uncoated paper

White uncoated labels are a practical option for boxes, paper wraps, dry product packs and in-house color or monochrome printing, provided the exact stock suits your inkjet or laser printer. They make a clean background for fragrance names, legible black text and many branding styles. Paper is generally not a good choice for repeated wet handling unless a specific construction is rated for it.

Brown kraft labels

Kraft material suits natural, handmade and botanical packaging aesthetics. Be aware that printed colors often appear muted or darker on brown stock than on a white proof. Check contrast on small ingredient type and barcodes. Ordinary kraft paper is not inherently water resistant and should be evaluated for the storage environment.

Semi-gloss and high-gloss papers

Gloss can complement vivid bath bomb colors and premium retail collections. It may produce stronger color impact, but it does not automatically make the label waterproof. Confirm coating compatibility with your printer’s ink or toner and test for smudges and abrasion once printed and applied.

Clear labels

Clear film can give a subtle, almost printed-on-package appearance on smooth pouches or jars. Test it with the actual bath bomb behind it. Light-colored artwork may disappear against the colorful product, especially because typical desktop printers cannot print white ink. Clear stock can also reveal adhesive patterns or bubbles on certain surfaces.

White synthetic film

A compatible polypropylene or polyester label may be the better starting point for moisture-prone containers or heavily handled pouches. But a water-resistant film does not guarantee waterproof ink, adhesive or overall printed performance. Match the material to your printing process and application surface; test the completed print after ordinary handling and moisture exposure. See the Waterproof Labels guide for the distinction between water-resistant and waterproof labeling systems.

Material Visual effect Best starting application Check carefully
White uncoated paper Clean, natural finish Dry cartons, back panels Moisture and ink/toner compatibility
Brown kraft paper Rustic, handmade appearance Dry gift and box packaging Color and text contrast
Gloss or semi-gloss paper Bright retail color Smooth dry boxes or wraps Coating, smear and rub resistance
Clear film Minimal look Smooth transparent bags or jars Contrast, bubbles and white-ink limitation
White synthetic film Durable-looking, practical finish Damp-handled jars or bags Full print, adhesive and exposure testing

Sheet Labels, Blank Rolls or Custom Printed Labels?

The best printing approach depends on how many fragrances you offer, how often your artwork changes and which printer you own. A small business producing ten seasonal scents may favor flexible sheets, while a larger production operation may benefit from a compatible dedicated roll-fed printer or professionally finished labels.

Blank labels on sheets

For small batches and frequent scent changes, blank sheet labels are convenient. You can print several fragrances on the same label layout and change text without ordering a new printed run. Confirm the correct inkjet- or laser-compatible material and the exact sheet layout. Use matching label templates for the size, margins and labels per sheet.

Blank inkjet roll labels

Blank roll labels can support efficient production on compatible Epson, Primera, Afinia and other roll-fed color-label printers. Confirm your specific model’s requirements for core size, outside roll diameter, sensing gap or mark, print width and feed orientation. Width across the roll and length in the feed direction are not interchangeable, even if the label dimensions look similar on paper.

Custom printed roll labels

If you prefer finished labels rather than running your own printer, custom printed rolls may work well for stable artwork and repeating product lines. Check proofs carefully: fragrance names, color details, ingredient text and any variable product information should match the approved design. Ask about material, finish, quantity, lead time and label orientation for hand or machine application.

Printing method Good fit Main benefit Verify before ordering
Desktop inkjet/laser sheets Prototypes, seasonal scents, smaller batches Flexible in-house updates Correct material and template
Dedicated inkjet rolls Repeated printing and larger batches Roll-fed workflow Core, OD, sensing, orientation and media
Professionally printed rolls Repeat designs and no in-house printer Ready-to-apply consistency Artwork proof, quantities and finish

Design Bath Bomb Labels That Customers Can Read

Build a clear front-panel hierarchy

From a normal shopping distance, shoppers should find the brand, product identity and fragrance or variant without searching through tiny typography. Put these first. Colors and small ingredient illustrations can help distinguish lavender, citrus and unscented lines, but the overall label system should stay consistent across fragrances.

Reserve space for information before choosing the size

Packaging content can include product identity, net quantity, ingredients, business details, directions, cautions and batch codes as applicable to the product. Do not assume that every bath bomb requires exactly the same wording. The formula, claims, country, sales channel and packaging arrangement can affect what is required. Decide where that information will go before ordering tiny labels.

Keep important copy away from folds and seals

Use a safe margin around edges, pouch gussets, carton folds and heat seals. Do not put a barcode over a wrinkle or seam, and keep QR codes on smooth flat areas. Print proofs at actual size, not enlarged on a monitor; if the ingredient copy becomes difficult to read, give it a larger dedicated panel.

Use contrast intentionally

High-contrast printing is especially important on transparent bags and kraft paper. Check a clear label against the actual bath bomb color, not a white mockup background. A pale lavender scent name over a pastel bath bomb can disappear even when it looks excellent on screen.

Establish a repeatable scent system

A consistent layout lets customers identify your brand while distinguishing variants. Try keeping your wordmark, placement and typography stable while changing a narrow color band, fragrance illustration or scent name. This approach also reduces errors when printing multiple bath bomb scents on the same production day.

Bath Bomb Labels and U.S. Cosmetic Labeling: Practical Considerations

Bath bombs are commonly marketed for bathing and personal care, which means cosmetic-labeling requirements often matter in the United States. The actual product, intended use and claims determine the requirements; this article is not a legal compliance determination for a particular formula. Claims about treating disease, relieving a medical condition, or changing body structure or function can raise additional drug-regulatory questions. FDA advises that cosmetic claims must be truthful and not misleading.

For retail cosmetics, the FDA’s labeling guidance covers matters such as product identity, accurate net quantity, the responsible business’s name and place of business, ingredient declarations, and appropriate warnings or directions where required. Placement and typography requirements also apply; small labels are not automatically exempt from every rule. Review both inner and outer packaging arrangements when applicable. Read the official FDA summary of cosmetic labeling requirements and FDA guidance on cosmetic claims.

The Modernization of Cosmetics Regulation Act (MoCRA) adds other obligations for some businesses, with certain small-business exemptions that are not universal. For production and compliance decisions, check the current FDA small-business cosmetics fact sheet and consult qualified regulatory advice when needed. Do not use this buying guide as a substitute for product-specific review.

For the label-buying decision, the practical lesson is simple: calculate how much readable space your actual product information needs before choosing the sticker dimensions. A decorative front label may need a separate back label, carton panel or other compliant labeling arrangement.

How to Test Adhesion, Moisture Resistance and Print Quality

  1. Use the actual finished package. Fill, seal and close it exactly as it will be sold.
  2. Apply in suitable conditions. Follow the label supplier’s recommendations for temperature, surface preparation and pressure; avoid touching the adhesive with oily fingers.
  3. Inspect edges and seams. Look for lifting on wrinkled bags, flexible pouches, curved tin walls and tight corners.
  4. Perform normal handling tests. Pack products, move them between shelves, rub the printed area gently and open and close the package where applicable.
  5. Try moisture exposure that matches reality. For bath-side jars or damp-handled packaging, handle the completed label with damp hands and monitor for smearing, lifting or curling. Don’t assume a short splash test proves long-term immersion performance.
  6. Recheck readability. Read small text, scan barcodes or QR codes, and verify that your product identity remains obvious when multiple scents are displayed together.
  7. Repeat across a few samples. One perfect prototype does not establish reliable production. Test different filled packages and at least two or three labels when practical.

A special caution for direct-to-bath-bomb labeling

Adhesive labels are usually designed for packaging surfaces, not loose cosmetic powder products. A sticker placed directly on a crumbly or textured bath bomb can fail to adhere and may disrupt the product’s surface. A bag, band, box, jar or tin is generally a more consistent place for a printed label.

Common Bath Bomb Label Mistakes

Mistake Why it causes trouble Better approach
Picking by bath bomb diameter alone Does not account for bag, box or fill shape Measure the finished package
Crossing a heat-seal or zipper Creates a ridge or weak adhesive area Keep the sticker within a flat panel
Choosing paper for repeatedly wet packaging Can curl or soften Test an appropriate synthetic film
Assuming every film is waterproof Ink, coating and adhesive may fail Test the complete printed label
Overloading a tiny round front label Unreadable information Use a separate back or side label
Designing a clear label on white only Text disappears on colorful contents Proof against the real product
Using the wrong printer stock Feeding, toner or ink problems Match inkjet/laser/roll equipment
Skipping compliance review Claims or product details may be incomplete Consult official guidance for your market
Applying without a package test Corners, wrinkles and seams lift later Run a small finished-batch test

Bath Bomb Label Buying Checklist

  1. Choose the package: clear bag, carton, pouch, jar, tin or gift box.
  2. Measure its usable panel: allow for folds, seals, rims and filled-package curvature.
  3. Test a size in paper: compare at least two layouts at 100% scale.
  4. Choose a printer-compatible material: paper or kraft for suitable dry packages; film when the actual environment justifies it.
  5. Plan required information: make room for product identity, ingredients and other applicable information.
  6. Select print format: sheet, compatible blank roll or custom printed roll.
  7. Test real labels: check printed color, adhesive, rubbing, moisture and legibility.

Frequently Asked Questions About Bath Bomb Labels

What size label is best for a single bath bomb?

It depends on the finished package, not just the bath bomb. Small circles such as 1.5″ or 2″, or a 2″ × 2″ square, can be useful paper cutout tests on clear bags. Boxed products may allow larger rectangular labels. Always measure the sample packaging.

Can I put a sticker directly on a bath bomb?

Direct adhesion is usually less reliable because bath bombs can be textured, powdery and fragile. Put the label on a bag, box, band or container and test the finished package.

Do bath bomb labels need to be waterproof?

Not always. A dry gift carton may work well with paper. A jar likely to be handled with damp hands may benefit from a suitable moisture-resistant synthetic film. Check the finished printing and adhesive—not just the face material.

What labels look best on clear bath bomb bags?

A small white, kraft or clear label can leave the product visible. The best choice depends on the bag film, bath bomb color and amount of text. Test contrast and adhesion on the real filled bag.

What label size works for a bath bomb box?

Common cutout starting points include 2″ × 2″, 2″ × 3″ and 3″ × 3″, but the correct size follows the flat carton panel and the space needed for content. Leave clearance at folds and lid edges.

Should I choose round or rectangular bath bomb labels?

Round labels are effective for circular tins, simple front logos and small bags. Rectangles typically give more room for directions, ingredients or multi-line fragrance names. Both can work when measured and tested.

Are kraft bath bomb labels water resistant?

Ordinary kraft paper is usually intended for dry packaging. Its brown background also changes the look of printed colors. Use an exposure-rated material when damp handling is expected.

Can I print bath bomb labels with a home inkjet printer?

Yes, on sheet-label stock specifically compatible with your printer. Use the matching template, print at actual size, and test printed color and drying before labeling production items.

Can I print them with a laser printer?

Yes, with materials approved for your laser printer. Do not substitute inkjet-only adhesive stock that is not rated for the laser process.

Are blank roll labels a good choice for bath bomb businesses?

They can be, especially when you use a compatible roll-fed inkjet label printer. Confirm the printer’s core, roll outside diameter, gap sensing and label orientation before ordering.

Should I use clear labels or white labels?

White gives predictable contrast and readability. Clear can look elegant on smooth transparent packaging, but the contents can reduce readability and common desktop printers cannot produce white ink. Test the design against the actual item.

How should I label a jar of mini bath bombs?

A round lid label plus a rectangular side label is a useful starting combination. Measure the usable lid circle inside its rim, then test the side label for curvature and humidity exposure.

What information belongs on bath bomb packaging?

Depending on the product, claims, market and packaging, information may include identity, net quantity, ingredients, responsible business details and relevant warnings or directions. Use official FDA guidance for U.S. retail cosmetics and obtain product-specific review where needed.

Is a QR code enough for the ingredient list?

Do not assume a QR code replaces information required on the physical label or package. It can supplement directions or product details, but required labeling must follow the applicable rules and placement requirements.

Can I print several fragrances on one sheet of labels?

Often yes, provided the sheet layout and printer software support it. Keep the template dimensions identical and verify that each printed label matches the correct fragrance and packaging before application.

What is the best way to test a label before ordering in quantity?

Make a full-size paper fit test, then apply a real printed label to a finished retail package. Inspect adhesion, readability, scuff resistance, normal moisture exposure and product visibility over a representative handling period.

Need Help Choosing Bath Bomb Labels?

Start with your finished package measurements, expected moisture exposure and printer model. Then compare materials and sizes using Blank Labels, Round Labels and Free Label Templates. For handmade bath and body packaging, Soap Labels provides more application examples, while Waterproof Labels explains moisture-related material selection.

Shop blank sheet labels or inkjet roll labels, or review Packaging Labels for additional box, jar and pouch applications.
Soap Bar Labels: How to Choose the Right Size, Material & Printing Method

Learn how to choose the right labels for handmade soap bars, belly bands, boxes and tins—including size, materials, printing and packaging tips.

Handmade soap can look beautiful on its own, but the label helps a shopper identify the scent, recognize the brand and understand what is inside the package. A soap bar sold at a farmers market has different labeling needs from a boxed bar on a retail shelf or a solid shampoo bar packaged in a tin. The right choice depends on the packaging surface, the information you need to display and the way the finished product will be stored and handled.

This buying guide explains how to select soap bar labels for paper belly bands, full wraps, cartons, shrink-wrapped bars and round tins. You will also learn how to measure a band, compare white paper, kraft and synthetic films, and decide between sheet labels, roll labels or custom printing. For a detailed lookup of individual dimensions, see the Soap Bar Label Size Guide. To compare products ready to purchase, visit Soap Labels.

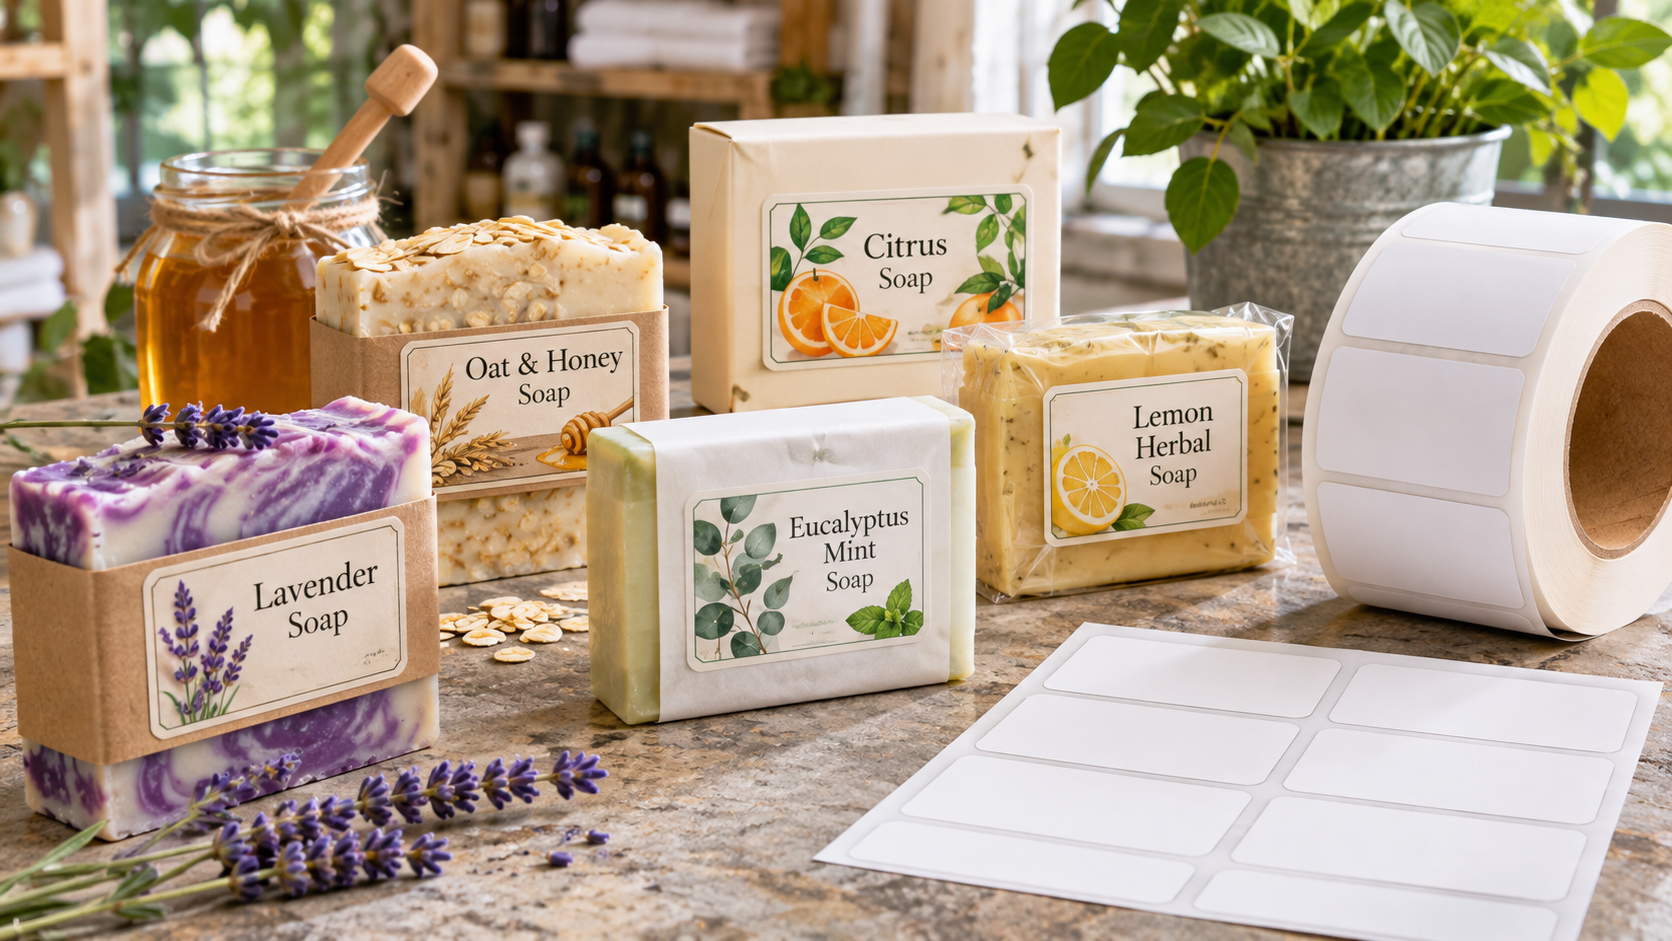
Handmade soap bars in paper belly bands and printed packaging beside blank sheet labels and a roll of labels.
Soap packaging can use belly bands, box labels, full wraps and smaller accent labels.

Quick Start Guide: Which Soap Labels Should You Choose?

Start with the package, not only the weight of the bar. A four-ounce square bar, a long narrow bar and a rounded artisan bar may all weigh the same but need different label dimensions. Choose the packaging method first, then measure it.

Soap package Common sizes to test What to check
Paper belly band 2″ × 6″, 2″ × 8″ or 3″ × 8″ Full path around the bar, overlap and how the band closes
Front label on a soap box 2″ × 3″, 3″ × 3″ or 3″ × 4″ Actual flat panel, corners and room for the brand
Shrink-wrapped or sleeved bar 2″ × 3″ or 2″ × 4″ Film compatibility, smoothness and readability
Ingredient or back panel 2″ × 4″ or 2″ × 5″ Amount of information and printed legibility
Round soap tin or package seal 2″, 2½″ or 3″ circle Flat lid diameter inside any rim

At a Glance

Rustic handmade look: kraft paper. Versatile small-run choice: compatible white matte/uncoated sheet labels. Moisture-prone package: test printer-compatible synthetic film. Roll-fed production: blank roll labels. No in-house printer: custom printed labels. First action: cut a plain-paper sample and test it on the real finished package.

Quick Soap Bar Label Size Chart

Use the following dimensions as paper-cutout tests, not guaranteed fits. The available labeling area depends on the bar shape, outer wrapper, box and closure. Product availability and printer requirements can also differ between sheets and rolls.

Packaging method Suggested test sizes Primary use Common pitfall
Guest soap or sample 1½″ × 2″, 2″ × 2″, 2″ × 3″ Small logo or fragrance identifier Too much copy on a small front
Standard artisan bar, front label 2″ × 3″, 2″ × 4″, 3″ × 3″ Brand, scent, product identity Label extends onto uneven soap or wrapper
Narrow belly band 2″ × 6″, 2″ × 8″ Centered wrap that leaves soap exposed Band too short to close securely
Wide belly band / sleeve 3″ × 8″, 3″ × 11″ Additional brand or information space Band hides decorative top or tears on a corner
Soap box label 2″ × 3″, 3″ × 4″, 3″ × 5″ Flat front-panel branding Printing too near folds or box edges
Ingredient panel 2″ × 4″, 2″ × 5″ Supporting product information Unreadably small type
Solid shampoo tin or seal 2″, 2½″, 3″ circle Lid branding and product identification Circle crosses a raised lid edge

For more sizing examples, see the dedicated soap bar size guide. When you know your dimensions, use free label templates and compare matching materials through our soap-label options.

How to Measure Soap for a Belly Band or Front Label

Measure the finished, sale-ready soap after it has completed its intended curing and packaging process. A sample taken before a bar has reached its normal final dimensions can give a misleading wrap length. Handmade bars are not always perfect rectangles, so use the widest and thickest points that the band must pass over.

Measuring a front label

  1. Choose the exact application surface. For a box, measure the flat front panel. For shrink film, use the smooth portion of the wrapped package rather than the underlying bar.
  2. Record usable width and height. Stay away from seams, folds, wrinkles, taper and rounded edges.
  3. Leave a little clearance. A small visible border makes centering easier and reduces lifting where labels meet corners.
  4. Make a physical sample. Print a rectangle at actual size, cut it out and tape it in place.

Measuring a belly band

A belly band travels around a chosen cross-section of the bar. For a rectangular bar, the starting wrap path is approximately two times the width plus two times the thickness (or, when wrapping the other direction, two times the length plus two times the thickness). Add enough closure allowance for the design and adhesive method. The band’s other dimension controls how much of the bar it covers.

Worked example: A bar measuring 3½″ long × 2½″ wide × 1″ thick is wrapped around its 2½″ × 1″ cross-section. The approximate path is 2 × (2½″ + 1″) = 7″. Adding ¼″–½″ of overlap gives a starting band length of roughly 7¼″–7½″. A 2″ × 8″ label may be worth testing, but the actual overlap and closure must be checked. The extra stock could be trimmed or folded only if compatible with the intended product and application.

This is a geometry example, not a universal recommendation. A thick, textured or irregularly shaped bar may require more allowance, and a paper band with an external seal behaves differently from a fully adhesive wrap. Check that any adhesive seam attaches to the intended material and does not become the first point of failure when the product is handled.

Packaging Tip

Test one bar from the middle of a production batch and a few of the largest finished bars. A band that closes on the smallest bar but pops open on a larger one is not production-ready.

Choose the Packaging Format Before the Label

1. Paper belly bands for handmade soap

Belly bands are popular when the bar’s color, texture or decorative swirl is part of the product appeal. They can be narrow and simple, or wide enough to carry a logo, scent, net weight and secondary text. A kraft band complements natural-looking bars, while white paper gives more predictable color reproduction.

For a self-adhesive band, confirm that the label stock, backing and seam work on the chosen packaging. With an uncoated paper sleeve, the closure may instead use a separate label or seal. A paper belly band is not the same thing as a waterproof label: keep the packaged product away from prolonged moisture until it is sold.

2. Boxed soap with a front and back label

Boxes offer flat, dependable surfaces and make it easier to organize product information. A front label can emphasize the brand and scent while a second side or back panel presents the information consumers need. Choose a label that remains clear of the carton’s folds, opening flap and closure. A 2″ × 3″ front label or larger rectangle can be a good cutout to test, depending on the box.

Boxed soaps are also useful for multiple scents that share the same carton. Changing only the front label reduces the number of unique boxes a business must store, provided every package still carries the correct product information.

3. Shrink-wrapped and clear-sleeved soap

Clear film lets the soap remain visible while protecting the bar from handling. Labels usually go on the film rather than on an uneven soap surface. The correct material depends on the actual shrink film, any heat involved in wrapping, the finished surface texture and how the product will be stored. Test printed labels after wrapping, not just on a flat sample of unused film.

4. Full wraps and printed sleeves

Full wraps use more printable area and can create a uniform retail look. They may be suitable for branding systems with many fragrance variations and substantial information requirements. The trade-off is greater design complexity: the seam must sit where it will not obscure important text, and the graphics need to align after the wrap is closed. When an adhesive label spans a corner, its material and adhesive must tolerate the fold.

5. Round soaps, solid shampoo bars and tins

Specialty products often fit round containers better than standard soap boxes. A circular top label can identify the fragrance or product type, while an additional bottom label provides supporting information. Measure inside raised tin rims, and consider how moisture or oils will affect the label after the package is opened.

Packaging Strength Potential drawback Good starting point
Belly band Shows the actual soap Wrap fit and closure 2″ × 8″ cutout
Folding carton Flat branding and info space Additional packaging cost 2″ × 3″ front cutout
Clear sleeve Protects and showcases product Film/adhesive compatibility 2″ × 3″ on finished film
Full wrap More graphic area Seam design and folds Measure full wrap path
Round tin Reusable and compact Small label surface 2″–3″ circle test

Best Soap Label Materials: Matte, Kraft, Gloss, Clear and Film

Material choice should follow the package and exposure, not just a preferred appearance. Soap can be stored in dry gift packaging, on a humid bathroom shelf, or in a shower after purchase. Those are different label environments. A label on a disposable carton may never contact water, while a label on a reusable tin may be handled with damp hands every day.

White uncoated or matte paper

White uncoated labels are a practical option for dry indoor packaging, especially soap boxes, information panels and everyday retail branding. Their non-gloss surface works well with clear typography and designs that allow handwritten batch or scent notes. Choose stock approved for your specific printer; not every matte stock is interchangeable between inkjet and laser equipment.

Brown kraft paper

Kraft communicates a rustic, handcrafted aesthetic and works well with earthy colors and minimally printed wraps. Because the stock is brown, ink colors can appear darker or less vivid than they do on white material. Run a color proof before committing to a large order. Kraft paper is generally not the choice for persistent wet contact.

White semi-gloss or high-gloss paper

Gloss finishes can make bright citrus fragrances, colorful botanicals and premium gift designs stand out. Check compatibility with the actual ink or toner system, and test for scuffing during shipping and at market displays. A glossy appearance alone does not make paper waterproof.

Clear films

Clear film labels create a low-visibility look on smooth packaging, particularly clear bags, tins and transparent cartons. The background still matters: a transparent label over busy soap colors may reduce text contrast. Most standard desktop printers do not print white ink, so light elements may disappear against a dark soap or wrapper.

Water-resistant synthetic film

Polypropylene and compatible polyester-film constructions are worth testing for labels exposed to damp hands, condensation, handling or bathroom storage. However, water-resistant face stock does not automatically mean the finished printed label is waterproof. Ink durability, coating, adhesive, package surface and application conditions all influence performance.

Material Typical application What to test
White uncoated Boxes, back panels, paper wraps Print quality and dry rub
Brown kraft Artisan belly bands, rustic packaging Color contrast and closure
Gloss / semi-gloss Bright retail branding Ink or toner compatibility and scuffs
Clear film Transparent sleeves and premium packaging Contrast, adhesive visibility and bubbles
White synthetic film Moisture-prone, frequently handled packaging Water resistance of the finished print and bond

Moisture Testing Tip

Make test packages with the actual printed stock and adhesive. Handle them with dry and damp hands, rub the printed surface, and inspect edges after normal storage. Choose based on the finished package, not the label-material name alone.

Should Soap Makers Buy Sheet Labels, Roll Labels or Custom Printed Labels?

The best format is the one that matches the printer, number of variations, application method and batch size. A growing business does not need to switch to rolls simply because it has grown—especially if it makes many scents in short runs. Conversely, a smaller shop may prefer rolls if it already owns a compatible roll-fed printer or applicator.

Blank labels on sheets

Sheet labels are convenient when printing on an approved desktop inkjet or laser printer. You can make a small batch of lavender soap labels, switch to citrus and then print a seasonal gift label without changing the production setup. Use the correct sheet template, printable material and printer settings. Print a plain-paper test at 100% before using adhesive sheets.

Blank roll labels

Rolls work well with compatible Epson, Primera, Afinia and other roll-label printers. They may improve workflow when printing larger volumes or using an applicator, but you must verify core size, maximum outside diameter, gap or black-mark sensing, feed direction and roll orientation. For roll labels, the width across the roll and the feed length are separate dimensions. A correct label size can still be supplied in an orientation that does not suit the printer or applicator.

Custom printed labels

If you do not want to print in-house, professionally printed labels can arrive ready for application. This can be appealing for consistent retail packaging or wholesale programs, particularly when brand colors and repeatability matter more than frequent design changes. Confirm minimum quantities, proofing, finishing, material and application specifications before ordering.

Feature Blank sheet labels Blank roll labels Custom printed
Printer needed Compatible desktop printer Compatible roll printer No
Frequent scent changes Easy to handle in short runs Works with suitable setup May require separate print quantities
Continuous production More manual reloading Often efficient Ready to apply
Artwork control In house In house Approved before printing
Critical check Sheet layout and media Core, OD, gap, direction Proof, lead time, specification

Explore blank labels for inkjet and laser printers, blank roll labels, and the ready-to-buy selections on the Soap Labels page.

Design Soap Labels That Look Good and Remain Readable

Give the front label one main job

A shopper should recognize the soap and fragrance quickly. Use the front panel for the product name, scent or variant and clear brand identity. Avoid shrinking everything to fit a detailed ingredient list onto a tiny belly band. A back or side label, carton panel or alternate wrap may be better for supporting details.

Plan information before choosing a label size

Depending on the product’s classification and selling market, packaging may need product identity, net quantity, business identification, ingredients and other information. Do not assume that a decorative soap band or template automatically fulfills those obligations. Reserve sufficient room in the package design, then evaluate final print legibility at actual size.

Understand the difference between soap, cosmetics and drugs

U.S. labeling requirements depend on how the product is made and represented. The U.S. Food and Drug Administration explains that a product meeting the specific definition of traditional soap and marketed only as soap is generally handled under the Consumer Product Safety Commission framework. Products marketed with cosmetic claims—such as moisturizing or deodorizing—or drug claims may fall under different FDA requirements. A cleansing bar containing synthetic detergents may be treated as a cosmetic even if sold as “soap.” Review the FDA’s soap/cosmetic/drug explanation and its Cosmetics Labeling Guide, and obtain product-specific compliance review as needed.

This is practical packaging guidance, not a legal determination about a particular formula or claim.

Barcodes, QR codes and batch codes

A barcode needs sufficient physical size, quiet zones and contrast to scan on the finished package. Avoid placing it across a belly-band fold or seam. A QR code should lead somewhere useful, such as product details, directions or a reorder page, and should be tested on a real package using several phones. If you print batch or lot codes after your main labels are made, leave a dedicated writable or variable-print area.

Design consistency across scents

A coordinated system helps customers distinguish a lavender bar from citrus or unscented varieties while recognizing the same brand. Keep the basic layout and typography consistent, then vary a small, controlled color or illustration element. This approach can also simplify template management and make proofing easier.

Apply and Test Labels Before a Large Production Run

  1. Choose a finished sample. Apply the proposed label to a fully packaged, representative bar.
  2. Clean the package surface if appropriate. Follow the packaging supplier’s guidance; do not use aggressive solvents that may damage film or carton finishes.
  3. Align the first edge. For a belly band, start square to the bar and wrap evenly, without forcing the paper to stretch over irregular edges.
  4. Close the seam deliberately. Verify that the overlap or seal uses an adhesive construction suitable for what it contacts.
  5. Test the actual environment. Include shelf handling, packing friction, temperature changes and any expected humidity.
  6. Check the printed information. Read it at actual size, scan any barcodes and inspect image quality after normal handling.

Look again after a day or two, not just immediately after application. Adhesive bond development and the stresses of shipping or display may reveal issues that a quick bench test misses.

Common Soap Labeling Mistakes to Avoid

Mistake Why it causes trouble Better approach
Choosing by soap weight alone Different shapes can share a weight Measure the finished packaged bar
Not allowing a belly-band closure The band may not meet or stay closed Test the wrap path plus seam allowance
Using paper in prolonged moisture Paper can weaken or lift Use an appropriate film when wet use is expected
Using printer-incompatible stock Poor print or feed performance Match the material to the actual printer
Printing over folds and edges Readability and adhesion suffer Keep important information in flat panels
Overloading a tiny front label Text becomes hard to read Use a separate information panel or larger package
Assuming “soap” is a single legal category Product claims can change classification Review the actual formula, claims and applicable rules
Skipping a production test Issues appear after a big print order Test several actual finished packages

Five-Step Soap Label Buying Checklist

  1. Choose packaging. Decide between a belly band, shrink film, carton, full wrap or tin before comparing label sizes.
  2. Measure and test. Record width, height and—when applicable—the complete band path and closure allowance. Print at full physical size.
  3. Choose material. Match paper, kraft, gloss or film to the actual surface and expected moisture/handling.
  4. Match the printing workflow. Confirm desktop sheets, blank rolls or custom printed stock; verify printer and application compatibility.
  5. Review the finished package. Check design, required information, scanability, adhesive hold and repeatability before ordering production quantities.

Ready to Choose Labels for Your Soap?

Compare paper, kraft, gloss and durable films in popular shapes and sizes. Shop blank sheet labels for desktop printing, blank rolls for compatible roll-fed printers or custom printed labels ready to apply.

Browse Soap Labels by Size and Material  |  Find Free Label Templates

Frequently Asked Questions About Soap Bar Labels

What is the best label size for handmade soap?

There is no single best size because a belly band, box front and clear sleeve require different dimensions. Common starting tests include 2″ × 3″ front labels and 2″ × 8″ belly bands. Measure the actual finished package before ordering.

How long should a soap belly band be?

Measure the path around the intended cross-section of the bar, then add closure allowance. For a rectangular bar, begin with twice the cross-section width plus twice its thickness. Confirm fit with a paper cutout.

Should I choose a belly band or a full wrap?

Belly bands allow shoppers to see more of the soap and suit artisan products. A full wrap provides greater space for graphics and information but requires more attention to seams, folds and closure.

Are kraft soap labels waterproof?

No. Traditional kraft paper is generally intended for dry packaging. For labels expected to face moisture or frequent damp handling, test a compatible synthetic film.

Should handmade soap have a waterproof label?

Not necessarily. A dry boxed bar or gift package may work well with paper. Labels on bathroom tins or damp-handled packaging may benefit from durable film. Test both the material and finished print.

What label works best on a soap box?

Rectangular and square paper labels often work well on smooth cartons. Try 2″ × 3″ or 3″ × 4″ as cutout examples, then choose based on the box’s true flat panel and the information you need to print.

Can I print soap labels on a home inkjet printer?

Yes, if the label stock and sheet layout are approved for that printer. Use the matching template and test at actual size before printing adhesive labels.

Can I use a laser printer for soap labels?

Yes, using laser-compatible materials designed to withstand your printer’s process. Do not run unsupported inkjet-only adhesive stock through a laser printer.

When do blank roll labels make sense for soap businesses?

They can be efficient with a compatible roll-fed label printer, continuous production or suitable applicators. Verify roll core, OD, sensing, and orientation before buying.

Can a soap label go directly on an uncovered bar?

Test cautiously. Uneven texture, moisture and oils can make direct adhesion unreliable. A belly band, shrink film or box generally provides a more consistent surface.

Can I use clear labels on soap packaging?

Yes, especially on smooth transparent packaging. Check text contrast against the actual soap color and remember that standard desktop printers often cannot print white ink.

What label material looks most professional?

That depends on the brand. Kraft supports rustic designs, matte white offers versatility, gloss emphasizes vivid graphics and clear film produces a minimal look. Fit and readability matter more than choosing one universally “best” finish.

Do I need ingredients on a soap label?

Requirements depend on the product’s actual regulatory classification, claims and market. Review the relevant FDA or CPSC framework and have the final package checked for your product rather than assuming the word “soap” determines every rule.

Can I put barcodes on soap labels?

Yes. Leave enough room for the barcode and quiet zones, avoid folds and curves, and verify that the printed code scans on the packaged item.

How can I prevent soap-label edges from lifting?

Keep labels on clean, compatible, relatively flat packaging surfaces; verify adhesive performance and avoid crossing stressed folds or uneven corners. Test the finished package under normal handling conditions.

Are sheet labels or custom printed labels better for a new soap brand?

Sheets give flexibility for low-volume seasonal scents and in-house changes. Custom printing removes the need for production equipment and may suit a stable design with repeat orders. Compare total workflow, not only price per label.

Need More Help Selecting a Soap Label?

Start with four decisions: (1) belly band, box, sleeve or tin; (2) the exact finished packaging dimensions; (3) expected moisture and handling; and (4) your printing method. If you are unsure of the size, print a full-scale test using a matching label template and compare it with a real soap package.

For dimensions by soap-packaging type, visit What Size Label for Soap Bars?. When you’re ready to compare available products, browse Soap Labels or the broader Blank Labels selection.

Supplement Bottle Labels: How to Choose the Right Size, Material & Printing Method

A practical guide to fitting and printing labels for vitamin, capsule, gummy and powder containers—from measuring the bottle to testing the finished package.

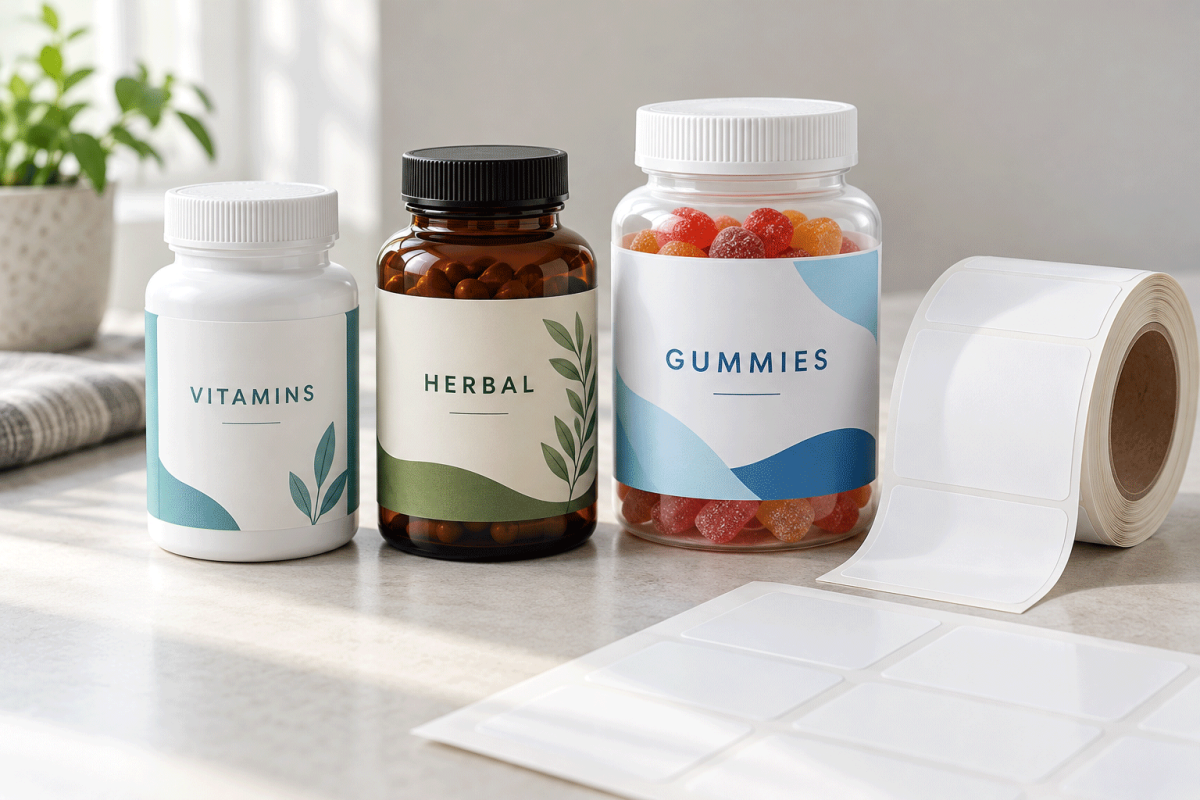
Supplement bottle labels need to do several jobs in a small space: identify the product, organize important information and stay attached through storage and daily handling. A label that looks right on a screen can still wrap crookedly, wrinkle at the bottle shoulder or leave too little room for readable text.

Start with the actual container, then choose the layout, material and printing method together. Capsule count and bottle capacity are useful descriptions, but they do not establish the dimensions of the smooth labeling panel. The same count can be packed in different bottles, and containers with the same capacity can have different shapes.

This guide walks through the practical decisions for vitamin bottles, herbal supplement containers, gummy packaging and powder tubs. For more sizing examples, use our Supplement Bottle Label Size Guide. For other container shapes, visit our Bottle Labels hub.

Quick answer: how do you choose supplement bottle labels?

Measure the bottle’s straight sidewall and circumference. Select a front-and-back or wraparound layout that provides enough space for the finished artwork. Choose label stock made for your printer and suitable for the bottle surface and expected exposure. Print a paper fit test at actual size, then test a printed adhesive sample before ordering a production quantity.

Paper can work well for dry indoor packaging. A compatible synthetic film is worth testing for bottles exposed to condensation, damp hands or frequent wiping. Water-resistant stock does not automatically make the printed ink, adhesive or complete package waterproof.

1. Choose a layout before designing the label

Begin with the information the package must carry. Reserve space for the main product identity and the supporting information before adding decorative artwork. If the design feels crowded, reconsider the layout or container rather than reducing all the type until it becomes difficult to read.

Supplement label layout options
Layout Practical advantage Check before ordering
Separate front and back Creates a focused front design and a dedicated information area. Both labels fit the smooth panel and can be applied consistently.
Single partial wrap Keeps branding and supporting content in one piece while leaving a visible gap. The gap remains clear of important text and the wrap tracks level.
Full wrap with overlap Uses more of the cylindrical surface. The adhesive bonds to the printed face beneath it; the seam does not cover information.
Body label plus secondary code label Separates fixed artwork from variable batch information. Secondary labels do not obscure required information and stay legible.

A round packer bottle usually supports a rectangular body label. A square or rectangular bottle may work better with individual face labels if its corners are tight. A broad powder tub offers more space, but its sidewall may taper enough to make a straight rectangular wrap unsuitable.

Decide where the seam should sit before placing text. Keep the main product identity centered in the intended front view, and make the information panel accessible when someone turns the bottle. Do not treat an extra label or lid sticker as a substitute for reviewing the package’s information requirements.

2. Measure the actual bottle

Use a production sample from the supplier you intend to buy from. Measuring a similar bottle or an online photograph can lead to an expensive mismatch.

  1. Find the straight sidewall. Identify where the shoulder ends and the bottom curve begins. The label should remain within that usable panel.
  2. Measure the usable height. Leave practical clearance above and below the label so normal placement variation does not push an edge onto a curve.
  3. Measure the circumference. Wrap a strip of paper around the intended label area, mark where it meets, then measure the strip flat.
  4. Check for taper. Compare the circumference near the top and bottom of the proposed label. A noticeable difference calls for a shorter label, separate panels or a shape designed for the container.
  5. Mark obstacles. Note molded seams, recessed panels, ribs and textured surfaces that could interrupt adhesion.
  6. Test the proposed size. Cut a paper rectangle, wrap it around the bottle and inspect it from every side.

A worked wrap-label example

Suppose your measured circumference is 7.25 inches and you want a 0.125-inch gap. The planned wrap width would be 7.125 inches: 7.25 minus 0.125. If the usable straight panel is 2.75 inches tall, a 2.5-inch-high test label would leave 0.25 inch of total vertical clearance when centered.

These measurements are an example, not a recommended stock size for every supplement bottle. Choose the final gap and clearance for your actual container, label construction and application process. If a nearby standard size changes the gap, test that size rather than scaling the artwork to fit an unsuitable label.

3. Compare size starting points without relying on capsule count

A short front label and a wraparound label serve different purposes. A front panel that fits well may still be too small for the entire package design. The examples below describe possible layouts; they are not guaranteed fits or a statement of stock availability.

Illustrative supplement label sizes, width across the bottle × height
Test size Possible role Main limitation
2 × 1 inches Compact front panel or secondary identifier. Limited room for supporting text.
3 × 2 inches Front or back panel on a suitably sized bottle. Measure curvature and available panel height.
4 × 3 inches Larger front panel or partial wrap. May be too tall for a short packer bottle.
6 × 2 inches Wrap candidate for a measured cylindrical bottle. Confirm circumference, seam location and information space.
8 × 3 inches Larger bottle or tub wrap candidate. Check printer limits and container taper.

In this table, width means the dimension traveling around the bottle. Roll-label product dimensions may describe the stock’s orientation across and along the roll. Check the listing and printer settings rather than assuming the first number always describes your artwork’s horizontal edge.

For capacity-based planning examples and additional measurement guidance, see the dedicated supplement bottle size guide. Keep the measured bottle specification with the artwork so a future packaging change triggers a new fit test.

4. Match the material to storage, handling and appearance

Think about where the bottle will spend its life. A dry cabinet, refrigerated product, busy retail shelf and gym bag present different conditions. Choose for those conditions before choosing a finish solely for appearance.

Label material selection
Material or finish Useful starting point What to test
White matte paper Dry indoor packaging with a clean, low-glare appearance. Scuffing, moisture exposure and adhesion.
Gloss or semi-gloss paper Colorful designs and a polished retail look. Ink compatibility, glare and rubbing.
Kraft paper Earth-toned herbal product branding. Contrast and how the brown background changes printed colors.
White synthetic film Bottles needing greater moisture resistance. Printed-image durability, adhesive performance and edge lift.
Clear film A transparent-label look on suitable containers. Text contrast against both the bottle and its contents.

Use stock specifically coated for your printing process. A material intended for laser printing may not accept inkjet ink correctly, and inkjet-only stock should not be put through a laser printer unless its manufacturer explicitly supports that use.

Clear labels need special attention on amber, dark or translucent bottles. Many desktop printers do not print white ink. A white area in the design can therefore remain transparent, and dark text may lose contrast against the package. Review a physical printed proof with the bottle filled as it will be sold.

Paper versus waterproof labels

Paper is a sensible option when the package remains dry and the printed sample survives the expected handling. For moisture exposure, compare appropriate waterproof label options and test the complete printed construction. Facestock, coating, ink or toner, adhesive and bottle surface all affect the result.

For refrigerated products, follow the label supplier’s application-temperature guidance. Applying a label to a cold, wet bottle can produce different results from applying it to a clean, dry bottle before refrigeration. Test the intended production sequence, including condensation after removal from cold storage.

5. Compare sheets, rolls and custom printing

The right format depends on your printer, order pattern and artwork. Small runs with frequent revisions favor flexibility. Repeated runs of approved artwork may benefit from a more streamlined production process.

Printing format comparison
Format Often useful for Confirm first
Blank sheet labels Short runs, multiple products and compatible desktop inkjet or laser printers. Sheet layout, printable area, media setting and alignment.
Blank inkjet roll labels Repeated batches on a dedicated compatible roll-label printer. Print width, core, roll diameter, gap sensing and material compatibility.
Custom printed roll labels Stable designs and labels supplied ready to apply. Proof, material, quantity, winding direction and application requirements.

A desktop sheet printer generally cannot accept label rolls. A thermal shipping-label printer also should not be assumed compatible with blank color-inkjet roll stock. Match the exact printer and media requirements before choosing the format.

If you apply labels with equipment, confirm the required roll direction, label presentation and liner arrangement with the applicator supplier. A roll that prints correctly can still be inconvenient or unsuitable at the application stage.

6. Build artwork around readable information

Start with the correct template at the final label dimensions. Keep important content inside the template’s safe area and extend backgrounds into the specified bleed area when the production process calls for it. Bleed and safe-area measurements vary, so use the requirements for the actual product or print provider.

Give dense information a plain, high-contrast background. Avoid placing decorative textures behind small type. Judge the proof at actual printed size rather than zooming into a screen preview, and inspect it under the lighting where customers will read it.

Keep a clear area around the barcode and preserve its required proportions and quiet zones. Do not stretch it to fill a decorative box. Test the final printed code on the curved bottle using the scanning equipment expected in your sales channel; a phone test alone does not establish retail barcode quality.

For reusable artwork help, visit our Label Templates hub or our Canva template instructions. Templates help with placement, but they do not verify product claims or regulatory compliance.

7. Reserve space for supplement-specific information

For U.S. dietary supplements, FDA identifies five basic labeling elements: product identity, net contents, nutrition information, ingredients, and the responsible manufacturer, packer or distributor’s name and business location. Identity and net contents belong on the principal display panel; other placement and formatting rules also apply.

Use FDA’s General Dietary Supplement Labeling guide and the current 21 CFR 101.36 as review references. Have the finished package and claims checked for your specific product before printing a production run.

A blank label, template or attractive mockup does not establish that a finished supplement package meets applicable requirements. Plan the information area early so the final review does not force a complete redesign.

8. Print a proof before the full run

  1. Confirm that the template matches the exact label product.
  2. Print a plain-paper proof at 100% or actual size; turn off automatic fitting or scaling.
  3. Check alignment against the sheet or a cut paper sample.
  4. Print a small quantity on the real label stock with appropriate media settings.
  5. Allow the print to dry or cure as directed by the media and printer suppliers.
  6. Apply samples to filled production bottles and inspect text, color, barcode and seam position.
  7. Approve and record the settings before continuing.

If alignment drifts progressively down a sheet, check page size, scaling and template pitch rather than moving every label separately. If every label has the same offset, verify the printer margins and template position. For rolls, confirm media calibration, sensing mode and the feed-direction dimensions.

9. Apply labels consistently and test the finished package

Start with a clean, dry surface prepared according to the bottle and adhesive suppliers’ guidance. Remove dust, handling residue and loose product powder. Do not assume a stronger cleaning solvent is better; it may damage the container or leave a residue.

Use a simple positioning guide for hand application. Tack the label in a consistent location and smooth it across the bottle without stretching it. With wrap labels, keep the leading edge square to the bottle so the ends meet level. Avoid repeatedly peeling and repositioning permanent-adhesive labels.

Allow the adhesive the recommended time to develop its bond, then test samples under the actual conditions you expect. Include normal handling, packaging contact, moisture where relevant and transport inside a packed carton. Inspect immediately and again after the chosen storage and handling period.

Record the bottle supplier and material, label product, printer settings, application conditions and observations. When something changes—such as a new bottle mold, adhesive, ink or cleaning method—repeat the relevant tests.

10. Troubleshoot common problems

Supplement label problems and first checks
Problem Possible cause First action
Edges lift Label crosses a curve, surface contamination or unsuitable adhesive. Reduce the height if necessary and test adhesion on a clean production bottle.
Wrap ends do not align Slanted placement or tapered sidewall. Check top and bottom circumference and use an application guide.
Print smears Wrong coating, unsuitable settings or insufficient drying. Confirm printer/media compatibility and test the supplier’s recommended settings.
Small text is hard to read Low contrast, crowded layout or poor print quality. Improve the information layout and inspect an actual-size proof.
Barcode scans inconsistently Distortion, low contrast, insufficient quiet zones or bottle curvature. Check the source artwork and validate the code on the finished container.
Clear label appears dull or bubbly Visible adhesive texture, trapped air or surface mismatch. Test application pressure and a different construction on the same bottle.

Frequently asked questions

What size label fits a 60-count supplement bottle?

There is no universal size. Capsule dimensions, bottle capacity and bottle mold vary. Measure the straight labeling panel and circumference of the actual bottle, then test the intended layout.

Are wraparound labels better than front-and-back labels?

A wrap can keep the design in one piece and provide a continuous information area. Front-and-back labels can work well when a shorter label fits the bottle better. Choose by measured fit, information space and application consistency.

Do supplement bottle labels need to be waterproof?

Dry indoor packaging may perform well with paper. For condensation, damp handling or wiping, test a compatible synthetic material and its printed image under the expected conditions.

Can I print supplement labels with a home printer?

You can use an appropriate desktop inkjet or laser printer with compatible sheet labels. Confirm the stock, template, print quality and durability with a physical proof.

Can I use clear labels on amber bottles?

Yes, if the finished design remains readable and the construction adheres well. Many desktop printers do not print white ink, so check contrast on a filled bottle before committing to clear stock.

Why are my labels lifting at the corners?

Possible causes include curved shoulders, contamination, application conditions and an adhesive that does not suit the bottle surface. Test a size contained within the straight panel and compare suitable adhesive samples.

Should a wrap label overlap?

Some layouts use a gap and others use overlap. With overlap, test adhesion to the label face and keep the seam clear of important information. The correct arrangement depends on the construction and application process.

Does a supplement label template make my packaging compliant?

No. A template establishes artwork placement and dimensions. Product-specific information, claims, formatting and the complete package still require an appropriate regulatory review.

Shop popular label options for supplement packaging

Measure your bottle, decide how much information the layout needs and test the material with your printer before ordering your full run.

What Size Label Fits a Vape Bottle? Complete Size Guide for E-Liquid & CBD Bottles

Vape bottle label size guide showing recommended labels for 10 ml, 15 ml, 30 ml, 60 ml, 100 ml and 120 ml bottles

Choosing the correct vape bottle label size helps your packaging look professional, keeps important information readable and reduces problems such as wrinkling, lifting or excessive overlap. The best size depends on the bottle’s diameter, height, shape and available smooth labeling area.

This guide provides starting recommendations for common 10 ml, 15 ml, 30 ml, 60 ml, 100 ml and 120 ml vape bottles. It also explains how to measure the actual container, compare label materials and choose between blank sheet labels, roll labels and professionally printed labels.

Important: Always Measure Your Actual Bottle

Vape bottles from different manufacturers can have different diameters, shoulders, caps and usable labeling areas even when they hold the same number of milliliters. Treat the sizes in this guide as starting points and test a paper mockup or label sample on the exact bottle you plan to use.

Quick Navigation

Quick Answer: Recommended Vape Bottle Label Sizes

The following dimensions are common starting points for straight-sided vape and e-liquid bottles. The correct label may be smaller if the bottle has tapered shoulders, pronounced curves, ridges or limited space beneath the cap.

Bottle Capacity Suggested Starting Size Common Label Style Typical Use
10 ml Approximately 1.5″ × 2″ Small front label or partial wrap Sample bottles, flavor testing and compact e-liquid containers
15 ml Approximately 1.75″ × 2.25″ Front label or partial wrap Small dropper bottles and compact retail packaging
30 ml Approximately 2″ × 3″ Front label, partial wrap or front-and-back set Nicotine salts, CBD oils and standard small e-liquid bottles
60 ml Approximately 2.5″ × 4″ Large front label or partial wrap Common retail vape juice and short-fill bottles
100 ml Approximately 3″ × 5″ Partial wrap or large front label Large-capacity e-liquid and short-fill bottles
120 ml Approximately 3″ × 6″ Partial wrap or extended front label Large retail bottles requiring more branding and information space

For additional bottle-specific recommendations, visit our vape bottle label size guide.

Recommended Label Sizes by Vape Bottle Capacity

10 ml Vape Bottle Labels

A 10 ml vape bottle has limited labeling space, so the label must communicate the most important information without overwhelming the container. A label near 1.5″ × 2″ may work as a small front panel or partial wrap on many straight-sided bottles.

Prioritize the brand name, flavor or variety, capacity and the most important required information. Additional details may need to appear on a small back label, outer carton or accompanying package.

15 ml Vape Bottle Labels

Many 15 ml bottles provide slightly more width and height than 10 ml containers. A starting size near 1.75″ × 2.25″ may offer enough room for a product name, flavor, logo, volume and basic directions.

Because many 15 ml bottles narrow near the shoulder, measure only the straight-sided area beneath the shoulder and above the base curve.

30 ml Vape Bottle Labels

The 30 ml bottle is common for nicotine salts, CBD oils and other concentrated products. A 2″ × 3″ rectangle is a practical starting point for many 30 ml containers, but bottle style matters.

A wide chubby gorilla bottle may support a broader wrap, while a narrow glass dropper bottle may require a smaller front label or a tall, narrow rectangle. Do not select a size based on capacity alone.

60 ml Vape Bottle Labels

A 60 ml container generally provides enough surface area for more detailed branding. A label near 2.5″ × 4″ may work well as a large front panel or partial wrap on many bottles.

This size can provide room for the brand, flavor, product description, volume, warnings, manufacturer information, ingredients, barcode and QR code. Review all applicable regulations before finalizing artwork.

100 ml Vape Bottle Labels

Large 100 ml bottles often use labels around 3″ × 5″, depending on the usable circumference and height. This format provides more design flexibility but should still avoid the bottle’s shoulder and lower curve.

Test how the artwork looks when the bottle is viewed from the front. A wide label may wrap farther around the sides than expected, moving important text away from the primary viewing area.

120 ml Vape Bottle Labels

A starting size near 3″ × 6″ may be suitable for many 120 ml bottles. However, long labels require careful application because even a small alignment error becomes more noticeable as the label wraps around the container.

A shorter partial-wrap label may sometimes produce a cleaner result than attempting a nearly complete wrap.

How to Measure a Vape Bottle for a Label

Accurate measurement is more important than the stated bottle capacity. Two bottles can both hold 60 ml while having different diameters, heights and usable labeling areas.

Five-Step Measuring Method

  1. Identify the smooth, straight-sided area. Do not include the cap, shoulder, neck, lower curve, ridges or recessed areas.
  2. Measure the usable label height. Leave a small margin above and below the proposed label.
  3. Measure the circumference. Wrap a flexible measuring tape or strip of paper around the bottle’s straight-sided section.
  4. Decide how much of the bottle to cover. Choose a front label, partial wrap, nearly full wrap or separate front-and-back labels.
  5. Create a paper mockup. Cut plain paper to the proposed dimensions and tape it temporarily to the bottle.

How to Measure the Bottle Circumference

Wrap a flexible tape measure around the bottle at the location where the label will be applied. If you do not have a flexible tape, wrap a narrow strip of paper around the bottle, mark where the ends meet and measure the paper with a ruler.

For a partial-wrap label, select a width smaller than the full circumference. Leaving an uncovered gap can make application easier and prevent the label edges from overlapping.

How Much Uncovered Space Should You Leave?

There is no single required gap, but leaving approximately 1/8″ to 1/4″ of uncovered space between the ends of a wrap label can make placement more forgiving. Bottles with severe curves may require a larger uncovered area.

Test with an Actual Label Sample

A paper mockup confirms general size, but an actual sample confirms adhesive performance, flexibility, print quality and resistance to handling. Test the proposed material on a clean bottle under normal filling, storage and shipping conditions.

Front Labels, Wrap Labels or Front-and-Back Labels?

Front Labels

A front label covers only the main viewing area. It is easy to apply and keeps the bottle visible, but provides limited room for ingredients, warnings and other information.

Partial-Wrap Labels

A partial-wrap label covers most of the bottle without meeting at the back. It provides more printable space while reducing the risk of overlap.

Front-and-Back Labels

Separate labels allow the front to focus on branding while the back displays ingredients, warnings, directions, barcodes and manufacturer details.

Nearly Full-Wrap Labels

A wide label offers maximum space but requires accurate measuring and application. Leave a small gap to avoid overlap unless the packaging is specifically designed for it.

Best Label Materials for Vape Bottles

Vape and e-liquid bottles may be exposed to oils, moisture, frequent handling, temperature changes and product residue. Material choice should reflect the actual storage and use conditions.

Material Appearance Best Environment Important Consideration
White Matte Clean, non-reflective and easy to read Dry indoor packaging Paper material is not intended for significant moisture exposure
White Gloss Smooth and polished with vibrant colors Retail bottles stored in dry conditions Confirm printer compatibility before ordering
Clear Minimal no-label appearance Clear glass or plastic bottles Clear materials are not automatically waterproof
Kraft Natural and handcrafted Dry specialty or artisan packaging Paper kraft labels should be kept away from moisture and product residue
Synthetic Poly Durable and professional Moisture-prone and frequently handled bottles Printed ink durability depends on the material, printer and ink system

Learn more about durable materials on our waterproof and water-resistant labels page.

Test for Oils and Product Residue

A material that performs well against water may react differently to oils, flavoring ingredients or e-liquid residue. Test the printed label with the actual filled product before committing to a larger quantity.

Should You Use Sheet Labels or Roll Labels?

Both formats can produce professional vape bottle labels. The best choice depends on your printer, production volume, number of designs and application method.

Feature Sheet Labels Roll Labels
Best volume Small batches and multiple designs Regular and higher-volume production
Printer Compatible desktop laser or inkjet printer Compatible Epson, Primera or Afinia inkjet roll-label printer
Application Usually applied by hand Applied by hand, dispenser or compatible applicator
Design changes Convenient for short runs and frequent changes Efficient for recurring production and variable data
Initial investment Lower if a suitable desktop printer is already available Requires a dedicated compatible roll-label printer

Printing Vape Bottle Labels

Desktop Inkjet Printing

Desktop inkjet printers are useful for colorful short runs, prototypes and businesses producing several flavor varieties. Use materials specifically designed for inkjet printing and allow printed sheets to dry before handling or application.

Desktop Laser Printing

Laser printers produce crisp text, barcodes and graphics with toner. Use laser-compatible sheet labels designed to withstand the heat and pressure of the fusing process.

Inkjet Roll-Label Printers

Compatible Epson ColorWorks, Primera and Afinia printers can print pre-cut roll labels in sequence. This format is useful for regular production, multiple SKUs, barcodes, lot numbers and variable product information.

Before ordering, confirm the required label width, direction, core size, maximum outside roll diameter and sensing method. Visit our inkjet roll-label printer compatibility guide for additional information.

Professionally Printed Labels

Custom printed labels are supplied ready to apply and eliminate the need to purchase a printer, maintain ink inventory or dedicate staff time to production. They may be the better option for established designs and recurring production runs.

What Information Should Appear on a Vape Bottle Label?

The information required on a vape or e-liquid bottle may vary by product type, ingredients, jurisdiction, distribution channel and applicable regulations. Verify current requirements with the appropriate regulatory authority or qualified adviser.

Common label elements may include:

  • Brand and product name
  • Flavor or variety
  • Net contents
  • Ingredient statement
  • Nicotine concentration or other relevant product information
  • Applicable warnings
  • Manufacturer or distributor information
  • Lot, batch or production code
  • Barcode or SKU
  • QR code
  • Website or customer-service information
  • Storage or handling instructions

Keep critical text away from rounded corners, edges and the portion of the label that wraps farthest around the back of the bottle.

Common Vape Bottle Label Mistakes

Mistake Possible Result Better Approach
Choosing by capacity alone The recommended size may not fit a differently shaped bottle Measure the actual container
Covering the bottle shoulder Wrinkles, bubbles or lifting edges Keep the label within the straight-sided area
Making a wrap label too wide Edges overlap or important information moves out of view Leave a small uncovered gap
Using incompatible material Smearing, poor toner adhesion or feeding problems Match the label material to the printer technology
Applying labels to oily bottles Reduced adhesive contact and lifting Clean and dry the bottle before application
Skipping product testing Unexpected reactions to oils, residue or storage conditions Test the complete printed label with the actual filled product

Vape Bottle Label Buying Guide

Step 1: Identify the Bottle

Record the bottle capacity, material, diameter, circumference, usable height and shape. Note whether it has straight sides, tapered shoulders or molded ridges.

Step 2: Choose the Label Style

Decide whether you need a front label, front-and-back set, partial wrap or nearly full wrap. Consider how much information must fit on the bottle.

Step 3: Select the Material

Choose a material based on moisture, oil exposure, handling, storage temperature, desired finish and printer compatibility.

Step 4: Select Sheets, Rolls or Custom Printing

Use sheet labels for smaller batches and desktop printing, roll labels for dedicated label printers and recurring production, or professionally printed labels when you want finished labels supplied ready to apply.

Step 5: Test Before Ordering

Print a paper mockup, request samples and test the proposed material on the actual bottle. Confirm the label fits, adheres properly and remains readable after filling, storage and handling.

Explore Vape Bottle Labels

Compare blank sheet labels, blank roll labels, materials and custom printed options for vape bottles, e-liquid packaging and related containers.

Shop and Learn About Vape Bottle Labels

Frequently Asked Questions About Vape Bottle Label Sizes

What size label fits a 30 ml vape bottle?

A 2″ × 3″ rectangle is a common starting point for many 30 ml vape bottles. Measure the actual bottle because glass dropper bottles, cylindrical bottles and chubby gorilla bottles can have different usable labeling areas.

What size label fits a 60 ml vape bottle?

A label near 2.5″ × 4″ may fit many 60 ml bottles as a large front panel or partial wrap. The correct size depends on the bottle circumference, shoulder and available straight-sided height.

What size label fits a 100 ml vape bottle?

A 3″ × 5″ label is a useful starting point for many 100 ml bottles. Test a paper mockup because some bottles are wider, shorter or more tapered than others.

Should a vape bottle label wrap completely around the bottle?

Not necessarily. A partial-wrap label is often easier to apply and leaves a small gap between the label ends. A full or nearly full wrap provides more space but requires more precise measuring and alignment.

What material is best for vape bottle labels?

White matte and gloss paper can work well in dry conditions. Synthetic materials are often a better choice for bottles exposed to moisture, oils, residue or frequent handling. Test the material with the actual product.

Are clear vape bottle labels waterproof?

Not automatically. Clear refers to the appearance of the material, not its resistance to water. Review the specific material construction and test the printed label under actual use conditions.

Can I print vape bottle labels with a desktop printer?

Yes. Blank sheet labels are available for compatible desktop inkjet and laser printers. Make sure the label material is designed for the printer technology you use.

Can I print vape bottle labels on rolls?

Yes. Blank roll labels are available for many compatible Epson ColorWorks, Primera and Afinia inkjet roll-label printers. Verify the required width, direction, core size and maximum roll diameter before ordering.

Can vape bottle labels include barcodes and QR codes?

Yes. Leave enough blank space around the code, use strong contrast and test scanning on the curved bottle before production.

Can I request samples before ordering?

Yes. Sample testing is strongly recommended to confirm label size, print compatibility, adhesion and resistance to moisture, oil or product residue.

Find the Right Labels for Your Vape Bottles

Choose blank sheet labels, blank roll labels or custom printed labels for vape bottles, e-liquid containers, CBD oils and related product packaging.

Shop Sheet Labels Shop Roll Labels Custom Printed Labels

Related Vape Label Resources

Back to Top

What Size Label Fits a Beer Bottle? Complete Guide to Beer Bottle Label Sizes

labels for beer bottles guide

Whether you’re labeling a few bottles of homebrew or producing thousands of craft beer bottles each week, choosing the correct label size is one of the easiest ways to give your product a professional appearance. A label that is too small can make the bottle look unfinished, while one that’s too large may wrinkle around curves, overlap seams, or interfere with caps and necks. Since beer bottles come in many different shapes and sizes, there isn’t a single label size that works for every application. This guide compares the most popular beer bottle styles, recommended label sizes, measuring techniques, material options, and printing methods to help you select the best label for your bottles.


Quick Start Guide

Looking for a quick recommendation?

  • Standard 12 oz Longneck Bottles
    Front Label: 3″ × 4″ or 3.5″ × 4″
    Neck Label: 1″ × 3″
  • Stubby Bottles
    Front Label: 3″ × 3″ or 3.5″ × 3.75″
  • 22 oz Bomber Bottles
    Front Label: 4″ × 5″ or 4″ × 6″
  • Belgian Bottles
    Front Label: 3.5″ × 5″ or 4″ × 5″
  • Growlers
    Front Label: 5″ × 6″ or 5″ × 7″

Always measure the smooth usable area of your bottle before ordering labels. Different bottle manufacturers often produce bottles with slightly different diameters and straight-wall heights.


At-a-Glance Recommendations

Bottle TypeMost Popular Label SizeCommon Shape
12 oz Longneck3″ × 4″Rectangle
Stubby Bottle3″ × 3″Square
22 oz Bomber4″ × 5″Rectangle
Belgian Bottle3.5″ × 5″Rectangle
Growler5″ × 6″Rectangle
Neck Labels1″ × 3″Rectangle
Bottle Caps1″ CircleCircle

Quick Answer

If you have…Recommended Label
Standard 12 oz beer bottle3″ × 4″
Short craft bottle3″ × 3″
Large bomber bottle4″ × 5″ or 4″ × 6″
Belgian bottle3.5″ × 5″
Growler5″ × 6″
Neck label1″ × 3″

Why Label Size Matters

A professionally designed label deserves to fit the bottle correctly. Proper sizing improves appearance, makes application easier, and helps important information remain readable. A correctly sized label also allows enough room for your brewery logo, beer style, alcohol content, government warnings, UPC barcode, QR code, ingredients, tasting notes, and branding without crowding the design. For breweries producing multiple beers, selecting consistent label proportions also creates a recognizable product line across different styles and bottle sizes.


Labels for Standard 12 oz Longneck Beer Bottles

Standard 12 ounce longneck beer bottle with professionally printed labelThe traditional 12-ounce longneck bottle remains the most common beer package in North America. It provides a generous straight panel for front branding while leaving room for optional neck and back labels. For most breweries and home brewers, a 3″ × 4″ label offers the best balance between appearance and usable print space. Excellent for craft beer Home brewing IPA bottles Lagers Stouts Ales Recommended Sizes 3″ × 4″ Labels 3.5″ × 4″ Labels 4″ × 4″ Labels

Labels for Stubby Beer Bottles

Short stubby beer bottle with square printed labelStubby bottles feature a shorter body with less vertical label space than longneck bottles. Square labels often complement the proportions of these bottles and create a balanced appearance. Many craft breweries use slightly smaller front labels while emphasizing bold graphics and typography. Recommended Sizes 3″ × 3″ Labels 3″ × 4″ Labels

Labels for 22 oz Bomber Bottles

22 ounce bomber beer bottle with large printed labelBomber bottles provide significantly more printable area than standard beer bottles. Their taller straight sides allow breweries to incorporate larger logos, illustrations, tasting notes, brewery history, pairing suggestions, and detailed product information. Many premium craft beers use oversized labels to maximize shelf impact. Recommended Sizes 4″ × 5″ Labels 4″ × 6″ Labels 5″ × 5″ Labels

Labels for Belgian Beer Bottles

Belgian style beer bottle with premium rectangular labelBelgian-style bottles are typically taller with elegant shoulders that benefit from vertically oriented labels. These bottles are popular for Belgian ales, saisons, farmhouse beers, specialty releases, and premium craft beverages. A taller label emphasizes the bottle’s shape while providing ample room for artwork and brewery branding. Recommended Sizes 3.5″ × 5″ Labels 4″ × 5″ Labels 4″ × 6″ Labels


Labels for Beer Growlers

Glass beer growler with large professionally printed product labelBeer growlers provide one of the largest printable surfaces of any beer container. Whether you package fresh draft beer, limited seasonal releases, or brewery-exclusive products, a large front label creates an impressive retail presentation while leaving room for detailed product information. Growlers are commonly used by craft breweries, brewpubs, taprooms, cider producers, kombucha companies, cold brew coffee producers, and refill stations. Popular Label Sizes 5″ × 6″ Labels 5″ × 7″ Labels 5″ × 8″ Labels

How to Measure a Beer Bottle for Labels

Diagram showing how to measure a beer bottle for labels

Beer bottles that appear identical often have slightly different body diameters, shoulder curves, and straight-wall heights depending on the manufacturer. Because of this, measuring your actual bottle is always recommended before purchasing labels.

Step 1 — Measure the Flat Label Panel

Measure only the straight portion of the bottle body where the label will be applied. Avoid measuring into the curved shoulder or lower heel of the bottle.

Step 2 — Measure the Circumference

Wrap a flexible tape measure around the bottle or use a strip of paper to determine the bottle circumference. Rather than wrapping the label completely around the bottle, leave approximately 1/8″–1/4″ of exposed glass to help prevent label overlap.

Step 3 — Check Curved Areas

Beer bottles become more curved near the shoulder and base. Keeping the label inside the straight portion reduces wrinkles and improves adhesion.

Step 4 — Print a Paper Sample

Before ordering labels, print your chosen template on ordinary paper, cut it out, and tape it to the bottle. This simple test confirms that the proportions and appearance are exactly what you want.


Front Labels, Back Labels & Neck Labels

labels from front, back and neck of beer bottles

Many commercial breweries divide information across multiple labels instead of placing everything on a single front panel.

Label PositionTypical Contents
Front LabelBrand name, beer style, artwork, logo, alcohol content, volume
Back LabelGovernment warning, UPC barcode, ingredients, brewery information, tasting notes
Neck LabelSeasonal branding, awards, limited release, promotional messaging
Bottle CapBeer style, logo or brewery initials

Using multiple labels creates a cleaner design while giving customers easier access to important product information.


Beer Bottle Neck Labels

Beer bottle with professionally printed neck labelNeck labels add a premium appearance and immediately attract attention on retail shelves. They’re commonly used for seasonal beers, limited editions, award-winning brews, and specialty releases. Most breweries choose a narrow rectangular label that wraps around the neck without extending onto the bottle shoulder. Popular Sizes 1″ × 3″ 1.25″ × 2.625″ 1″ × 4″

Beer Bottle Cap Labels

Beer bottle cap with printed round labelRound labels designed for bottle caps provide a simple way to identify beer styles while adding another branding opportunity. Many breweries print IPA, Stout, Porter, Lager, Pilsner, Saison, or seasonal names directly on the cap label. Bottle cap labels also work well for home brewers organizing multiple recipes. Popular Sizes 1″ Round

Choosing the Best Label Material

label materials to use on beer bottles

Beer bottles experience refrigeration, condensation, transportation, and frequent handling. Choosing the proper label material is just as important as selecting the correct size.

MaterialBest For
White MatteHome brewers, short runs, handwriting, economical labels
Gloss WhiteBright retail graphics and vibrant colors
Semi-GlossGeneral purpose brewery packaging
Clear LabelsPremium “printed directly on glass” appearance
Brown KraftRustic craft breweries and vintage branding
Waterproof FilmIce buckets, refrigerated bottles and moisture exposure

Waterproof Beer Bottle Labels

Condensation is one of the biggest challenges for beer bottle labels. Traditional paper labels perform well for many applications, but bottles stored in coolers, refrigerators, or ice buckets often benefit from waterproof synthetic label materials. These films resist moisture while maintaining excellent print quality and adhesion.

Waterproof labels are especially popular for:

  • Craft breweries
  • Cold storage
  • Outdoor events
  • Restaurant service
  • Beverage distributors
  • Wedding favors
  • Home brewing competitions

Clear Beer Bottle Labels

Clear labels create one of the most premium appearances available. When printed correctly, the transparent material allows portions of the bottle to remain visible, creating the impression that graphics have been printed directly onto the glass. This style has become increasingly popular among modern craft breweries.


Sheet Labels vs. Roll Labels

the difference between sheet labels and roll labels
Sheet LabelsRoll Labels
Perfect for home brewers Laser & inkjet compatible Lower quantities Economical Easy storageBest for production Epson ColorWorks Primera printers Afinia printers Automatic applicators

If you’re producing fewer than several hundred bottles at a time, sheet labels often provide the most economical solution. Commercial breweries printing thousands of labels generally prefer roll labels for their faster printing and easier application.


Common Mistakes When Choosing Beer Bottle Labels

  1. Choosing labels based only on bottle capacity.
  2. Not measuring the straight label panel.
  3. Wrapping labels too far around the bottle.
  4. Ignoring condensation and moisture.
  5. Using the wrong material for the printer.
  6. Not testing a printed paper sample first.
  7. Using artwork with insufficient bleed.
  8. Choosing labels that interfere with neck curvature.

Buying Guide

When selecting beer bottle labels, consider the bottle size, label placement, printing method, storage conditions, and production volume. Home brewers generally benefit from sheet labels printed on desktop laser or inkjet printers because they allow economical short runs and frequent design changes. Growing breweries often transition to roll labels for Epson ColorWorks, Primera, or Afinia printers because they increase production speed while maintaining professional print quality. If your beer will be refrigerated, displayed in coolers, or submerged in ice, waterproof label materials provide the greatest durability. Premium craft breweries often choose clear labels or high-gloss white materials to maximize shelf appeal. Finally, always measure your actual bottle, print a paper sample, and verify the fit before ordering larger quantities.


Frequently Asked Questions About Beer Bottle Labels

What is the most common beer bottle label size?

For standard 12-ounce longneck bottles, the most popular size is 3″ × 4″. This size provides plenty of room for branding while fitting comfortably within the bottle’s straight label panel.


Should beer bottle labels wrap completely around the bottle?

Generally, no. Leaving approximately 1/8″ to 1/4″ of exposed glass helps prevent labels from overlapping, lifting, or wrinkling after application.


Are waterproof labels necessary for beer bottles?

If bottles will be refrigerated, stored in coolers, or placed in ice buckets, waterproof labels provide the best durability and appearance. Standard paper labels work well for many indoor applications but may soften when exposed to moisture.


Can I print beer bottle labels with my inkjet printer?

Yes. Blank sheet labels designed for inkjet printers allow you to produce professional beer bottle labels from your desktop printer. Make sure you select a material compatible with your printer.


What’s the difference between sheet labels and roll labels?

Sheet labels are ideal for home brewers and smaller production runs, while roll labels are better suited for commercial printing, Epson ColorWorks, Primera, Afinia printers, and automatic applicators.


How do I measure a beer bottle for labels?

Measure only the straight section of the bottle where the label will sit. Avoid measuring into the shoulder or base curves and always test with a paper sample before ordering.


Can clear labels be used on beer bottles?

Absolutely. Clear labels create a premium “printed directly on the glass” appearance and are especially popular among craft breweries.


Which material is best for homebrew labels?

White matte labels remain one of the most popular choices because they print beautifully on desktop inkjet and laser printers while offering excellent value.


What size label works best on growlers?

Most breweries choose labels between 5″ × 6″ and 5″ × 7″, depending on the growler diameter and available printable area.


Can I use removable labels on beer bottles?

Yes. Removable adhesives work well when bottles will be reused or returned. Permanent adhesives are recommended for retail sales.


Should I use separate front and back labels?

Many breweries place branding on the front label and move ingredients, government warnings, UPC barcodes, and tasting notes to a smaller back label for a cleaner appearance.


Can I print variable information on each label?

Yes. Desktop inkjet and laser printers make it easy to print different beer names, batch numbers, seasonal artwork, or QR codes without ordering preprinted labels.


Do I need neck labels?

Neck labels are optional but add shelf appeal and are commonly used for seasonal releases, limited editions, medals, and promotional messaging.


What is the best label shape for beer bottles?

Rectangular labels remain the most popular because they maximize printable space, although oval and circular labels are frequently used for specialty craft beers.


Can beer bottle labels be applied by hand?

Yes. Sheet labels and roll labels can both be applied manually. Larger breweries often use automatic label applicators for higher production volumes.


Will waterproof labels survive ice buckets?

Quality waterproof film labels are specifically designed to withstand condensation, refrigeration, and ice buckets while maintaining excellent adhesion.


Should I test my design before ordering?

Always print your design on ordinary paper and tape it to the bottle first. This simple step helps verify size, appearance, and artwork placement.


Where can I buy blank beer bottle labels?

LaserInkjetLabels.com offers blank sheet labels, blank roll labels, waterproof materials, clear labels, and custom printed labels for beer bottles in a wide variety of sizes and materials.


Related Articles


Shop Blank Beer Bottle Labels

Whether you’re labeling a few bottles of homebrew or producing thousands of craft beers every week, LaserInkjetLabels.com offers blank sheet labels, roll labels, waterproof materials, clear labels, and custom printed labels to fit virtually every beer bottle on the market.

Shop Blank Labels Shop Roll Labels Shop Waterproof Labels

What Size Label Fits a Candle Jar? Complete Size Guide

Candle jars showing common front and lid label sizes

Choosing the right candle-jar label requires more than knowing how many ounces of wax the container holds. Two jars sold as 8-ounce candle jars may have different diameters, heights, curves, lids and usable labeling areas. The best label is one that fits entirely within the jar’s smooth, relatively flat surface while leaving enough room for your brand name, fragrance, wax type and other important product information.

This guide provides practical starting sizes for popular candle containers, including 4-ounce, 6-ounce, 8-ounce and 9-ounce jars. It also explains how to measure your actual container before ordering blank labels, because the final choice should always be based on the jar in your hands—not its advertised capacity alone.

Quick Start Guide

Need a recommendation fast? Start here. These are our most common recommendations for candle makers. Measure your container before ordering, but this guide will point you in the right direction.

I Have… Recommended Starting Label Recommended Material
4 oz Candle Jar 2″ Circle White Matte
6 oz Candle Jar 2″ Square White Matte
8 oz Straight-Sided Jar 2″ × 3″ Rectangle White Matte
9 oz Straight-Sided Jar 3″ × 2″ Rectangle White Matte
12 oz Candle Jar 3″ Square Gloss White
16 oz Candle Jar 3″ × 4″ Rectangle Gloss White

Our Most Common Recommendations

  • Best Overall Label: 2″ × 3″ Rectangle
  • Most Popular Material: White Matte
  • Best Premium Finish: Gloss White
  • Best Rustic Appearance: Kraft Paper
  • Best Modern Look: Clear Labels
  • Best Durability: Waterproof Polypropylene
  • Best for Beginners: Sheet Labels
  • Best for High-Volume Printing: Roll Labels

LaserInkjetLabels Pro Tip

If you’re unsure between two label sizes, test both using ordinary printer paper before ordering. Most candle makers discover that the slightly smaller option produces a cleaner, more upscale appearance while remaining easier to apply consistently.

Quick Answer: What Size Label Fits a Candle Jar?

For many common candle jars, front labels between 2 and 3 inches wide work well. An 8-ounce straight-sided jar often accommodates a 2″ × 3″ rectangle, 2″ × 4″ horizontal label, 2½” circle or similar compact design. A 9-ounce straight-sided jar often works well with a label around 2″ × 3″, although the jar’s exact flat area must be measured before ordering.

Smaller 4-ounce jars generally look best with 1½- to 2-inch labels, while wider 10- to 16-ounce vessels may support labels measuring 2½ to 4 inches across.

Quick Candle-Jar Label Size Chart

candle jar size comparison chart image

Use the following recommendations as starting points. Because candle vessels vary by manufacturer, always measure your actual jar and test a paper cutout before purchasing a large quantity of labels.

Candle Container Common Front-Label Starting Sizes Possible Lid-Label Sizes Bottom Warning-Label Starting Sizes
4 oz jar 1½” × 2″, 1¾” circle or 2″ circle 1½”–2″ circle 1½”–2″ circle
6 oz jar or tin 1½” × 2½”, 2″ × 2″ square or 2″ circle 2″–2½” circle 1½”–2″ circle
8 oz jar 2″ × 3″, 2″ × 4″, 2½” circle or 2½” square 2½”–3″ circle 2″–2½” circle
9 oz straight-sided jar 2″ × 3″, 2¼” × 3″ or 2½” circle Measure the lid before ordering 2″–2½” circle
10–11 oz tumbler 2½” × 3″, 3″ square or 3″ circle Measure the lid before ordering 2″–2½” circle
12 oz jar 2½” × 4″, 3″ × 3″ square or 3″ circle Approximately 3″ circle when the lid allows 2½” circle
16 oz jar 3″ × 4″, 3″ × 5″, 3½” circle or 3½” square Measure the lid before ordering 2½”–3″ circle

Important: These are practical starting recommendations, not guaranteed dimensions for every candle vessel. Jar capacity describes how much product the container holds; it does not establish the jar’s exact height, diameter or labelable area.


How to Measure a Candle Jar for a Label

how to measure candle jars guide

Before ordering labels, measure the smooth area on the actual candle container. Do not measure across curved shoulders, tapered edges, raised seams, embossing or the thick rounded area near the bottom of the jar. Labels adhere most cleanly when every edge remains within a smooth, consistent surface.

Step 1: Identify the Flat Labeling Area

Hold the jar at eye level and locate the smoothest front-facing portion of the container. On a straight-sided jar, this area may cover most of the body. On an apothecary jar, mason jar or curved tumbler, the usable area may be considerably smaller than the jar’s overall height.

Step 2: Measure the Maximum Label Height

Use a flexible ruler or measuring tape to measure vertically between the upper and lower curves of the container. Leave a small margin above and below the proposed label so minor placement differences do not push the label onto a curved surface.

For example, if the smooth vertical area measures 2½ inches, a label approximately 2 or 2¼ inches tall may be safer than a full 2½-inch label.

Step 3: Measure the Available Width

Measure the width of the front-facing area you want the label to cover. For a centered front label, you usually do not need to calculate the full circumference. Measure the visual space available before the container begins curving away from the viewer.

For a wraparound label, measure the circumference with a flexible tape or a strip of paper. Leave a small gap between the ends unless you specifically want the label to overlap.

Step 4: Measure the Lid and Bottom Separately

Do not assume the lid label or bottom warning label should match the front label. Measure the flat, unobstructed area on the lid and the base separately. Avoid raised rings, feet, seams and deeply recessed areas that may prevent complete adhesive contact.

Step 5: Test the Size With Plain Paper

Before ordering a large quantity, cut a piece of ordinary paper to the proposed label dimensions and temporarily attach it to the container with removable tape.

View the jar from several angles and ask:

  • Does the label look proportionate to the container?
  • Do all four edges remain on the flat surface?
  • Is there enough space for the product name and fragrance?
  • Does the label leave enough glass visible for the desired presentation?
  • Will small placement differences cause an edge to reach a curve?

LaserInkjetLabels Tip

Test at least two nearby sizes. A slightly smaller label often looks more polished and is easier to apply consistently than one that uses every available fraction of an inch.


What Size Label Fits a 4 oz Candle Jar?

Four-ounce candle jars are commonly used for samples, travel candles, gift sets, wedding favors, seasonal collections and introductory fragrance sizes. Because the vessel is compact, the label should display the most important branding without overwhelming the glass.

Recommended Starting Sizes

  • 1½” × 2″ rectangle: A useful compact size for a brand name, fragrance and wax description.
  • 1¾” circle: A balanced option for a small logo-focused design.
  • 2″ circle: A strong choice when the jar has a wide enough flat front or when labeling the lid.
  • 1½” square: Suitable for minimalist packaging with limited text.

A small front label should prioritize information carefully. The brand name, fragrance and basic product identity belong on the front. Longer burning instructions, company information and safety language can be placed on a separate bottom label or on the outer packaging.

Best Shapes for 4 oz Candle Jars

Circle labels create a soft, handcrafted appearance and work especially well for favors and gift sets. Small rectangles use the available width efficiently and provide more room for longer fragrance names. Square labels can create a modern boutique look when the container has a broad, straight front.

Our Starting Recommendation

Begin by testing a 1½” × 2″ rectangle and a 1¾” or 2″ circle. Select the one that best matches the amount of text and the jar’s flat printable area.


What Size Label Fits a 6 oz Candle Jar or Tin?

Six-ounce candles are popular for small retail candles, travel collections, gift boxes and candle tins. Container styles vary widely in this category, so the correct label depends heavily on whether the vessel is a glass jar, metal tin, straight-sided tumbler or short round container.

Recommended Starting Sizes

  • 1½” × 2½” rectangle: Provides useful width without requiring a tall flat area.
  • 2″ square: Creates a balanced contemporary presentation.
  • 2″ circle: Works well on many jar fronts, lids and round tins.
  • 2″ × 3″ rectangle: May fit wider straight-sided vessels after measurement.

Special Considerations for Candle Tins

Round candle tins frequently use a large circle label on the lid and a smaller safety label on the bottom. A separate side label may not be necessary unless you need additional room for ingredients, fragrance notes, a barcode or company information.

Measure inside the raised rim of the lid rather than using the lid’s total outside diameter. A label that touches or crosses the raised edge may wrinkle, lift or appear off-center.

Our Starting Recommendation

For a 6-ounce glass candle jar, begin with a 1½” × 2½” rectangle or 2″ square. For a round tin, test a 2″ circle on the lid and a smaller circle or rectangle on the bottom.


What Size Label Fits an 8 oz Candle Jar?

The 8-ounce candle jar is one of the most widely used sizes for handmade and retail candles. It is available in straight-sided glass, amber glass, mason-style jars, jelly jars, apothecary vessels and tumblers. Because those containers can have very different shapes, there is no single label size that fits every 8-ounce candle jar.

Recommended Starting Sizes

  • 2″ × 3″ rectangle: One of the most versatile choices for an 8-ounce straight-sided jar.
  • 2″ × 4″ horizontal rectangle: Useful for a broader design or a partially wrapping label.
  • 2½” circle: Popular for a centered artisan-style front label.
  • 2½” square: A strong option for modern or minimalist branding.
  • 3″ circle: May work on a wide lid or a broad jar after careful measurement.

Straight-Sided 8 oz Jars

Straight-sided jars are generally the easiest 8-ounce vessels to label because the walls provide a larger consistent surface. They often accommodate square and rectangular labels more successfully than tapered jelly jars or containers with pronounced shoulders.

Even on a straight-sided jar, leave space above the thick lower base and below any shoulder, lid or threaded area. A label that fits the geometric dimensions but reaches these transitions may still develop lifted edges.

Tapered, Mason-Style and Apothecary 8 oz Jars

Containers that narrow toward the bottom or curve toward the top provide less flat space. A smaller centered label—such as a 2-inch rectangle, 2-inch circle or narrow oval—may adhere more cleanly than a broad rectangular design.

How Much Information Fits?

A 2″ × 3″ rectangle generally provides space for:

  • Brand name
  • Candle fragrance
  • Wax type
  • Net weight
  • A small decorative graphic

Keep detailed warnings and burning instructions on a separate bottom label so the front remains easy to read and visually appealing.

Packaging Tip

For an upscale appearance, pair a simple front label with a coordinated lid label and a separate bottom warning label. Each label can perform one clear job instead of forcing every detail onto the front.

Our Starting Recommendation

For most straight-sided 8-ounce jars, first test a 2″ × 3″ rectangle, a 2½” circle and a 2½” square. For a tapered or curved container, begin with the smallest of those options.


What Size Label Fits a 9 oz Straight-Sided Candle Jar?

Nine-ounce straight-sided candle jars are popular because they provide a smooth body, professional proportions and enough space for prominent branding. Many vessels in this category are approximately 2¾ to 3 inches wide, but their labelable height can differ based on the base thickness, shoulder, lid and specific manufacturer.

Recommended Starting Sizes

  • 2″ × 3″ rectangle: A dependable starting point for many 9-ounce straight-sided vessels.
  • 2¼” × 3″ rectangle: Uses more vertical space when the jar provides a sufficiently tall flat panel.
  • 2½” circle: Offers a strong centered design while leaving visible glass around the label.
  • 2½” square: Suitable for clean, modern packaging.
  • 3″ square: May fit broader vessels but should be tested carefully before ordering.

As one representative example, a 9-ounce straight-sided jar measuring approximately 2.875 inches wide was listed with a maximum side-label area of about 2.25 inches tall by 3 inches wide. That provides a useful reference, but it should not be treated as a universal specification for all 9-ounce candle jars.

Should the Label Cover Most of the Jar?

Not necessarily. Many premium candle brands deliberately use a label that covers only part of the visible front. Leaving glass around the design can make the product feel less crowded and allows the candle color and vessel finish to remain part of the presentation.

A larger label is useful when you need additional branding or product details. A smaller label is often more effective when the logo, fragrance name and typography are intended to be the main visual focus.

Our Starting Recommendation

Begin with a 2″ × 3″ rectangle. If the jar has more than 2¼ inches of safe flat height, also test a 2¼” × 3″ rectangle. For a more minimal design, compare both with a 2½” circle.


Choosing Between the Recommended Sizes

When two or three label sizes fit the same jar, make the final decision based on the design rather than selecting the largest possible option automatically.

Choose a Smaller Label When… Choose a Larger Label When…
Your design is logo-focused and minimal. You need space for a longer fragrance or product name.
You want more of the candle and glass visible. The front label includes wax type, weight or fragrance notes.
The jar has tapered or curved sides. The jar has a broad, smooth, straight-sided body.
You are concerned about hand-application consistency. You need stronger visibility in a retail display.
You use separate bottom and lid labels. The front label must carry most of the product information.

Need Blank Labels for Candle Jars?

LaserInkjetLabels.com offers blank printable candle labels in numerous circle, square, rectangle and specialty sizes. Choose from sheet labels for desktop inkjet and laser printers or roll labels for compatible roll-fed printing systems.

Browse Blank Candle Labels


What Size Label Fits a 10 oz or 11 oz Candle Jar?

Ten-ounce and eleven-ounce candle jars are popular with boutique candle makers because they provide more room for branding while still maintaining a clean, modern appearance. Most containers in this size range are either straight-sided tumblers or contemporary glass jars with gently rounded corners.

The additional front surface makes these jars an excellent choice for decorative labels, seasonal collections, and luxury branding.

Recommended Starting Sizes

  • 2½” × 3″ Rectangle – Excellent overall choice.
  • 3″ Square – Popular for premium candle brands.
  • 3″ Circle – Ideal for centered minimalist branding.
  • 2½” × 4″ Rectangle – Provides additional room for decorative artwork.

These larger vessels often accommodate more detailed artwork while still leaving enough glass visible to showcase the candle color.

Our Starting Recommendation

For most straight-sided 10–11 oz candle jars, begin by testing a
3″ square and a
2½” × 3″ rectangle.
These two sizes work well across a wide variety of container styles.


What Size Label Fits a 12 oz Candle Jar?

Twelve-ounce candle jars provide one of the largest printable surfaces commonly used by handmade candle companies. They are ideal for premium collections, luxury fragrances, and retail products where shelf presentation is especially important.

Recommended Starting Sizes

  • 3″ Square
  • 3″ Circle
  • 2½” × 4″
  • 3″ × 4″

Many premium candle companies intentionally use labels that cover only about half of the available front surface. This allows the glass, wax color, and vessel itself to become part of the product presentation.


What Size Label Fits a 16 oz Candle Jar?

Sixteen-ounce candle jars are frequently used for large candles, gift collections, and long-burning premium products. Their larger front surface gives you tremendous flexibility when designing your packaging.

Recommended Starting Sizes

  • 3″ × 4″
  • 3″ × 5″
  • 3½” Circle
  • 3½” Square
  • 4″ Square (after measuring)

If your candle includes fragrance notes, burn time, wax information, social media links, or QR codes, larger rectangular labels often provide the best balance between aesthetics and available print space.

LaserInkjetLabels Tip

Larger jars don’t necessarily require oversized labels. Many luxury candle brands intentionally use smaller centered labels to create a clean, upscale appearance.


Choosing Labels by Candle Container Style

Container style often influences label selection just as much as container size.

Straight-Sided Glass Jars

These are generally the easiest containers to label because they provide a large, flat printable surface. Squares and rectangles both perform exceptionally well.

Tumbler Candle Jars

Tumbler jars usually feature gently curved sides. Labels should remain within the center portion of the glass to minimize lifting near the edges.

Apothecary Jars

Because apothecary jars narrow near the top and bottom, slightly smaller labels often produce cleaner results than labels that attempt to fill the entire front.

Mason Jar Candles

Mason jars have embossed logos, shoulders, and threaded tops that reduce the usable labeling area. A centered front label paired with a matching lid label often creates the best presentation.

Candle Tins

Round tins frequently benefit from a large decorative lid label and a separate warning label on the bottom rather than using a side label.


Where Should Candle Labels Be Placed?

Many candle products actually use three different labels rather than one.

Location Purpose Recommended Shape
Front Branding & fragrance Circle, Square or Rectangle
Lid Brand identification Circle
Bottom Safety warning Circle or Rectangle

Using multiple labels allows each one to serve a specific purpose while keeping the front of the candle attractive and uncluttered.


Should You Use Circle, Square or Rectangle Labels?

circle v rectangle example on candle jars

Each label shape creates a different impression.

Circle Square Rectangle
Traditional artisan look Modern premium appearance Maximum information
Excellent for centered logos Balanced contemporary design Great for ingredients and fragrance notes
Popular for candles Luxury collections Retail packaging
Simple minimalist branding Symmetrical layouts Long product names

None of these shapes is universally better than the others. The right choice depends on your logo, typography, container style, and the amount of information that must appear on the front of the candle.

Our Design Recommendation

If you’re launching a new candle line, test one circle, one square, and one rectangle on the actual jar before committing to a production run. Viewing all three side by side often makes the best choice obvious.


Professional Candle Packaging Tips

  • Keep the fragrance name easy to read from several feet away.
  • Avoid placing important information near curved edges.
  • Use high-resolution graphics for crisp printing.
  • Leave generous white space around your logo.
  • Choose one consistent label shape across your product line.
  • Use matching lid labels for premium gift collections.
  • Separate safety information onto a bottom label whenever possible.
  • Always print a paper test before ordering large quantities.


Recommended Label Sizes for Popular Candle Jars and Vessel Lines

Many candle makers search for a label by the name of the jar, vessel supplier or product line they use. This can be a helpful starting point, but even containers with the same advertised capacity may have different diameters, label-panel heights and side profiles.

The chart below combines published vessel measurements with practical starting label sizes. Always confirm the current specifications for your exact container and test the proposed label with a plain-paper cutout before ordering.

Supplier or Vessel Published Container Details Suggested Front-Label Starting Sizes Important Consideration
CandleScience Small Straight-Sided Jar Approximately 3.6 oz wax fill; 2.70″ tall; listed side-label height of 1.88″ 1½” × 2″, 1½” square or 1¾” circle Keep the label height safely below the published 1.88″ maximum, especially when labels will be applied by hand.
CandleScience 8 oz Straight-Sided Jelly Jar Straight, non-tapered sides designed to be easier to label 2″ × 3″, 2″ × 4″, 2½” square or 2½” circle Straight sides provide more flexibility than a tapered jelly jar, but the actual flat height should still be measured.
CandleScience Libbey Straight-Sided Tumbler Approximately 8.5 oz wax fill; 3.50″ tall; 3.15″ top outside diameter; listed label height of 3″ 2½” × 3″, 3″ square or 3″ circle The published 10″ label width refers to a full side or wraparound format. A centered front label can be much narrower.
Makesy 11 oz Dream Vessel Approximately 11 oz capacity; supplier lists a 3″ circle and a 3″ × 2½” rounded rectangle 3″ circle or 3″ × 2½” rounded rectangle These dimensions come directly from the vessel supplier and are strong starting points for this specific product line.
Makesy 12 oz Aura Vessel Contemporary glass vessel offered in matte, translucent, metallic and iridescent finishes Begin by testing 2½” × 3″, 3″ circle and 3″ square Opaque and metallic finishes can affect contrast. Test both size and print visibility on the actual vessel color.
Fillmore Container 9 oz Straight-Sided Jar 3.50″ tall; 2.82″ outside diameter; 2.25″ label-panel height; 8.82″ circumference 2″ × 3″, 2″ × 4″, 2¼” × 3″ or 2½” circle A front label should generally remain at or below the published 2.25″ panel height. The 8.82″ circumference also supports a longer partial-wrap or wraparound design.
Fillmore Container 12 oz Straight-Sided Jar 3.14″ tall; 3.38″ outside diameter; 1.84″ label-panel height; 10.63″ circumference 1½” × 3″, 1¾” × 3″, 1¾” × 4″ or a compact circle Although this jar holds more than the 9 oz version, its published label-panel height is shorter. This is a good example of why capacity alone cannot determine label size.
Fillmore Container 16 oz Amber Straight-Sided Jar 3.81″ tall; 3.56″ outside diameter; 2.50″ label-panel height; 11.31″ circumference 2″ × 3″, 2½” × 3″, 2½” × 4″ or 3″ circle Amber glass can reduce the readability of transparent labels. White or light-colored printing areas may provide stronger contrast.
Ball 16 oz Mason Jar Available in regular-mouth and wide-mouth styles; body shape may include embossing, shoulders or molded details 2″ × 3″, 2½” circle or 3″ circle when the front surface allows Measure between embossed areas and curves. A front label that fits a smooth straight-sided candle vessel may not fit the same-capacity mason jar.

Note: Suppliers can revise vessels or introduce additional versions under similar product names. Confirm the item number and current specifications before using any recommendation as a production standard.


Why Jar Brand and Capacity Are Not Enough

The examples above show why a label should never be selected solely because a container is described as an 8-ounce, 9-ounce or 12-ounce candle jar.

The following characteristics can change the usable label area:

  • The thickness of the glass base
  • The presence of rounded shoulders
  • A tapered or curved body
  • Embossed logos or decorative patterns
  • The height of the lid or threaded neck
  • A recessed label panel
  • The difference between wax fill weight and overflow capacity
  • Manufacturing changes between product versions

LaserInkjetLabels Tip

Save the supplier name, vessel item number and final label size in your production records. This makes reordering easier and prevents confusion when several jars have similar capacities but different dimensions.


Front Label or Wraparound Label?

Manufacturer specifications sometimes list a label width that equals most or all of the container’s circumference. That does not mean you must use a full wraparound label.

A centered front label is often the better choice when:

  • You want the wax and vessel finish to remain visible.
  • Your branding is simple and logo-focused.
  • Labels will be applied manually.
  • You use a separate bottom warning label.
  • You want a clean, premium presentation.

A partial-wrap or full-wrap label may be more useful when:

  • You need room for fragrance notes and product details.
  • The label includes burning instructions or company information.
  • You need a barcode, QR code or batch information.
  • The jar has a long, uninterrupted straight-sided panel.
  • You want the label itself to be the dominant design feature.

How to Calculate a Wraparound Label

Measure the jar’s circumference with a flexible measuring tape or a narrow strip of paper. Decide whether you want a visible gap or an overlapping seam.

For a label with a gap, subtract the desired gap from the measured circumference. For example, if the jar measures 8.82 inches around and you want a ¼-inch gap, the maximum wrap-label length would be approximately 8.57 inches.

Do not automatically use the full available height. Leave a small margin above and below the label to account for placement variation and any subtle curve in the glass.

Our Wraparound Recommendation

Before ordering a custom or less-common wrap size, create a full-size paper prototype. Wrap it around the jar, mark the seam and verify that all text and graphics remain visible from the intended viewing angle.


Label Recommendations by Branding Style

Branding Style Label Shape to Test Material or Finish to Consider
Minimalist or luxury Small centered square, circle or vertical rectangle White matte, clear or premium synthetic material
Rustic or farmhouse Circle, oval or compact rectangle Kraft or white matte paper
Bright and contemporary Square or broad horizontal rectangle Gloss white or bright white matte
Apothecary inspired Narrow vertical rectangle or oval Matte white, kraft or clear
Information-heavy retail packaging Large rectangle, partial wrap or separate front and back labels White matte, gloss or durable synthetic material
Gift set or seasonal collection Coordinated front and lid labels Finish selected to match the collection design

How to Test Labels Across an Entire Candle Collection

Candle companies frequently use several vessel sizes while keeping the same overall branding. Rather than forcing one label size onto every jar, create a coordinated size family.

For example:

  • Use a 1¾” circle on travel candles.
  • Use a 2½” circle on standard jars.
  • Use a 3″ circle on larger tumblers.
  • Keep the logo, fonts and basic layout consistent across all three.

The same approach works for square and rectangular labels. Scaling the label while preserving the visual design creates a consistent product line without compromising the fit on each container.

Find a Label Size for Your Candle Vessel

LaserInkjetLabels.com offers blank printable labels in hundreds of circle, square, rectangle, oval and specialty sizes. Shop labels on sheets for desktop printers or rolls for compatible roll-fed inkjet printing systems.

Browse Blank Candle Labels


Choosing the Best Label Material for Candle Jars

candle label comparison chart image

After selecting the correct label size, the next decision is choosing the right material. Your label material affects not only the appearance of your candle, but also how well the label performs during shipping, handling, storage, and everyday use.

A premium fragrance deserves a premium presentation, and the label is often the first thing customers notice. Whether your brand emphasizes luxury, rustic charm, clean minimalism, or vibrant color, selecting the appropriate material helps reinforce your overall brand image.

Below are the most popular blank label materials used by candle makers and when each one works best.


White Matte Labels

White matte labels are one of the most versatile choices for candle jars. Their smooth, non-glare surface produces crisp text, rich colors, and a handcrafted appearance that works well for both small businesses and larger production runs.

Best For

  • Soy candles
  • Farmhouse collections
  • Hand-poured candles
  • Seasonal candles
  • Gift candles
  • Everyday retail products

Advantages

  • Easy to write on
  • Excellent print quality
  • Professional appearance
  • Affordable
  • Works well with both colorful and minimalist designs

Our Recommendation

If you’re just starting a candle business, white matte labels are often the best overall choice because they combine excellent print quality, broad compatibility, and an attractive finish at an economical price.


Gloss White Labels

Gloss labels enhance contrast and color, making photographs, metallic accents, and vibrant branding stand out. They are commonly used by premium candle companies that want a polished retail appearance.

Best For

  • Luxury candle brands
  • Retail boutiques
  • Gift collections
  • Holiday product lines
  • Premium fragrance collections

Advantages

  • Bright, vivid colors
  • Professional retail appearance
  • Excellent image reproduction
  • Easy to clean

Clear Labels

Clear labels create the popular “printed directly on the glass” appearance. They allow the candle color and the container itself to become part of the overall design, producing a clean, contemporary presentation.

Because the candle wax is visible through the label, darker text and high-contrast graphics generally produce the most readable results.

Best For

  • Colored wax candles
  • Luxury collections
  • Minimalist branding
  • Modern product lines

Design Tip

If your candle wax is cream, white, or pastel, avoid using light-colored text on clear labels. Strong contrast significantly improves readability.


Kraft Labels

Kraft paper labels have become extremely popular with artisan candle makers because they communicate a natural, handcrafted aesthetic. They pair especially well with soy candles, wooden lids, amber glass, and rustic packaging.

Best For

  • Farmhouse décor
  • Handmade candles
  • Organic collections
  • Craft fairs
  • Farmers markets

Advantages

  • Natural appearance
  • Unique texture
  • Warm earth-tone color
  • Excellent for rustic branding

Waterproof Polypropylene Labels

Although candle labels are not typically exposed to moisture in normal use, waterproof polypropylene labels provide additional durability during shipping, storage, and frequent handling. They also resist oils, scuffing, and many household chemicals.

Recommended For

  • Spa products
  • Bathroom candles
  • Outdoor markets
  • Subscription boxes
  • Premium retail products

If your candles are packaged with body care products, bath accessories, or shipped in environments where condensation may occur, waterproof labels are an excellent upgrade.


Which Label Material Is Right for Your Candle Business?

If Your Brand Style Is… Recommended Material
Farmhouse or Rustic Kraft Paper
Luxury Boutique Gloss White
Modern Minimalist Clear Labels
Everyday Handmade White Matte
Maximum Durability Waterproof Polypropylene

Matte vs. Gloss: Which Finish Should You Choose?

Matte Finish Gloss Finish
Soft, handcrafted appearance Bright retail presentation
Minimal glare Enhanced color vibrancy
Easy to write on Professional polished finish
Popular for artisan brands Popular for luxury brands

Neither finish is universally better. The right choice depends on your brand personality, packaging design, and the impression you want customers to have when they first see your candle.

Our Material Recommendation

For most candle makers, we recommend beginning with white matte labels unless your branding clearly benefits from another finish. Matte labels offer excellent print quality, broad design flexibility, and a timeless appearance that complements nearly every candle style.


Should You Use Sheet Labels or Roll Labels for Candle Jars?

One of the most common questions we receive from candle makers isn’t about label size—it’s about label format.

Should you purchase blank labels on sheets or on rolls?

The answer depends less on the size of your candle business and more on how you produce your candles. A business making 50 candles a week may be perfectly happy with sheet labels, while another producing the same quantity may benefit from roll labels because of its workflow or printing equipment.

The good news is that many popular label sizes are available in both formats, making it easy to transition as your business grows.


When Sheet Labels Are the Better Choice

Sheet labels remain the preferred option for many home-based candle businesses because they work with standard desktop inkjet and laser printers and require no specialized equipment.

Sheet Labels Are Ideal If You…

  • Print labels only when needed.
  • Produce small batches of candles.
  • Create seasonal fragrances.
  • Frequently change label designs.
  • Need maximum flexibility.
  • Apply labels by hand.

Because labels remain attached to an 8½” × 11″ sheet until needed, they’re easy to organize, store, and transport.

LaserInkjetLabels Tip

Many successful candle companies continue using sheet labels long after they’ve grown beyond a hobby. If your production process works well, there’s no reason to change simply because your business is larger.


When Roll Labels Become the Better Choice

Roll labels are popular with growing businesses because they simplify printing and handling when larger quantities are required.

If you’re using a compatible roll-fed label printer, rolls can eliminate the need to reload sheets during longer production runs and can improve workflow efficiency.

Roll Labels Are Ideal If You…

  • Print hundreds of labels at one time.
  • Own a compatible roll-fed label printer.
  • Want faster production.
  • Need labels in long continuous runs.
  • Are preparing for wholesale or retail distribution.

Many businesses begin with sheet labels and later transition to rolls once production becomes more consistent.


Sheet Labels vs. Roll Labels

Sheet Labels Roll Labels
Compatible with most desktop printers Designed for compatible roll-fed printers
Excellent for smaller production runs Excellent for continuous printing
Easy to change designs Efficient for larger quantities
Simple to store Reduced printer reloading
Ideal for startups Popular with established production workflows

Inkjet vs. Laser Printing

Both printer technologies produce excellent candle labels when paired with compatible materials.

Inkjet Printing

Inkjet printers are known for vibrant color reproduction and excellent photo quality. They’re a popular choice for candle makers who use colorful artwork, watercolor designs, or detailed graphics.

Advantages

  • Excellent color
  • Rich gradients
  • Beautiful photography
  • Ideal for boutique branding

Laser Printing

Laser printers excel at producing crisp black text, sharp logos, and highly readable barcodes. They’re often chosen by businesses printing larger quantities of labels with straightforward branding.

Advantages

  • Sharp text
  • Excellent barcode quality
  • Fast printing
  • Smudge-resistant output

Our Recommendation

Neither technology is inherently better. The best choice is to purchase blank labels that are specifically manufactured for the printer you already own. Using inkjet labels in a laser printer—or laser labels in an inkjet printer—can result in poor print quality or feeding issues.


How to Apply Candle Labels Like a Professional

Even a beautifully designed label can look unprofessional if it’s applied crooked or contains trapped air bubbles.

Following a consistent application process helps every candle in your product line maintain the same polished appearance.

Step 1 — Clean the Glass

Remove fingerprints, dust, oils, and wax residue using a lint-free cloth before applying labels.

Step 2 — Align the Label

Use the edge of the jar or the center of the lid as your reference point before making contact with the adhesive.

Step 3 — Apply From the Center Outward

Press the center of the label first, then smooth toward the edges to reduce trapped air.

Step 4 — Check Alignment

View the candle from multiple angles before packaging. Small alignment corrections are much easier immediately after application.


Common Candle Labeling Mistakes

  • Choosing labels based only on candle capacity.
  • Ignoring the printable flat area.
  • Using artwork with insufficient contrast.
  • Printing without first testing alignment.
  • Applying labels to dusty glass.
  • Attempting to cover embossed logos.
  • Using oversized labels that extend onto curved surfaces.
  • Trying to fit all product information onto one front label.

Growing Your Candle Business

Many successful candle companies don’t completely change their labeling process as they grow. Instead, they refine it.

A typical progression looks something like this:

Business Stage Typical Workflow
Startup Sheet labels printed on demand using a desktop printer.
Growing Business Standardized label designs with larger production batches.
Established Brand Roll-fed printing, streamlined production, and consistent branding across multiple product lines.

The important thing isn’t rushing to the next stage—it’s selecting a labeling process that supports your current production needs while leaving room to grow.

Find the Right Blank Labels for Your Candle Business

Whether you’re pouring your first batch of candles or shipping hundreds of orders every month, choosing the right blank labels helps create a professional presentation that reflects the quality of your products.

Browse our selection of blank sheet labels and roll labels available in hundreds of sizes and materials for inkjet and laser printers.


Quick Buying Guide: Choosing the Right Candle Label in Five Minutes

If you’ve made it this far, you probably have a good idea of which label size fits your candle jar. The final step is selecting the combination of size, material, finish, and printing method that best matches your product.

The checklist below summarizes the decision process used by many successful candle makers.


Step 1 — Identify Your Candle Container

Container Recommended Starting Label
4 oz 2″ Circle
6 oz 2″ Square
8 oz 2″ × 3″ Rectangle
9 oz Straight-Sided 2″ × 3″ Rectangle
12 oz 3″ Square
16 oz 3″ × 4″ Rectangle

Step 2 — Select Your Label Material

Your Brand Style Recommended Material
Rustic Handmade Kraft Paper
Luxury Gloss White
Modern Clear Labels
Classic White Matte
Maximum Durability Waterproof Polypropylene

Step 3 — Choose Your Printing Method

If You… Choose…
Print small batches Sheet Labels
Own a roll-fed printer Roll Labels
Need vibrant graphics Inkjet-Compatible Labels
Print mostly text Laser-Compatible Labels

Step 4 — Test Before Ordering Large Quantities

Before purchasing a large quantity of labels, print a sample on plain paper, cut it out, and temporarily tape it to the candle jar. Viewing the container from several angles is one of the simplest ways to confirm that the proportions look right.

Testing also helps identify potential issues with curved glass, embossed logos, decorative lids, or wrap-around designs before you begin production.

LaserInkjetLabels Tip

We recommend testing two nearby label sizes whenever possible. In many cases, a label that’s just slightly smaller produces a cleaner, more premium appearance than one that fills every available inch of glass.


Candle Label Planning Checklist

Before ordering labels, ask yourself:

  • Have I measured the flat printable area?
  • Does the label fit within the smooth surface of the glass?
  • Will customers easily read the fragrance name?
  • Does my brand logo remain prominent?
  • Will I use a separate warning label?
  • Do I need a matching lid label?
  • Have I selected the correct material for my brand?
  • Have I chosen labels compatible with my printer?
  • Have I printed and tested a sample?

Related Resources

Continue learning with these helpful guides:

  • What Size Label Fits a Mason Jar?
  • Waterproof Labels Explained
  • Sheet Labels vs. Roll Labels
  • Circle vs. Rectangle Labels
  • Clear Labels vs. White Labels
  • Gloss vs. Matte Labels
  • Choosing the Right Label Adhesive
  • How to Print Professional Product Labels

Recommended Products

Depending on your container and branding style, you may want to explore:

  • Blank Sheet Labels
  • Blank Roll Labels
  • Circle Labels
  • Square Labels
  • Rectangle Labels
  • Waterproof Labels
  • Clear Labels
  • Kraft Labels
  • White Matte Labels
  • Gloss White Labels
  • Label Templates

Final Thoughts

Selecting the right candle label is about much more than finding a label that physically fits the jar. The right combination of size, material, finish, and design creates packaging that reinforces your brand and helps your products stand out whether they’re displayed at a craft fair, boutique, farmers market, or online store.

By measuring your container, testing a sample, and choosing materials that complement your branding, you’ll create labels that look professional and perform reliably from production through the customer’s first burn.

Ready to Find the Right Candle Labels?

Browse hundreds of blank printable label sizes designed for candle jars, tins, tumblers, and specialty containers. Choose from sheet labels or roll labels in materials compatible with both inkjet and laser printers.

Browse Blank Candle Labels

“`html


Still Not Sure Which Label You Need?

Choosing the right label doesn’t have to be complicated. If you’re unsure where to start, answer these four questions and you’ll quickly narrow down the best options for your project.

Step 1 — What Are You Labeling?

  • Candle Jar
  • Candle Tin
  • Mason Jar
  • Honey Jar
  • Coffee Bag
  • Soap Packaging
  • Food Containers
  • Another Product

Step 2 — What Size Is the Container?

Measure the flat printable area—not just the overall dimensions of the container. This provides the best starting point for choosing a label that looks professional and applies cleanly.

Step 3 — Where Will the Product Be Used?

  • Indoor display
  • Retail shelf
  • Refrigerated
  • Outdoor market
  • Shipping nationwide
  • Gift packaging

The environment often determines which label material will perform best.

Step 4 — What Printer Will You Use?

  • Inkjet Printer
  • Laser Printer
  • Roll Label Printer

Always choose labels specifically designed for your printer type to achieve the best print quality and feeding performance.


Helpful Resources

Browse Labels by Size

Find blank labels organized by exact dimensions, including circles, rectangles, squares, ovals and specialty shapes.

Blank Labels by Size

Browse Labels by Material

Compare white matte, gloss, kraft, clear and waterproof label materials to find the best option for your application.

Sheet Label Materials

Download Free Label Templates

Use free templates to design and test your labels before printing.

Label Templates

Explore the Label Learning Center

Read additional buying guides covering label sizes, materials, printing tips and packaging ideas.

Label Learning Center


Common Questions We Hear From Customers

“Can I use the largest label that fits?”

Usually not. Leaving a small border of visible glass often creates a cleaner, more premium appearance and reduces the chance of labels lifting around curved edges.

“Should every candle size use the same label?”

Not necessarily. Many successful candle brands scale their label sizes while keeping the logo, fonts and overall layout consistent. This creates a cohesive product line without forcing one size to fit every container.

“Do I need a separate warning label?”

Many candle makers place the required safety information on the bottom of the container. This keeps the front label clean and focused on your brand while still providing customers with important safety information.

“Should I choose circle or square labels?”

Neither is universally better. Circle labels often create a handcrafted feel, while square and rectangular labels provide more room for branding and product information. Testing both on your actual container is the best way to decide.


Our Advice

If you’re between two label sizes, order or print a sample of both. Seeing each size on your actual container is the fastest way to decide. A label that’s slightly smaller than the maximum printable area often produces the most polished, professional result.

cta browse candle label sizes

Shop Popular Candle Label Sizes

Can You Use Laser Labels in an Inkjet Printer? Find Out!

Curious if you can use laser labels in an inkjet printer? Discover the surprising compatibility of these two printing technologies and make your labeling tasks easier!

Understanding Laser Labels vs. Inkjet Labels

When it comes to labeling your products, packages, or personal items, the type of label you choose can make a significant difference. Laser labels and inkjet labels are the two primary types available in the market, and understanding their distinctions can help you make an informed choice.

Laser labels are specifically designed for use with laser printers. These labels are typically made from materials that can withstand the high heat generated by laser printers during the printing process. Laser printers use a laser beam to produce an image on a drum, which is then transferred onto the paper using toner. The toner, a powder, is fused onto the paper with heat and pressure, resulting in a durable and smudge-resistant print.

Inkjet labels, on the other hand, are formulated for use with inkjet printers. These printers work by spraying microscopic droplets of liquid ink onto the paper to create an image. The inkjet labels are usually coated to absorb the ink quickly, preventing smudging and ensuring sharp, vivid print quality. Inkjet labels are typically not designed to withstand the heat of a laser printer, which can lead to melting or warping.

Understanding the specific needs of your printer and the labels designed for it is crucial to achieving the best print quality and maintaining the longevity of your equipment. Using the wrong type of label can result in poor print quality, printer damage, or both. Therefore, it is essential to match your labels to the appropriate printer technology.

How Inkjet Printers Work

To grasp the compatibility of laser labels with inkjet printers, it is essential to understand how inkjet printers work. Inkjet printers are popular for their versatility, affordability, and ability to produce high-quality prints with vivid colors and sharp details.

Inkjet printers use a printing technology that involves spraying tiny droplets of liquid ink onto the paper. The print head, which contains multiple nozzles, moves back and forth across the paper, depositing ink droplets in a precise pattern to form text and images. These droplets are incredibly small, typically measured in picoliters, allowing for detailed and accurate prints.

The ink used in inkjet printers is usually water-based and can be either dye-based or pigment-based. Dye-based inks are known for their vibrant colors and smooth gradients, making them ideal for photo printing. Pigment-based inks, on the other hand, are more durable and resistant to fading, making them suitable for documents and labels that require longevity.

Inkjet printers come in various types, including single-function printers, all-in-one printers, and photo printers. They are widely used in homes, offices, and businesses due to their ability to handle a wide range of media types, including plain paper, glossy photo paper, and specialized labels. However, the compatibility of these printers with different types of labels, such as laser labels, requires careful consideration due to the differences in printing technology.

The Compatibility of Laser Labels with Inkjet Printers

The question of whether you can use laser labels in an inkjet printer is a common one, and the answer is not as straightforward as a simple yes or no. The compatibility of laser labels with inkjet printers depends on several factors, including the label material, the printer’s capabilities, and the specific printing requirements.

Laser labels are designed to withstand the high heat and pressure of laser printers. These labels are often made from materials like polyester, vinyl, or other heat-resistant substances. While these materials can be durable and produce excellent results in laser printers, they may not be optimized for the liquid ink used in inkjet printers. The coating on laser labels is typically not designed to absorb ink, which can lead to smudging, poor print quality, or slow drying times when used with inkjet printers.

In some cases, manufacturers produce multi-purpose labels that are compatible with both laser and inkjet printers. These labels are specially coated to handle the different printing technologies and provide acceptable results with either type of printer. However, it is essential to check the label packaging or product specifications to ensure they are suitable for use with your inkjet printer.

It is also worth noting that while some inkjet printers may handle laser labels without significant issues, others may struggle with feeding the thicker or more rigid materials through the printer. This can result in paper jams, misfeeds, or damage to the printer components. Therefore, it is crucial to test a small batch of labels before committing to a large print job to ensure compatibility and avoid potential printer damage.

Risks of Using Laser Labels in Inkjet Printers

While the idea of using laser labels in an inkjet printer may seem convenient, it comes with several risks that could affect both your printing quality and the longevity of your printer. Understanding these risks can help you make an informed decision and avoid potential problems.

One of the primary risks of using laser labels in an inkjet printer is poor print quality. Laser labels are not typically coated to absorb ink, which can result in smudging, bleeding, or uneven ink distribution. This can lead to illegible text, blurry images, and an overall unprofessional appearance. Additionally, the ink may take longer to dry on laser labels, increasing the risk of smudging or transferring when handled.

Another significant risk is the potential for printer damage. Inkjet printers are designed to handle specific types of media, and using materials not intended for inkjet printing can cause mechanical issues. Laser labels are often thicker and more rigid than inkjet labels, which can lead to paper jams, misfeeds, or damage to the printer’s feed mechanism. In some cases, the adhesive used on laser labels may not be compatible with inkjet printers, causing labels to peel off inside the printer and create sticky residue that can affect future print jobs.

Using laser labels in an inkjet printer can also void your printer’s warranty. Manufacturers typically specify the types of media that are compatible with their printers, and using non-recommended materials can be considered misuse. If your printer encounters issues due to the use of laser labels, the manufacturer may refuse to honor the warranty, leaving you responsible for repair or replacement costs.

Benefits of Using the Right Labels for Your Printer

Using the appropriate labels for your printer offers several benefits that can enhance your printing experience and ensure the best possible results. By matching the labels to your printer’s technology, you can achieve optimal print quality, maintain the longevity of your printer, and avoid potential issues.

One of the most significant benefits of using the right labels is the superior print quality. Inkjet labels are specifically designed to absorb ink quickly and evenly, resulting in sharp, vibrant prints with crisp text and clear images. This is particularly important for labels that need to convey important information, such as shipping labels, product labels, or barcode labels. By using labels designed for your inkjet printer, you can ensure that your prints are legible and professional-looking.

Another benefit is the reduced risk of printer damage. Inkjet labels are formulated to work seamlessly with the feeding mechanism of inkjet printers, minimizing the chances of paper jams, misfeeds, or other mechanical issues. This helps maintain the smooth operation of your printer and reduces the likelihood of costly repairs or downtime. Additionally, using the correct labels ensures that the adhesive is compatible with your printer, preventing residue buildup that can affect future print jobs.

Using the right labels can also extend the life of your printer. Printers that consistently handle compatible media are less likely to experience wear and tear on their components. This can result in fewer maintenance issues and a longer lifespan for your printer. By investing in the appropriate labels, you can protect your printer investment and enjoy reliable performance for years to come.

Tips for Printing on Laser Labels with Inkjet Printers

If you find yourself in a situation where you need to use laser labels with an inkjet printer, there are several tips you can follow to achieve the best possible results. While this is not the ideal scenario, these strategies can help mitigate some of the risks and improve print quality.

First, consider testing a small batch of labels before committing to a large print job. This allows you to assess how well the ink adheres to the label surface and whether there are any issues with smudging or drying times. Adjust your printer settings to optimize print quality, such as selecting a higher print resolution or adjusting the ink density. This can help improve the appearance of your prints and reduce the likelihood of smudging.

Second, allow ample drying time for the printed labels. Since laser labels are not designed to absorb ink quickly, the ink may take longer to dry compared to inkjet labels. After printing, place the labels in a well-ventilated area and avoid stacking them until the ink is fully dry. This can help prevent smudging and ensure that the labels are ready for use.

Another tip is to handle the labels carefully to avoid smudging or transferring the ink. Use clean, dry hands when handling the labels, and avoid touching the printed areas as much as possible. If you need to apply the labels to products or packages, wait until the ink is completely dry to prevent any transfer of ink.

Finally, consider using a spray fixative to protect the printed labels. A light coating of fixative can help seal the ink and reduce the risk of smudging. Be sure to test the fixative on a small batch of labels first to ensure it does not affect the print quality or adhesive properties of the labels.

Alternatives to Laser Labels for Inkjet Printing

While it is possible to use laser labels in an inkjet printer with some adjustments, there are better alternatives available that are specifically designed for inkjet printing. Exploring these options can help you achieve superior print quality and avoid the risks associated with using incompatible labels.

One of the most straightforward alternatives is to use inkjet labels. These labels are designed to work seamlessly with inkjet printers, providing excellent print quality and quick drying times. Inkjet labels come in various sizes, shapes, and materials, making it easy to find the perfect match for your labeling needs. Whether you need glossy photo labels, matte address labels, or weather-resistant labels, there is an inkjet label option available.

Another alternative is to use multi-purpose labels that are compatible with both laser and inkjet printers. These labels are coated to handle the different printing technologies, providing acceptable results with either type of printer. Multi-purpose labels can be a convenient option if you have both laser and inkjet printers and want to use the same labels for different printing tasks. However, it is important to check the label packaging or product specifications to ensure they are suitable for your specific printer model.

For specialized labeling needs, consider using label materials that are designed for specific applications. For example, if you need durable labels for outdoor use, look for weather-resistant inkjet labels made from materials like polyester or vinyl. These labels are designed to withstand exposure to moisture, UV light, and other environmental factors, ensuring that your labels remain legible and intact.

By exploring these alternatives, you can find the right labels for your inkjet printer and avoid the potential issues associated with using laser labels. Investing in compatible labels can help you achieve the best possible results and maintain the longevity of your printer.

Customer Experiences and Testimonials

Hearing from customers who have experimented with using laser labels in inkjet printers can provide valuable insights and help you make an informed decision. While individual experiences may vary, these testimonials can highlight common challenges and potential solutions.

One customer, Sarah, shared her experience of using laser labels in her inkjet printer for a small batch of address labels. She found that the print quality was initially acceptable, but the ink smudged easily when handled. To mitigate this issue, Sarah allowed the labels to dry for several hours before using them. While this approach worked for her short-term project, she ultimately decided to switch to inkjet labels for future printing tasks to avoid the drying time and potential smudging.

Another customer, Mark, attempted to use laser labels in his inkjet printer for product labeling. He encountered issues with the labels feeding through the printer, resulting in frequent paper jams and misfeeds. After several frustrating attempts, Mark realized that the thicker material of the laser labels was not compatible with his inkjet printer’s feeding mechanism. He switched to inkjet-compatible labels and noticed an immediate improvement in print quality and printer performance.

On the other hand, Lisa, a small business owner, successfully used multi-purpose labels with both her laser and inkjet printers. She appreciated the convenience of using a single type of label for different printing tasks and found that the multi-purpose labels provided satisfactory results with both printer types. Lisa’s experience highlights the potential benefits of using labels specifically designed for compatibility with multiple printing technologies.

These customer experiences underscore the importance of using the right labels for your printer and the potential challenges of using incompatible materials. While some customers found temporary workarounds, the overall consensus is that using inkjet-compatible labels provides the best results and minimizes potential issues.

Frequently Asked Questions about Labels and Printers

To further clarify the topic of using laser labels in inkjet printers, here are some frequently asked questions and their answers:

Can I use laser labels in an inkjet printer?

While it is possible to use laser labels in an inkjet printer, it is not recommended due to potential issues with print quality, drying times, and printer compatibility. Inkjet labels are specifically designed for use with inkjet printers and provide better results.

What happens if I use the wrong type of label in my printer?

Using the wrong type of label can result in poor print quality, smudging, paper jams, and potential printer damage. It is essential to use labels that are compatible with your printer’s technology to achieve the best results and avoid issues.

Are there labels that work with both laser and inkjet printers?

Yes, there are multi-purpose labels that are designed to be compatible with both laser and inkjet printers. These labels are coated to handle different printing technologies and provide acceptable results with either type of printer.

How can I improve print quality when using laser labels in an inkjet printer?

If you need to use laser labels in an inkjet printer, consider testing a small batch first, adjusting printer settings for higher resolution, allowing ample drying time, and handling the labels carefully to avoid smudging. Using a spray fixative can also help protect the printed labels.

What are the benefits of using inkjet labels with an inkjet printer?

Using inkjet labels with an inkjet printer ensures superior print quality, reduces the risk of printer damage, and extends the life of your printer. Inkjet labels are designed to absorb ink quickly and evenly, resulting in sharp, vibrant prints with minimal drying time.

Can using the wrong labels void my printer’s warranty?

Yes, using labels that are not recommended by the printer manufacturer can void your printer’s warranty. Manufacturers specify compatible media types, and using incompatible materials can be considered misuse, leading to warranty denial.

What should I do if my printer jams when using laser labels?

If your printer jams when using laser labels, stop the print job and carefully remove the jammed labels. Switch to inkjet-compatible labels to prevent future jams and ensure smooth printer operation. If the problem persists, consult your printer’s user manual or contact the manufacturer for assistance.

Conclusion: Making the Right Choice for Your Printing Needs

In conclusion, while it is technically possible to use laser labels in an inkjet printer, it is not the ideal solution due to potential issues with print quality, drying times, and printer compatibility. Laser labels are designed for the high heat and pressure of laser printers, whereas inkjet labels are formulated to work seamlessly with the liquid ink used in inkjet printers. By using the correct labels for your printer, you can achieve superior print quality, maintain the longevity of your printer, and avoid potential problems.

When selecting labels for your printing needs, consider the specific requirements of your printer and the type of labels best suited for your tasks. Inkjet labels provide the best results for inkjet printers, offering sharp, vibrant prints with quick drying times. Multi-purpose labels can be a convenient option if you use both laser and inkjet printers, but it is essential to ensure they are compatible with your printer model.

Customer experiences and testimonials highlight the challenges and potential solutions associated with using laser labels in inkjet printers. While some customers found temporary workarounds, the overall consensus is that using inkjet-compatible labels provides the best results.

By making informed choices and investing in the right labels for your printer, you can achieve professional-looking prints, protect your printer investment, and enjoy reliable performance for all your labeling tasks.

How to Use PNG Label Templates with Canva

Creating professional-looking labels does not require advanced design software. With Canva and PNG label templates from LaserInkjetLabels.com, you can quickly design labels for products, shipping, packaging, branding, and more without needing graphic design experience.

PNG templates are especially useful because they give you a visual guide showing exactly where each label is located on the sheet. You can add text, logos, colors, images, QR codes, and other design elements directly on top of the template before printing.

What Is a PNG Label Template?

A PNG label template is an image file that shows the exact layout of the labels on a sheet. Each label position is outlined so you can align your design elements correctly.

Unlike Word or PDF templates, PNG files work especially well in Canva because you can simply upload the image and use it as a design guide. This makes it easy to create custom labels while ensuring everything lines up properly when printed. You can download templates for any of our sizes here: Templates Page

PNG templates are useful for:

  • Product labels
  • Shipping labels
  • Candle labels
  • Cosmetic labels
  • Food packaging labels
  • QR code labels
  • Barcode labels
  • Thank you stickers
  • Return address labels
  • Promotional labels

Step 1: Download the Correct PNG Template

Start by downloading the PNG template that matches the exact label size you are using. Even small differences in label size can affect print alignment, so it is important to use the correct template for your specific sheet.

For example, if you are printing on a 2″ x 4″ label sheet, make sure you download the 2″ x 4″ PNG template rather than a similar size.

Step 2: Open Canva and Create a New Design

Go to Canva and create a new custom design.

For most full-sheet label templates, you will want to use a custom size of:

  • 8.5 inches wide
  • 11 inches tall

This matches the size of a standard sheet of labels.

If Canva asks for dimensions in pixels instead of inches, you can switch the units to inches before creating the design.

Step 3: Upload the PNG Template

Once your blank Canva design is open, upload the PNG template file to Canva.

After uploading the template:

  1. Drag the PNG file onto the blank canvas
  2. Resize it so it fills the entire 8.5″ x 11″ page
  3. Make sure it is aligned exactly to the edges of the page
  4. Lock the PNG template in place so it does not move while you design

Locking the template is helpful because it prevents accidental shifting while adding text and graphics.

Step 4: Add Your Design Elements

Now you can start designing your labels directly on top of the template.

You can add:

  • Logos
  • Product names
  • Ingredients
  • Scents or flavors
  • Pricing
  • Barcodes
  • QR codes
  • Website URLs
  • Social media icons
  • Decorative graphics
  • Background colors or shapes

When designing, keep important text and graphics slightly inside the edges of each label. This helps avoid cutting off information during printing.

For best results, leave a small “safe zone” around the outer edge of every label.

Step 5: Duplicate Your Design Across the Sheet

Once you create the first label, you can copy and paste the design onto the other label positions shown on the PNG template.

Canva makes it easy to duplicate elements and align them consistently across the sheet.

If every label on the page is identical, this process is very fast. If you need variable information, such as different product names or scents, you can customize each label individually.

Step 6: Hide or Remove the Template Before Printing

Before downloading your finished design, you should hide or remove the PNG template layer.

The template is only meant to help with placement and should not appear in the final printed version.

Once the template is hidden:

  1. Download the design as a PDF Print file for best print quality
  2. Open the file and print at 100% scale
  3. Make sure “Fit to Page” is turned off in your printer settings

Printing at actual size is important so the labels line up correctly on the sheet.

Final Tips for Better Label Alignment

To get the best results when printing labels from Canva:

  • Always use the correct label template size
  • Print a test page on plain paper first
  • Hold the test sheet over your label sheet to verify alignment
  • Keep important text away from the label edges
  • Print at 100% scale with no page resizing
  • Use high-resolution logos and images for sharper printing

Using PNG label templates with Canva is one of the easiest ways to create custom labels for business, product packaging, shipping, and organization. With the right template and a few minutes of setup, you can create professional-looking labels that print accurately and consistently.

5 Reasons to Choose Blank Inkjet Semi-Gloss Labels

If you’re looking for high-quality labels that deliver a professional look, Inkjet Semi-Gloss Labels are the perfect choice. Whether you’re labeling products, packaging, or marketing materials, these labels provide a polished appearance with excellent print quality. Here’s why they stand out:

1. Vibrant, High-Quality Printing

Semi-gloss labels enhance color vibrancy and sharpness, making your designs pop. Whether you’re printing logos, barcodes, or full-color images, these labels ensure crisp, professional results.

2. Sleek, Polished Appearance

With a slight sheen, semi-gloss labels offer a premium look without excessive glare. This makes them perfect for branding, product packaging, and promotional materials that need to stand out.

3. Durable & Smudge-Resistant

Designed for inkjet printers, these labels quickly absorb ink to prevent smudging. Their semi-gloss coating adds durability, making them resistant to handling and minor moisture exposure.

4. Versatile for Various Applications

Ideal for bottles, jars, mailers, boxes, and more, these labels are a go-to choice for businesses and DIY projects alike. Whether you’re labeling handmade goods or shipping products, they provide a professional touch.

5. Easy to Print & Apply

Compatible with most inkjet printers, these labels are user-friendly and hassle-free. Their strong adhesive ensures they stick securely to different surfaces, keeping your labels looking flawless.

Upgrade your branding today! Order your White Semi-Gloss Inkjet labels now!

Where to Find Quality Labels Without Breaking the Bank

Labels are an essential part of the operations of both small and large businesses. Having a good labeling system can provide peace of mind while conducting everyday operations. A quality well-printed label can promote the branding of a product, while increasing sales for that specific product.

Most consumer products are also identified by the product labels. It is therefore, worthwhile to invest in quality labels, especially those that are super affordable. For customers looking to find quality and affordable labels for their projects, businesses, or facilities, here are some of the ways in which our company will offer competitive pricing and a quality product in the industry.

We Offer High-Quality Labels

 Our labels are of the highest standard with outstanding quality that provides our customers with confidence in our product. Our labels are made with care so that they will adhere to the surface of almost any product. With a quality print and colors that stands out, customers can be confident that their labels are built to last.

Our Selection Contains A Large Variety of Labels

We also have a variety of these labels for purchase, including labels for home or office DIY projects, production facilities or even small businesses. Whether customers need labels that can easily be peeled off, or those that last months to years, we have a selection to match any need.

For customers interested in sheet labels, we have a selection for both inkjet and laser printing. If a customer is setting up a home-based business and is looking to print a few labels each week to grow the business, a sheet label for inkjet printing would be a great investment. With these labels, customers can even experiment with the colors and designs to achieve a desired print of label for their marketing and logo needs, as well as return address labels.

Similarly, customers who have large facilities in which products are prepared for shipping to different parts of the country, would benefit from quality laser-printed sheet labels. With these sheet labels, customers with large business can have their products labeled efficiently and shipped timely to meet the demand for their products.

Customers can also obtain inkjet and laser roll labels for projects such as barcodes and shipping labels. For those customers looking to have specific custom labels printed, we can have those ready to apply to products. Customers can also have their labels printed with our state-of-the-art printers, that produce striking and radiant print.

Our Website is Easy to Use

Customers that prefer to place their orders online can take advantage of our website, which is designed with the customer’s needs in mind. They can order their labels online and have them delivered in a timely manner. Our website is built to ensure that customers can easily navigate and enjoy the experience of buying their labels online.

We Have A Large Capacity to Manufacture Labels

Our label company also has the capacity to print custom label sizes and shapes for customers with custom ideas and projects. Our custom label size capabilities mean that customers can work with us to ensure that they obtain the best quality labels to meet their desired outcome. Whether customers have very large or small products to label, our company can make any amount of labels to meet our client’s demands.

We Are Experts in the Label Industry

We have tremendous expertise and experience in manufacturing labels, making us a leading expert in the field. Customers can trust us with their projects and have confidence in the quality of labels we can provide them. Our team is well-trained and has expertise in various label projects to guarantee customer satisfaction.

Our Labels Can Be Used for Any and All Products

We have served many clients and business of all sizes, ranging from home businesses to shipping departments, as well as manufacturing facilities. We have worked with businesses such as vape shops, independent coffee and tea manufacturers, candle and soap makers, and wineries and breweries.

Our customers can vouch for the quality of label products we have offered. Additionally, many of our clients require a higher quality label. For example, breweries and wineries require labels for wine and beer bottles, distillation supplies, and signage around their premises.

Clients may need to have custom-made beer bottles with unique shapes, as well as color schemes that can successfully promote the branding of the beer. The label on a beer must also adhere to the bottle throughout fluctuations of warm or cool temperatures and must be waterproof to prevent peeling off from the bottle when left to chill in ice. Similarly, labels on wine bottles must not peel off during shipping and staging at the location of sale.

For labels such as those used on tea or coffee products, these labels must also be durable enough that the colors in the label print do not fade even when stored on store shelves for extended periods of time. This also goes for products such as candles and soap. Customers in stores also tend to buy these products based on how much they can connect with the products, and a lot of this has to do with the label packaging.

For many shipping departments and production facilities, quality of labels greatly matters. A lot of the logistics in these fields rely on labels that adhere strongly to shipping material such as boxes, crates, and plastic. Additionally, if barcodes are printed on these labels, it should be easy to scan the barcodes in a fast and efficient way.

Our labels are also made of durable material that can withstand the changes in temperature and handling during the shipping process. Customers can be assured that their valuable products or goods will not get lost during transit.

Our Label Products are Affordable

Our labels are also affordable for the average customer and will probably fit in the budget for most customers’ projects. While our company strives to provide customers with good quality products, we also want to ensure that customers do not exceed their budgets. Customers will find that the quality of the products they receive will be worth the cost.

For customers interested in high-quality, efficient labels online, come explore our website. It might be the next step in getting started on that DIY branding project, or a start to your own business.

End Of Article